🧢 Beautiful ✨ Detailed πŸ’ Adorable

Valentine's Teddy Bear Amigurumi Pattern

Valentine's Teddy Bear Amigurumi Pattern
4.1β˜… Rating
10-12 Hours Time Needed
1.7K Made This
βœ‚οΈ

Advanced Level

Designed for experienced knitters, these patterns involve intricate designs and complex techniques to challenge and inspire.

⏱️

Slow & Steady

A 10-12 hour projectβ€”great for savoring the process over several sessions.

🧸

Cute Companion

An adorable friend to cherish, handcrafted with love to bring comfort and joy for years to come.

About This Valentine's Teddy Bear Amigurumi Pattern

This Valentine's Teddy Bear pattern showcases advanced amigurumi construction with a uniquely shaped body that starts with an oval foundation and builds into a dimensional form. The pattern includes detailed instructions for creating symmetrical left and right arms with specific shaping, legs with embroidered claws and red accents, adorable ears, and an oval muzzle with embroidered nose details. What makes this pattern truly special are the two heart size options - a small heart perfect for the bear to hold or a larger heart for more dramatic effect. Optional angel wings with delicate petal-like edges add an ethereal Valentine's touch.

Valentine's Teddy Bear Amigurumi Pattern crochet pattern - detailed view of completed project

The pattern features extensive photo tutorials showing invisible decrease techniques, proper stuffing methods, and assembly positioning. Each component is carefully designed to create balanced proportions and a professional finished look that captures the sweet innocence of a classic teddy bear with romantic Valentine's flair.

Why You'll Love This Valentine's Teddy Bear Amigurumi Pattern

I'm absolutely head over heels for this Valentine's bear pattern because it combines technical challenge with pure heartfelt sweetness. There's something incredibly rewarding about working through the intricate body shaping - watching that oval base transform into a plump, huggable teddy body feels like magic happening right in your hands. I especially love the attention to detail with the left and right arms being mirror images of each other, which creates such a professional, balanced look. The embroidered nose and claws add personality that brings this bear to life, and those little red accents on the ears and paws are just the perfect pop of Valentine's color. Creating the heart - whether you choose small for a subtle touch or large for maximum impact - feels like you're literally crocheting love itself. And if you add those angel wings, the bear transforms from adorable to absolutely angelic. This isn't just a pattern; it's a labor of love that results in a meaningful gift that will be treasured for years. Every stitch is an expression of affection, making this the perfect project when you want to create something truly from the heart.

Valentine's Teddy Bear Amigurumi Pattern step 1 - construction progress Valentine's Teddy Bear Amigurumi Pattern step 2 - assembly progress Valentine's Teddy Bear Amigurumi Pattern step 3 - details and accessories Valentine's Teddy Bear Amigurumi Pattern step 4 - final assembly and finishing

Switch Things Up

I absolutely love personalizing this Valentine's bear for different occasions and recipients. For a more neutral everyday bear, I skip the red accents entirely and make the ears and paw details in the same cream color as the body, or use coordinating pastels like soft pink, lavender, or baby blue. This creates a gentle, classic teddy that works year-round. I've also experimented with different yarn types - using fluffy chenille or velvet yarn creates an incredibly soft, luxurious texture that takes the cuddle factor to the next level.

Color combinations are where you can really make this pattern your own. A chocolate brown bear with gold or copper accents looks sophisticated and rich, perfect for autumn or as a more masculine gift. White or ivory with silver or light blue creates a winter wonderland or celestial theme, especially beautiful with the angel wings. For kids, bright primary colors or rainbow accents on a white body create a cheerful, playful look.

The heart component offers endless customization too. I've made striped hearts using color changes every few rounds, or worked in variegated yarn for a multicolored effect. You could embroider names, dates, or messages onto the heart before attaching it. Some makers create the heart in one color and add surface crochet designs like initials or small flowers. I've even made bears holding multiple small hearts in graduated sizes cascading down the front.

For special occasions beyond Valentine's Day, this pattern adapts beautifully. Make it in wedding colors with a white or ivory bear holding a heart in the couple's accent color - add a tiny crocheted veil or bow tie for extra charm. Birthday bears can hold hearts with embroidered ages or names. For baby showers, pastel versions with the baby's initial embroidered on the heart become treasured keepsakes. Christmas bears in red and white with green accents (skip the heart, add a tiny Santa hat) are adorable holiday decorations.

The wings open up even more possibilities. Make them in metallic yarn for extra sparkle, or use a contrasting color for dramatic effect - imagine deep purple wings on a white bear, or iridescent white wings on a black bear. You could also modify the wing pattern to create butterfly wings instead by changing the shaping and adding antennae. Or skip the wings entirely and add other accessories like a crocheted flower crown, a miniature scarf, or even tiny crocheted glasses for a quirky scholarly bear. The base pattern is so versatile that once you've made it once, you'll want to create an entire collection in different styles!

Common Mistakes & How to Fix Them

βœ— Not maintaining consistent tension when working the oval body base, resulting in an uneven foundation that affects the entire bear's shape βœ— Confusing the left and right arm patterns which have mirror shaping, causing arms to not be symmetrical when attached to body βœ— Forgetting to attach safety eyes between rounds eleven and twelve before stuffing, making it impossible to secure them properly later βœ— Overstuffing the arms which should remain unstuffed, making them too rigid and difficult to position naturally when closing and sewing βœ— Not firmly stuffing the bottom part of the body as instructed, causing the bear to be unable to sit properly βœ— Incorrectly finishing the muzzle and legs by not following the specific technique shown in photos, creating gaps or uneven closures

Valentine's Teddy Bear Amigurumi Pattern

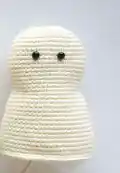
Create the ultimate symbol of love with this enchanting Valentine's Teddy Bear amigurumi pattern! This adorable bear comes complete with charming details including embroidered claws, red accents on ears and paws, a sweet muzzle, and your choice of a small or large heart accessory. Optional angel wings add an extra touch of heavenly romance. Worked in cream, red, and light brown cotton yarn with a 2.5mm hook, this detailed pattern features comprehensive photo tutorials including invisible decrease techniques and step-by-step assembly instructions. Perfect for Valentine's Day gifts, anniversary surprises, or expressing love any day of the year, this bear combines classic teddy charm with romantic details that speak straight to the heart.

Advanced 10-12 Hours

Materials Needed for Valentine's Teddy Bear Amigurumi Pattern

β€” Main Fabric

  • 01
    Schachenmayr ORIGINAL Catania 100% cotton yarn in cream/color 130
  • 02
    Schachenmayr ORIGINAL Catania 100% cotton yarn in red/color 115
  • 03
    Schachenmayr ORIGINAL Catania 100% cotton yarn in light brown/color 257
  • 04
    Polyester wool stuffing or fiberfill

β€” Tools Required

  • 01
    2.5 mm crochet hook
  • 02
    2.00 mm crochet hook (for ears)
  • 03
    6mm safety eyes
  • 04
    Tapestry needle
  • 05
    Scissors
  • 06
    Stitch marker
  • 07
    Thin black thread
  • 08
    Black embroidery thread
  • 09
    Chopstick or stuffing tool

Progress Tracker

0% Complete

β€” Body :

Info :

Use 2.5 mm hook and cream (130) yarn

Round 1 :

7 crochet chains (7)

Round 2 :

inc on the 2nd ch from the hook, 4 sc, 3 sc on the last chain, turn and work on the other side of the foundation chain, 5 sc (14)

Round 3 :

2 inc, 4 sc, 3 inc, 4 sc, 1 inc (20)

Round 4 :

(1 sc, 1 inc) x2, 4 sc, (1 sc, 1 inc) x3, 5 sc, 1 inc (26)

Round 5 :

(2 sc, 1 inc) x2, 4 sc, (2 sc, 1 inc) x3, 6 sc, 1 inc (32)

Round 6 :

2 sc, (1 inc, 3 sc) x2, 4 sc, (1 inc, 3 sc) x3, 4 sc, 1 inc, 1 sc (38)

Round 7 :

38 sc around (38)

Round 8 :

3 sc, 1 inc, 18 sc, 1 inc, 15 sc (40)

Round 9 :

40 sc around (40)

Round 10 :

4 sc, 1 inc, 19 sc, 1 inc, 15 sc (42)

Round 11 :

42 sc around (42)

Round 12 :

5 sc, 1 inc, 20 sc, 1 inc, 15 sc (44)

Round 13-15 :

44 sc around, 3 rounds (44)

Info :

Attach the safety eyes between rounds 11 and 12 with 5 stitches in-between. Use invisible decrease which is worked in the front loops only

Round 16 :

5 sc, 1 dec, 20 sc, 1 dec, 15 sc (42)

Round 17 :

42 sc around (42)

Round 18 :

5 sc, 1 dec, 19 sc, 1 dec, 14 sc (40)

Round 19 :

40 sc around (40)

Round 20 :

5 sc, 1 dec, 18 sc, 1 dec, 13 sc (38)

Round 21 :

4 sc, 3 inc, 16 sc, 3 inc, 12 sc (44)

Round 22 :

44 sc around (44)

Round 23 :

7 sc, 1 inc, 21 sc, 1 inc, 14 sc (46)

Round 24 :

46 sc around (46)

Round 25 :

8 sc, 1 inc, 22 sc, 1 inc, 14 sc (48)

Round 26 :

48 sc around (48)

Round 27 :

9 sc, 1 inc, 23 sc, 1 inc, 14 sc (50)

Round 28 :

50 sc around (50)

Round 29 :

10 sc, 1 inc, 24 sc, 1 inc, 14 sc (52)

Round 30 :

52 sc around (52)

Round 31 :

11 sc, 1 inc, 25 sc, 1 inc, 14 sc (54)

Round 32-37 :

54 sc around, 6 rounds (54)

Round 38 :

7 sc, (1 dec, 3 sc)x3, 12 sc, (1 dec, 3 sc) x3, 5 sc (48)

Round 39 :

7 sc, (1 dec, 2 sc)x3, 12 sc, (1 dec, 2 sc) x3, 5 sc (42)

Round 40 :

7 sc, (1 dec, 1 sc)x3, 12 sc, (1 dec, 1 sc) x3, 5 sc (36)

Round 41 :

7 sc, 3 dec, 12 sc, 3 dec, 5 sc (30)

Finishing :

Crochet 8 sc more after round 41 to be on the corner. Stuff the body firmly, especially bottom part. Cut the yarn leaving a long tail to close gap. Using the long tail of yarn, start from second loop and sew the opening through the front loops by going across each stitch. Add stuffing during the close gap if needed

β€” Legs (Make 2) :

Round 1 :

6 sc in magic ring (6)

Round 2 :

(1 inc) x6 (12)

Round 3 :

(3 sc, 1 inc) x3 (15)

Round 4-6 :

15 sc around, 3 rounds (15)

Finishing :

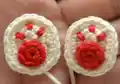
Cut the yarn leaving a tail 25-30 cm long. Use the needle, insert it under second stitch of face then come back to the beginning and insert the needle across stitch and bar. Sew the red around to leg. Embroider three claws using a tail of red yarn

β€” Red Arounds :

Instructions :

In magic ring 8 sc. Close it in the same way as leg. Leave a tail of yarn for sewing

β€” Ears :

Info :

Use the 2.00 mm hook

Round 1 :

4 crochet chains (4)

Round 2 :

inc on the 2nd ch from the hook, 1 sc, 3 sc on the last chain, turn and work on the other side of the foundation chs, 2 sc (8)

Round 3 :

2 inc, 1 sc, 3 inc, 1 sc, 1 inc (14)

Round 4 :

(1 sc, 1 inc) x2, 1 sc, (1 sc, 1 inc) x3, 2 sc, 1 inc (20)

Finishing :

Cut the yarn and leave a tail for sewing. Sew the red arounds to ears

β€” Arm (Left) :

Round 1 :

7 sc in magic ring (7)

Round 2 :

(1 inc) x7 (14)

Round 3 :

14 sc around (14)

Round 4-16 :

1 dec, 6 sc, 1 inc, 5 sc, 13 rounds (14)

Finishing :

Don't stuff the arm. Crochet 1 sc more after round 16, then close the arm with 6 sc across both sides. Cut the yarn leaving the tail 20 cm for sewing

β€” Arm (Right) :

Round 1 :

7 sc in magic ring (7)

Round 2 :

(1 inc) x7 (14)

Round 3 :

14 sc around (14)

Round 4-16 :

1 dec, 5 sc, 1 inc, 6 sc, 13 rounds (14)

Finishing :

Don't stuff the arm. Crochet 6 sc more after round 16, then close the arm with 6 sc across both sides. Cut the yarn leaving the tail 20 cm for sewing

β€” Muzzle :

Round 1 :

6 sc in magic ring (6)

Round 2 :

(1 inc) x6 (12)

Round 3 :

(3 sc, 3 inc) x2 (18)

Round 4 :

5 sc, 2 inc, 7 sc, 2 inc, 2 sc (22)

Round 5 :

22 sc around (22)

Finishing :

Finish the muzzle as the legs. Cut the yarn leaving a tail 30-35 cm long. Embroider the nose

β€” Heart (Small) :

Round 1 :

5 sc in magic ring (5)

Round 2 :

(1 inc) x5 (10)

Round 3 :

(1 sc, 1 inc) x5 (15)

Round 4-6 :

15 sc around, 3 rounds (15)

Info :

Finish the first piece of heart. Don't cut the yarn from second piece. Lay your two pieces together. Insert your hook in the next stitch (after finished) of first piece from inside to outside. Pick up the loop of second piece and pull it through. Now two pieces are connected. Make a starting chain, then insert your hook in next stitch of first piece and make a first stitch of new round (round 7). Put your marker here

Round 7 :

Two pieces together, 15 sc of first piece and 15 sc of second (30)

Round 8-9 :

30 sc around (30)

Round 10 :

1 dec, 11 sc, 2 dec, 11 sc, 1 dec (26)

Round 11 :

1 dec, 9 sc, 2 dec, 9 sc, 1 dec (22)

Round 12 :

1 dec, 7 sc, 2 dec, 7 sc, 1 dec (18)

Round 13 :

1 dec, 5 sc, 2 dec, 5 sc, 1 dec. Start to stuff the heart lightly (14)

Round 14 :

1 dec, 3 sc, 2 dec, 3 sc, 1 dec (10)

Round 15 :

1 dec, 1 sc, 2 dec, 1 sc, 1 dec (6)

β€” Heart (Big) :

Round 1 :

6 sc in magic ring (6)

Round 2 :

(1 inc) x6 (12)

Round 3 :

(1 inc, 1 sc) x6 (18)

Round 4 :

(1 inc, 2 sc) x6 (24)

Round 5-7 :

24 sc around, 3 rounds (24)

Info :

Finish the first piece of heart. Don't cut the yarn from second piece. Lay your two pieces together. Insert your hook in the next stitch (after finished) of first piece from inside to outside. Pick up the loop of second piece and pull it through. Now two pieces are connected. Make a starting chain, then insert your hook in the next stitch of first piece and crochet a first stitch of new round (round 8). Put your marker here

Round 8 :

Two pieces together, 24 sc of first piece and 24 sc of second (48)

Round 9-10 :

48 sc around, 2 rounds (48)

Round 11 :

1 dec, 20 sc, 2 dec, 20 sc, 1 dec (44)

Round 12 :

1 dec, 18 sc, 2 dec, 18 sc, 1 dec (40)

Round 13 :

1 dec, 16 sc, 2 dec, 16 sc, 1 dec (36)

Round 14 :

1 dec, 14 sc, 2 dec, 14 sc, 1 dec (32)

Round 15 :

1 dec, 12 sc, 2 dec, 12 sc, 1 dec (28)

Round 16 :

1 dec, 10 sc, 2 dec, 10 sc, 1 dec (24)

Round 17 :

1 dec, 8 sc, 2 dec, 8 sc, 1 dec (20)

Round 18 :

1 dec, 6 sc, 2 dec, 6 sc, 1 dec. Start to stuff the heart (16)

Round 19 :

1 dec, 4 sc, 2 dec, 4 sc, 1 dec (12)

Round 20 :

1 dec, 2 sc, 2 dec, 2 sc, 1 dec (8)

β€” Wings (Make 2) :

Round 1 :

6 sc in magic ring (6)

Round 2 :

(1 inc) x6 (12)

Round 3 :

(1 inc, 1 sc) x6 (18)

Round 4 :

(1 inc, 2 sc) x6 (24)

Round 5 :

(1 inc, 3 sc) x6 (30)

Finishing :

Crochet 2 chains. In second chain from the hook: 1 sl st. Then fold the circle in half and make a slip stitch across two sides. Crochet 2 chains. Turn your crocheting and make a slip stitch in second chain from the hook. Do a sl st across next two stitches. You should have 14(15) pieces. Cut the yarn leaving a tail for sewing. For the second wing, use a needle to move the yarn to the other corner. The wings should be symmetrical with each other

Assembly Instructions

  • Place the muzzle below the eyes and shape it to be more oval. Stuff it firmly and sew the muzzle to body securely.
  • Sew the ears to the body at the top of the head, positioning them as shown in the pattern photos for proper placement.
  • Attach the legs to the bottom of the body using the stitch and bar technique shown in the detailed assembly photos.
  • Position the arms at the corners of the body and connect them together at the beginning before sewing each arm securely to the body.
  • Attach your choice of small or large heart to the bear's paws or front, positioning as desired for your design.
  • If using wings, position them symmetrically on the back of the bear and sew securely, ensuring mirror image placement.
  • Embroider the nose on the muzzle using black embroidery thread and add any final decorative touches as desired.

Important Notes

  • πŸ’‘Pattern uses invisible decrease technique worked in front loops only - detailed photo tutorial included at end of pattern
  • πŸ’‘Use a stitch marker consistently to track your rounds and prevent losing your place in the pattern
  • πŸ’‘Stuff the body firmly, especially the bottom part, to allow the bear to sit properly and maintain its shape
  • πŸ’‘Arms should NOT be stuffed - they remain flat for easier closing and more natural positioning when sewn to body
  • πŸ’‘Left and right arms have different shaping patterns to create mirror images - pay close attention to which you're making
  • πŸ’‘Cut yarn tails to specified lengths for sewing as shorter tails may not be sufficient for secure attachment
  • πŸ’‘The muzzle and legs use a special finishing technique shown in photos - follow carefully to avoid gaps in closure

This heartwarming Valentine's Teddy Bear pattern was lovingly designed to help you create the perfect expression of affection for someone special. With intricate details like embroidered features, sweet red accents, and your choice of heart sizes, every element comes together to create a gift that truly speaks from the heart. The optional angel wings add a heavenly touch that makes this bear even more magical. Whether for Valentine's Day, anniversaries, or just because, this teddy bear will become a treasured keepsake that symbolizes love and care in every stitch. πŸ’•πŸ§Έ Happy crocheting! ✨

You ask,

we answer.

FAQs

What's the difference between the left and right arms in this pattern?

The left and right arms have mirror image shaping to create symmetry when attached to the bear's body. The left arm works decreases, single crochet, and increases in one direction (1 dec, 6 sc, 1 inc, 5 sc), while the right arm reverses this pattern (1 dec, 5 sc, 1 inc, 6 sc). This creates natural-looking arms that curve appropriately when sewn to the body. Make sure to follow the correct pattern for each arm!

Should I make the small heart or the big heart for my Valentine's bear?

It depends on your vision! The small heart (starting with 5 sc in magic ring) is perfect for the bear to hold in its paws and creates a sweet, subtle look. The big heart (starting with 6 sc) makes more of a statement and works beautifully if you want the heart to be the focal point. Some makers even create both sizes and have the bear hold the small heart while displaying the large heart separately!

Why does the pattern specify not to stuff the arms?

Leaving the arms unstuffed serves multiple purposes. First, it makes them easier to flatten and close with the 6 sc across technique. Second, unstuffed arms are more flexible and poseable, allowing you to position them naturally when sewing to the body. Third, they create a softer, more huggable feel. Stuffed arms would be too rigid and make the bear look stiff rather than cuddly.

What is the invisible decrease technique mentioned in this pattern?

The invisible decrease is a technique that works through front loops only, creating a smoother, less visible decrease that's perfect for amigurumi. The pattern includes a detailed photo tutorial showing exactly how to insert your hook through the front loops of two stitches, pull through, then complete the decrease. This technique prevents the gaps and bumps that regular decreases can create, giving your bear a professional, polished appearance.

Are the angel wings optional, and how do they attach?

Yes, the wings are completely optional! They add a Valentine's angel theme but can be omitted for a classic teddy bear look. To make them, you create a flat circle that's then folded and edged with decorative slip stitch scallops creating 14-15 petal-like pieces. The wings are made as mirror images (moving the yarn to opposite corners) and sewn symmetrically to the bear's back. They're a beautiful touch but not essential to the overall design.