Create an irresistibly soft and cuddly panda pillow that's perfect for both children and adults! This charming 29x29 cm crochet pillow combines plush yarn with adorable panda features including black ears, a sweet nose, and endearing spots. Made with YarnArt Dolce yarn, this cozy companion doubles as both a decorative accent and a huggable friend. Whether you're crafting a gift for a loved one or adding personality to your own space, this panda pillow brings warmth and whimsy to any room.
Progress Tracker
0% Complete
— Pillow :
Round 1 :
Use white plush yarn. Make 90 ch, connect with the first loop
Info :
Leave a long thread and sew the top of the pillow. Fasten the thread and hide inside the pillow. Fill tightly and evenly. Fill the angles of the pillow well. Sew and fasten the thread and hide inside the pillow.
— Ear (2 details) :
Round 1 :
Use black plush yarn. 6 sc in magic ring {6}
Round 2 :
(inc) - repeat 6 times {12}
Round 3 :
(1 sc, inc) - repeat 6 times {18}
Round 4 :
(2 sc, inc) - repeat 6 times {24}
Round 5 :
(3 sc, inc) - repeat 6 times {30}
Round 6 :
(4 sc, inc) - repeat 6 times {36}
Round 7 :
(5 sc, inc) - repeat 6 times {42}
Round 9 :
(19 sc, dec) - repeat 2 times {40}
Info :
Leave a long thread for sewing
— Nose :
Round 1 :
Use white plush yarn. 6 sc in magic ring {6}
Round 2 :
(inc) - repeat 6 times {12}
Round 3 :
(1 sc, inc) - repeat 6 times {18}
Round 4 :
(2 sc, inc) - repeat 6 times {24}
Round 5 :
(3 sc, inc) - repeat 6 times {30}
Round 6 :
(4 sc, inc) - repeat 6 times {36}
Round 7 :
(5 sc, inc) - repeat 6 times {42}
Round 8-9 :
42 sc (2 rounds)
Info :
Leave a long thread for sewing
— Leg (2 details) :
Round 1 :
Use black plush yarn. 6 sc in magic ring {6}
Round 2 :
(inc) - repeat 6 times {12}
Round 3 :
(1 sc, inc) - repeat 6 times {18}
Info :
Leave a long thread for sewing
— Arm (2 details) :
Round 1 :
Use black plush yarn. 6 sc in magic ring {6}
Round 2 :
(inc) - repeat 6 times {12}
Info :
Leave a long thread for sewing
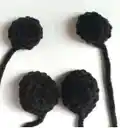
— Spot (2 details) :
Round 1 :
Use black plush yarn. 12 ch
Round 2 :
Begin to work from the second loop from the hook: 10 sc, 3 sc in 1 loop. On the other side of the chain: 10 sc, sl st
Round 3 :
1 ch, begin to work from the second loop from the hook: inc, 9 sc, inc, 1 sc, inc, 11 sc, sl st
Round 4 :
1 ch, begin to work from the second loop from the hook: 1 sc, inc, 4 sc, hdc, 5 dc, hdc, 1 sc, sl st
Info :
Fasten the thread and leave a long thread for sewing
This adorable Panda Pillow pattern brings together comfort and cuteness in one perfect project! Designed with plush yarn for that irresistibly soft texture, this pillow makes a wonderful gift for any age. The straightforward construction and charming details create a piece that's both functional and full of personality. Whether displayed on a bed, couch, or chair, this handmade panda pillow adds warmth and whimsy to any space. 🐼🧶 Happy crocheting! ✨