🧢 Beautiful ✨ Detailed πŸ’ Adorable

Top Hat Teddy Amigurumi Pattern

Top Hat Teddy Amigurumi Pattern
4.4β˜… Rating
8-10 Hours Time Needed
3.7K Made This
βœ‚οΈ

Intermediate Level

Ideal for those with basic knitting experience, featuring slightly more advanced stitches and techniques to expand your skills.

⏱️

All-Day Adventure

Requires 8-10 hours, ideal for a full day of immersive knitting.

🧸

Cute Companion

An adorable friend to cherish, handcrafted with love to bring comfort and joy for years to come.

About This Top Hat Teddy Amigurumi Pattern

The Top Hat Teddy pattern is a sophisticated amigurumi design that brings elegance and charm to your crochet collection. Featuring detailed instructions for creating a fully articulated teddy bear complete with a classic top hat, bow tie, and optional rockstar accessories, this pattern offers versatility for customization. Whether you choose the traditional brown teddy with mushroom accents or the bold rockstar version with felt lightning bolts and colorful details, you'll create a memorable keepsake that showcases your crochet skills.

Top Hat Teddy Amigurumi Pattern crochet pattern - detailed view of completed project

This comprehensive pattern includes step-by-step photo guides for complex assembly steps, particularly helpful for attaching felt details and creating the signature face features. The invisible decrease method ensures a professional finish with minimal gaps in your work.

Why You'll Love This Top Hat Teddy Amigurumi Pattern

I absolutely love this pattern because it offers incredible creative freedom while maintaining clear, detailed instructions that build your confidence as you work. The ability to choose between two distinct styles means you can personalize your teddy to match any personality or occasion. I find the felt detail work on the Rockstar version particularly rewarding, as it adds a unique dimensional quality that makes your finished piece truly one-of-a-kind. The satisfaction of seeing those adorable face details come together and the structured top hat take shape makes every stitch worthwhile. Plus, the comprehensive photo guides eliminate guesswork, allowing you to focus on enjoying the creative process rather than worrying about technique.

Top Hat Teddy Amigurumi Pattern step 1 - construction progress Top Hat Teddy Amigurumi Pattern step 2 - assembly progress Top Hat Teddy Amigurumi Pattern step 3 - details and accessories Top Hat Teddy Amigurumi Pattern step 4 - final assembly and finishing

Switch Things Up

I love experimenting with different color combinations for this Top Hat Teddy pattern to create unique personalities for each bear I make. Instead of the traditional brown and mushroom palette, I've created versions in soft pastels like lavender and cream for a vintage shabby-chic aesthetic, or bold jewel tones like emerald green with gold accents for a luxurious feel.

For a seasonal twist, I enjoy making holiday-themed versions by swapping the bow tie for a festive scarf in red and white stripes for Christmas, or orange and black for Halloween. The top hat can be decorated with seasonal embellishments like tiny felt holly leaves, snowflakes, or autumn foliage stitched around the band.

I've also experimented with different textures by using fuzzy eyelash yarn for a super soft, cuddly version, or cotton yarn for a firmer structure that holds its shape beautifully for display. The belly color is another great place to add personalityβ€”try stripes, polka dots using surface crochet, or even a heart shape for Valentine's Day.

Sometimes I create matching accessories beyond what's in the pattern, like tiny crocheted canes, miniature bouquets of flowers, or even little vests and jackets to dress up my teddies for different occasions. Adding embroidered details like pocket watches on the belly or decorative stitching on the paws gives each bear its own story and character that makes them truly one-of-a-kind keepsakes.

Common Mistakes & How to Fix Them

βœ— Forgetting to stuff the snout before sewing it onto the head, making it difficult to achieve proper shaping and dimension βœ— Placing safety eyes before mapping out the entire face layout, which can result in uneven or awkward facial proportions βœ— Not using the invisible decrease method as recommended, leaving visible gaps and holes that compromise the professional appearance βœ— Skipping the cardboard insert in the top hat, causing it to collapse or lose its structured shape over time βœ— Sewing body parts without pinning first, leading to misaligned limbs and an unbalanced finished teddy bear βœ— Over-stuffing the arms and legs at the top where they'll be sewn shut, creating bulky seams that are difficult to close neatly

Top Hat Teddy Amigurumi Pattern

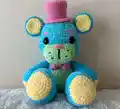
Create an adorable teddy bear with a charming top hat and bow tie! This detailed amigurumi pattern guides you through crafting a sophisticated teddy companion, complete with customizable options for a classic Top Hat Teddy or a vibrant Rockstar version with felt details, shoulder pads, and accessories. Perfect for gifting or adding personality to your crochet collection, this pattern combines traditional techniques with creative embellishments to bring your plushie to life.

Intermediate 8-10 Hours

Materials Needed for Top Hat Teddy Amigurumi Pattern

β€” Main Fabric

  • 01
    Premier Just Chenille yarn in Cocoa Brown (3 skeins) for Top Hat Teddy
  • 02
    Bernat Velvet yarn in Mushroom (1 skein) for Top Hat Teddy
  • 03
    Red Heart Super Saver in Black (1 skein)
  • 04
    Red Heart Super Saver in White (1 skein)
  • 05
    Loops & Threads Chenille Home Slim in Mustard (2 skeins) for Rockstar version
  • 06
    Sweet Snuggles Lite in Winter White (1 skein) for Rockstar version
  • 07
    Bernat Blanket in Crimson (1 skein) for Rockstar version
  • 08
    Yarn Bee in Charcoal (1 skein) for Rockstar version
  • 09
    Premier Just Chenille yarn in Light Blue (1 skein) for Rockstar version
  • 10
    Polyester stuffing
  • 11
    Black embroidery thread
  • 12
    White embroidery thread (optional)
  • 13
    Light blue felt sheet for Rockstar version
  • 14
    Red felt sheet for Rockstar version

β€” Tools Required

  • 01
    4mm crochet hook
  • 02
    6mm crochet hook (for Rockstar version)
  • 03
    Stitch markers
  • 04
    Sewing pins
  • 05
    Yarn needle
  • 06
    Scissors
  • 07
    Embroidery needle
  • 08
    Hot glue gun and hot glue
  • 09
    18mm safety eyes (2) for Top Hat Teddy
  • 10
    30mm safety eyes (2) for Rockstar version
  • 11
    2 black buttons for Top Hat Teddy
  • 12
    12 pyramid studs for Rockstar version
  • 13
    Piece of cardboard (recycled scrap piece)

Progress Tracker

0% Complete

β€” Body :

Round 1 :

MR 6 sc (6)

Round 2 :

Inc x6 (12)

Round 3 :

(Sc, inc) x6 (18)

Round 4 :

Sc, inc, (sc 2, inc) x5, sc (24)

Round 5 :

(sc 3, inc) x6 (30)

Round 6 :

Sc 2, inc, (sc 4, inc) x5, sc 2 (36)

Round 7 :

(sc 5, inc) x6 (42)

Round 8 :

Sc 3, inc, (sc 6, inc) x6, sc 3 (48)

Round 9 :

(sc 7, inc) x6 (54)

Round 10 :

Sc 24 in main color, sc 13 in belly color, sc 17 in main color (54)

Round 11 :

Sc 23 in main color, sc 15 in belly color, sc 16 in main color (54)

Round 12 :

Sc 22 in main color, sc 17 in belly color, sc 15 in main color (54)

Round 13 :

Sc 22 in main color, sc 17 in belly color, sc 15 in main color (54)

Round 14 :

(sc 7, dec) x2, sc 4 in main color, sc 3 in belly color, dec, sc 7, dec, sc 3 in belly color, sc 4 in main color, dec, sc 7, dec (48)

Round 15 :

Sc 21 in main color, sc 13 in belly color, sc 14 in main color (48)

Round 16 :

Sc 3, dec, (sc 6, dec) x2, sc 6, dec, sc 5 in main color, sc in belly color, dec, sc 6, dec, sc 3 (42)

Round 17 :

Sc 18 in main color, sc 12 in belly color, sc 12 in main color (42)

Round 18 :

(sc 5, dec) x2, sc 4 in main color, sc in belly color, dec, sc 5, dec, sc 2 in belly color, sc 3 in main color, dec, sc 5, dec (36)

Round 19 :

Sc 17 in main color, sc 8 in belly color, sc 11 in main color (36)

Round 20 :

Sc 17 in main color, sc 8 in belly color, sc 11 in main color (36)

Round 21 :

Sc 2, dec, (sc 4, dec) x2, sc 2 in main color, sc 2 in belly color, dec, sc 2 in belly color, sc 2 in main color, dec, sc 4, dec, 2sc (30)

Round 22 :

Sc around (30)

Round 23 :

(sc, dec) x10 (20)

Info :

Make a slip stitch and fasten off, leaving a long tail for sewing. Stuff and set aside.

β€” Snout :

Info :

Ch 11 and work in a continuous spiral around both sides of the chain

Round 1 :

Starting in the 2nd ch from hook - inc, sc 8, inc. Flip work and continue on other side - inc, sc 8, inc (24)

Round 2 :

Sc, inc, sc 8, (sc, inc) x2, sc 9, inc (28)

Round 3 :

Sc 2, inc, sc 8, (sc 2, inc) x2, sc 10, inc (32)

Round 4 :

Sc around (32)

Round 5 :

Sc 3, inc, sc 8, (sc 3, inc) x2, sc 11, inc (36)

Round 6 :

Sc 4, inc, sc 8, (sc 4, inc) x2, sc 12, inc (40)

Info :

Finish with slip stitch and fasten off. Leave long tail for sewing. Set aside.

β€” Head :

Round 1 :

MR 6 sc (6)

Round 2 :

Inc x6 (12)

Round 3 :

(Sc, inc) x6 (18)

Round 4 :

Sc, inc, (sc 2, inc) x5, sc (24)

Round 5 :

(sc 3, inc) x6 (30)

Round 6 :

Sc 2, inc, (sc 4, inc) x5, sc 2 (36)

Round 7 :

(sc 5, inc) x6 (42)

Round 8 :

Sc 3, inc, (sc 6, inc) x5, sc 3 (48)

Round 9 :

(sc 7, inc) x6 (54)

Round 10-15 :

Sc around (54) - 6 rounds

Round 16 :

Sc, inc, (sc 2, inc) x17, sc (72)

Round 17 :

(sc 3, inc) x18 (90)

Round 18 :

Sc around (90)

Round 19 :

(sc 3, dec) x18 (72)

Round 20 :

Sc around (72)

Round 21 :

Sc, dec, (sc 2, dec) x17, sc (54)

Round 22 :

Sc around (54)

Round 23 :

(sc 7, dec) x6 (48)

Round 24 :

Sc around (48)

Round 25 :

Sc 3, dec, (sc 6, dec) x5, sc 3 (42)

Round 26 :

Sc around (42)

Round 27 :

(sc 5, dec) x6 (36)

Round 28 :

Sc 2, dec, (sc 4, dec) x5, sc 2 (30)

Infos :

Pause here. Add temporary stuffing. Place safety eyes between rounds 15-16, about 9-10 stitches apart. Position snout between rounds 16-17, stretching down 8 rounds to between rounds 24-25. Add snout details using embroidery thread. Create whites of eyes with white yarn. Add black accent lines next to eyes. Sew on eyebrows between rounds 11-12 and 12-13, about 4-5 stitches in length, 7 stitches apart. Make eyebrows 5-6 layers thick. Continue to Round 29.

Round 29 :

(sc 3, dec) x6 (24)

Round 30 :

Sc, dec, (sc 2, dec) x5, sc (18)

Round 31 :

(Sc, dec) x6 (12)

Info :

Stuff a little more

Round 32 :

Dec x6 (6)

Info :

Fasten off and set aside for assembly

β€” Ears (Make 2) :

Info :

Inner Ear - Use belly color

Round 1 :

MR 6 sc (6)

Round 2 :

Inc x6 (12)

Round 3 :

(Sc, inc) x6 (18)

Round 4 :

sc, inc (sc 2, inc) x5, sc (24)

Info :

Make slip stitch and fasten off. Leave short tail to weave into outer ear.

Info :

Outer Ear - Use main color

Round 1 :

MR 6 sc (6)

Round 2 :

Inc x6 (12)

Round 3 :

(Sc, inc) x6 (18)

Round 4 :

sc, inc (sc 2, inc) x5, sc (24)

Info :

Sandwich inner ear piece to outer ear piece with right sides facing outward

Round 5 :

sc around both pieces (24)

Info :

Finish with slip stitch and fasten off. Leave long tail for sewing. Set aside.

β€” Arms (Make 2) :

Round 1 :

MR 6 sc in belly color (6)

Round 2 :

Inc x6 (12)

Round 3 :

(Sc, inc) x6 (18)

Round 4 :

sc, inc, (sc 2, inc) x5, sc (24)

Round 5 :

(sc 3, inc) x6 (30)

Info :

Change to main color

Round 6 :

Sc 2, inc, (sc 4, inc) x5, sc 2 (36)

Round 7-8 :

Sc around (36) - 2 rounds

Round 9 :

Dec x3, sc 24, dec x3 (30)

Round 10 :

Sc around (30)

Round 11 :

(sc 3, dec) x6 (24)

Round 12-13 :

Sc around (24) - 2 rounds

Info :

Start stuffing. Only lightly stuff towards the top.

Round 14 :

Sc, dec, (sc 2, dec) x5, sc (18)

Round 15-19 :

Sc around (18) - 5 rounds

Round 20 :

(Sc, dec) x6 (12)

Round 21 :

Sc around (12)

Info :

Make additional 5 sc. The 5th stitch will be new end of round.

Round 22 :

Pinch arm closed and sc across both sides (6)

Info :

Leave long tail for sewing. Fasten off. Set aside.

β€” Legs (Make 2) :

Round 1 :

MR 6 sc in belly color (6)

Round 2 :

Inc x6 (12)

Round 3 :

(Sc, inc) x6 (18)

Round 4 :

sc, inc, (sc 2, inc) x5, sc (24)

Round 5 :

(sc 3, inc) x6 (30)

Round 6 :

Inc x6, sc 24 (36)

Info :

Change to main color

Round 7 :

(Sc, inc) x6, sc 24 (42)

Round 8-9 :

Sc around (42) - 2 rounds

Round 10 :

(Sc, dec) x6, sc 24 (36)

Round 11 :

Sc around (36)

Round 12 :

Dec x6, sc 24 (30)

Round 13-14 :

Sc around (30) - 2 rounds

Round 15 :

(sc 3, dec) x6 (24)

Info :

Start stuffing. Only lightly stuff towards the top.

Round 16 :

Sc around (24)

Round 17-18 :

Sc around (24) - 2 rounds

Round 19 :

Sc, dec, (sc 2, dec) x5, sc (18)

Round 20-25 :

Sc around (18) - 6 rounds

Round 26 :

(Sc, dec) x6 (12)

Round 27 :

Pinch legs closed and sc around both sides (6)

Info :

Leave long tail for sewing. Fasten off. Set aside.

β€” Top Hat - Brim :

Round 1 :

MR 6 sc (6)

Round 2 :

inc x6 (12)

Round 3 :

(Sc, inc) x6 (18)

Round 4 :

Sc, inc, (sc 2, inc) x5, sc (24)

Round 5 :

(sc 3, inc) x6 (30)

Round 6 :

Sc 2, inc, (sc 4, inc) x5, sc 2 (36)

Round 7 :

(sc 5, inc) x6 (42)

Round 8 :

Sc 3, inc, (sc 6, inc) x5, sc 3 (48)

Round 9 :

(sc 7, inc) x6 (54)

Info :

Make slip stitch and fasten off. Leave long tail for sewing. Set aside.

β€” Top Hat - Hat Top :

Round 1 :

MR 6 sc (6)

Round 2 :

inc x6 (12)

Round 3 :

(Sc, inc) x6 (18)

Round 4 :

Sc, inc, (sc 2, inc) x5, sc (24)

Round 5 :

(sc 3, inc) x6 (30)

Round 6 :

Sc 2, inc, (sc 4, inc) x5, sc 2 (36)

Round 7 :

BLO sc around (36)

Round 8-12 :

Sc around (36) - 5 rounds

Round 13 :

Sc 2, dec, (sc 4, dec) x5, sc 2 (30)

Round 14 :

Sc around (30)

Round 15-16 :

Sc around (30) - 2 rounds

Info :

Finish with slip stitch and fasten off. Leave long tail for sewing. Set aside.

β€” Bow Tie :

Info :

Leave long front tail. Ch 5 and work in rows. End each row with ch 1 and turn.

Round 1 :

Starting in 2nd ch from hook - sc 4, ch 1 (4)

Round 2-23 :

Sc 4, ch 1, turn (4) - 22 rounds

Infos :

Leave long tail and fasten off. Fold in half so beginning ch 5 meets round 23. Sew together keeping seam in center. Wrap yarn tails around center and tie knot. Pull tightly to cinch center. Wrap yarn around center 10-11 times. Tie knot in back to finish.

Assembly Instructions

  • Attach the head to the body by centering the head on top of the body, outlining with sewing pins where you want it sewn. Sew the body to the head using the pins as guidelines, stuffing the neck area extra before finishing to prevent floppiness.
  • Sew the ears onto the head with tops between rounds 8-9, extending down 3 rounds to between rounds 11-12. Position ears 4 single crochet stitches away from the eyebrows on each side.
  • Create the top hat structure by tracing the hat top onto cardboard, cutting it out, and inserting it into the hat top piece against the inside top. Line up centers of brim and hat top.
  • Sew the hat brim onto the head between rounds 6-7 of the brim. Then sew the hat top piece onto the brim at the same location, stuffing the hat about three-quarters of the way before completing the sewing.
  • Attach the bow tie using a yarn needle, inserting both tail ends into the neck where the head and body meet. Sew through the back of the bow several times to ensure it's secure.
  • Sew the arms onto the body starting at the point where the head and body meet, angling them slightly downward and sewing down 5 rounds vertically on each side.
  • Attach the legs to the body bottom between rounds 6-7, ensuring they're evenly spaced and positioned for the teddy to sit or stand properly.

Important Notes

  • πŸ’‘Use stitch markers to track your rounds, especially when working with color changes for the belly and during complex shaping sequences
  • πŸ’‘Always use the invisible decrease method as recommended to avoid visible gaps and achieve a professional finish throughout your project
  • πŸ’‘Make the snout before completing the head to properly map out facial feature placement including eyes, nose, and eyebrows for balanced proportions

This charming Top Hat Teddy pattern brings timeless elegance to your amigurumi collection with sophisticated details and versatile customization options. Whether you choose the classic gentlemanly teddy or the bold rockstar version with felt accents and accessories, you'll create a memorable companion that showcases your crochet skills beautifully. The comprehensive photo guides and detailed instructions make even complex assembly steps approachable and rewarding. Perfect for gifting or displaying, this teddy combines traditional amigurumi techniques with creative embellishments that bring personality to every stitch. Happy crocheting! 🧢✨

You ask,

we answer.

FAQs

Can I use different yarn weights for this pattern?

Yes, but your finished teddy will be a different size. The pattern recommends 4mm hook with medium weight yarn for the classic version and 6mm hook with bulky yarn for the rockstar version. If you substitute yarns, adjust your hook size accordingly and be aware that safety eye sizes may need to change to maintain proper proportions.

Do I need to make both the classic and rockstar versions, or can I choose one?

You can absolutely choose just one version! The pattern provides instructions for both styles, with the rockstar version including additional accessories like felt details, shoulder pads, and bracelets. Follow the instructions specific to your chosen version, marked clearly throughout the pattern.

What's the invisible decrease method and why is it important?

The invisible decrease is a technique that minimizes gaps between stitches when decreasing, creating a smoother, more professional finish. It's especially important for this pattern because the teddy's face and body need to look seamless. The pattern strongly recommends using this method throughout instead of regular decreases.

How do I attach the felt details for the Rockstar version without sewing?

The pattern mentions you can use hot glue as an alternative to sewing the felt pieces. Follow all the same preparation steps for cutting and positioning the felt, but instead of using embroidery thread to attach the pieces, carefully apply hot glue to secure them to the crocheted surface.

What size will my finished teddy be?

The finished size depends on your yarn choice and tension. Using the recommended yarns and hooks, the classic Top Hat Teddy will be approximately 8-10 inches tall, while the Rockstar version with bulkier yarn will be larger, around 12-14 inches. Your personal tension may affect the final size.

Can I make the teddy without the top hat and bow tie?

Yes, the teddy is complete without accessories, though the top hat and bow tie give it signature charm. You could also substitute different accessories like a scarf, different hat style, or seasonal decorations to customize your teddy for different occasions or preferences.