๐Ÿงถ Beautiful โœจ Detailed ๐Ÿ’ Adorable

Stitch Amigurumi Pattern

Stitch Amigurumi Pattern
4.1โ˜… Rating
8-10 Hours Time Needed
2.1K Made This
โœ‚๏ธ

Intermediate Level

Ideal for those with basic knitting experience, featuring slightly more advanced stitches and techniques to expand your skills.

โฑ๏ธ

All-Day Adventure

Requires 8-10 hours, ideal for a full day of immersive knitting.

๐Ÿงธ

Cute Companion

An adorable friend to cherish, handcrafted with love to bring comfort and joy for years to come.

About This Stitch Amigurumi Pattern

Stitch Amigurumi Pattern crochet pattern - detailed view of completed project

Standing at about 18cm tall when completed with the recommended yarn weight, this Stitch makes the perfect companion for Disney fans of all ages. The pattern uses basic amigurumi techniques combined with color-changing methods to achieve Stitch's unique appearance.

Why You'll Love This Stitch Amigurumi Pattern

I absolutely love how this pattern brings such a beloved character to life through crochet. The way the color changes create Stitch's belly marking feels so rewarding to complete, and watching his personality emerge as you add each feature is truly magical. The detailed instructions for the ears and claws make even the trickier parts achievable, and I find the process of assembling all the pieces together incredibly satisfying. There's something special about creating a character that brings so much joy to people, whether you're making it for yourself or as a gift for a Disney fan. The finished piece has such charm and character that it becomes more than just a crochet projectโ€”it's a little friend you've brought into the world with your own hands.

Stitch Amigurumi Pattern step 1 - construction progress Stitch Amigurumi Pattern step 2 - assembly progress Stitch Amigurumi Pattern step 3 - details and accessories Stitch Amigurumi Pattern step 4 - final assembly and finishing

Switch Things Up

I love experimenting with different color variations when making this Stitch pattern! While the classic blue is absolutely iconic, I've tried creating him in pastel shades for a softer, nursery-friendly version that still captures his charm. You could even make a pink Angel version by swapping the blues for pinks and purplesโ€”she's Stitch's girlfriend in the movies and would make a perfect companion piece.

For those who want to add extra personality, I sometimes embroider a little smile or different expression on the face, or even add small details like felt spots on his back. If you're making this for a child, consider using child-safe embroidered eyes instead of felt for added durability. I've also experimented with adding a small Hawaiian flower accessory or a tiny guitar to reference scenes from the movies.

Another fun variation I enjoy is adjusting the sizeโ€”using bulky yarn and a larger hook creates an oversized cuddle buddy that's perfect for hugging, while using thread and a tiny hook makes an adorable keychain-sized version. You can even play with the ear positions slightly to give different expressionsโ€”slightly forward ears look more alert and playful, while more sideways ears give a relaxed, content appearance. The possibilities are endless, and each variation brings its own unique personality to this beloved character!

Common Mistakes & How to Fix Them

โœ— Forgetting to maintain consistent tension during color changes can create uneven stripes on the body and belly area โœ— Not positioning the ears correctly in line with the arms and legs results in an unbalanced appearance โœ— Placing the eyes too close together or too far apart drastically changes Stitch's characteristic expression and look โœ— Under-stuffing the head and body leads to a floppy amigurumi that won't hold its sitting position properly โœ— Attaching the claws in the wrong orientation makes them point in awkward directions instead of naturally forward โœ— Skipping the pinning step before sewing pieces together often results in crooked or misaligned limbs and features

Stitch Amigurumi Pattern

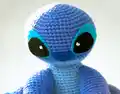
Bring Disney's most beloved alien to life with this adorable Stitch amigurumi crochet pattern. This detailed guide walks you through creating the iconic blue experiment with his signature big ears, charming eyes, and playful personality. Perfect for Disney fans and crochet enthusiasts alike, this pattern includes complete instructions for crafting Stitch's distinctive features including his light blue belly patch, large ears with pink inner details, and cute little tail. The finished amigurumi stands approximately 18cm tall and makes a wonderful gift or display piece for any Lilo & Stitch collector.

Intermediate 8-10 Hours

Materials Needed for Stitch Amigurumi Pattern

โ€” Main Fabric

  • 01
    Yarn in dark blue, medium blue, light blue, and pink colors
  • 02
    Yarn weight: 50g/133m
  • 03
    100-150g of medium blue, less than 50g of other colors

โ€” Tools Required

  • 01
    Crochet hook 2.5mm
  • 02
    Pins
  • 03
    Stitch markers
  • 04
    Stuffing/fiberfill
  • 05
    Tapestry needle
  • 06
    Sewing needle
  • 07
    Felt in light blue or white and black
  • 08
    Sewing thread in light blue, white, and black
  • 09
    Optional: embroidery needle
  • 10
    Scissors

Progress Tracker

0% Complete

โ€” Head :

Round 1 :

6 sc in MR (6)

Round 2 :

2 sc in each st (12)

Round 3 :

(1 sc, inc) x6 (18)

Round 4 :

(2 sc, inc) x6 (24)

Round 5 :

(3 sc, inc) x6 (30)

Round 6 :

(4 sc, inc) x6 (36)

Round 7 :

(5 sc, inc) x6 (42)

Round 8 :

(6 sc, inc) x6 (48)

Round 9 :

(7 sc, inc) x6 (54)

Round 10-19 :

1 sc in each st (54)
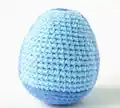
Info :

Change to light blue

Round 20 :

(7 sc, inv dec) x6 (48)

Round 21 :

(6 sc, inv dec) x6 (42)

Round 22 :

(5 sc, inv dec) x6 (36)

Round 23 :

(4 sc, inv dec) x6 (30)

Info :

Stuff the head firmly, add more stuffing at the end if needed

Round 24 :

(3 sc, inv dec) x6 (24)

Round 25 :

(2 sc, inv dec) x6 (18)

Info :

Cut yarn leaving long tail for sewing head to body

โ€” Ears (Make 4 - 2 in medium blue, 2 in pink) :

Info :

Work in rounds without turning. First crochet the pink inner ears, cut yarn and weave in ends. For blue outer ears, leave long tail for sewing

Starting :

15 ch, from 2nd ch from hook

Round 1 :

13 sc, 5 sc in last st, 13 sc (31)

Round 2 :

1 ch (not counted), 12 sc, (inc) x5, 13 sc (35). Skip the ch or end round with sl st

Round 3 :

1 ch, 12 sc, (1 sc, inc) x5, 13 sc (40)

Round 4 :

1 ch, 40 sc (40)

Info :

At the end, crochet the two ear parts together with right sides facing out. See photo

โ€” Body :

Round 1 :

6 sc in MR (6)

Round 2 :

2 sc in each st (12)

Round 3 :

(1 sc, inc) x6 (18)

Round 4 :

(2 sc, inc) x6 (24)

Round 5 :

(3 sc, inc) x6 (30)

Round 6 :

(4 sc, inc) x6 (36)

Round 7 :

(5 sc, inc) x6 (42)

Round 8 :

(6 sc, inc) x6 (48)

Round 9 :

1 sc in 46 sts, pick up 47th st with medium blue and finish with light blue, 1 sc in light blue (48)

Info :

After each color change, cut yarn and tie ends together

Round 10-15 :

In light blue: 15 sc, finish 16th st with medium blue. 30 sc with medium blue, finish 31st st with light blue and crochet last st in light blue (48)

Round 16 :

In light blue: (3 sc, inv dec), 6 sc, inv dec, 2 sc, color change (1 sc). In medium blue: 3 sc, inv dec, (6 sc, inv dec) x3, 1 sc, color change, 1 sc (42)

Round 17-18 :

In light blue: 14 sc, finish 15th st with medium blue. In medium blue: sc in each st, finish last sc with light blue (42)

Round 19 :

In light blue: (5 sc, inv dec) x2, (pick up st, finish with medium blue) (1 sc). In medium blue: 4 sc, inv dec, (5 sc, inv dec) x2, 5 sc, for decrease pick up st with light blue and finish (36)

Round 20 :

In light blue: 12 sc, color change to medium blue (1 sc). In medium blue: 22 sc, color change to light blue (1 sc) (36)

Round 21 :

In light blue: 13 sc, color change (1 sc), 21 sc, color change (1 sc) (36)

Round 22 :

In light blue: (4 sc, inv dec) x2, 1 sc, color change (1 sc). In medium blue: 2 sc, inv dec, (4 sc, inv dec) x2, 4 sc, inv dec, finish inv dec with light blue (30)

Round 23 :

1 sc in each st (make color changes) (30)

Info :

Stuff body and add more stuffing at the end

Round 24 :

In light blue: (3 sc, inv dec) x2, 1 sc, color change (1 sc). In medium blue: 1 sc, inv dec, (3 sc, inv dec) x2, 3 sc, pick up st through two sts with medium blue, finish with light blue (24)

Round 25 :

sc in each st (make color changes) (24)

Round 26 :

(2 sc, inv dec) x2, 1 sc, color change (1 sc), inv dec, (2 sc, inv dec) x3 (18)

Info :

Cut yarn and weave in. Sew head and body together using mattress stitch

โ€” Legs (Make 2) :

Info :

Start in dark blue

Round 1 :

6 sc in MR (6)

Round 2 :

2 sc in each st (12)

Info :

Change to medium blue

Round 3 :

(1 sc, inc) x6 (18)

Round 4 :

(2 sc, inc) x6 (24)

Round 5-7 :

1 sc in each st (24)

Round 8 :

(2 sc, inv dec) x6 (18)

Round 9 :

1 sc in each st (18)

Round 10 :

(2 sc, inc) x6 (24)

Round 11-14 :

1 sc in each st (24)

Round 15 :

(2 sc, inv dec) x6 (18)

Round 16-17 :

1 sc in each st (18)

Info :

Stuff leg, hold edges together and crochet along edge to close. Cut yarn leaving tail for sewing

Claws :

Work between rounds 4 and 5, on the 5th stitch along. Important that claws are where the edge closing ends, so they point upward when legs are sewn. Attach yarn accordingly. See photos

Claw 1 :

1 ch, in next st: 1 dc, 1 ch, in next st 1 sc

Claw 2 :

in next st 1 sl st and 2 ch, in next st: 1 dc, 1 ch, sc in next st

Claw 3 :

sl st in next st, 2 ch, 1 dc, 1 ch, sl st

Info :

Cut yarn and weave in ends

โ€” Arms (Make 2) :

Info :

Start in dark blue

Round 1 :

6 sc in MR (6)

Round 2 :

2 sc in each st (12)

Info :

Change to medium blue

Round 3 :

(1 sc, inc) x6 (18)

Round 4 :

(2 sc, inc) x6 (24)

Round 5-7 :

1 sc in each st (24)

Round 8 :

(2 sc, inv dec) x6 (18)

Round 9 :

1 sc in each st (18)

Round 10 :

(2 sc, inc) x6 (24)

Round 11-15 :

1 sc in each st (24)

Round 16 :

(2 sc, inv dec) x6 (18)

Round 17-18 :

1 sc in each st (18)

Info :

Stuff leg

Round 19 :

(1 sc, inv dec) x6 (12)

Round 20 :

1 sc in each st (12)

Info :

Crochet along edge to close. This time claws end in line with end of crocheted edge, so they point in right direction when arms are sewn. Attach yarn accordingly. See photos. Claws are crocheted same way as legs

โ€” Tail :

Round 1 :

6 sc in MR

Round 2 :

2 sc in each st (12)

Round 3 :

1 sc in each st (12)

Round 4 :

(1 sc, inc) x6 (18)

Round 5 :

(1 sc, inv dec) x6 (12)

Info :

Cut yarn leaving tail for sewing

โ€” Eyes :

Info :

Cut eyes as shown in photos. Sew black part onto light blue part with black yarn. Embroider small white dot onto black with white sewing or embroidery thread

Info :

Pin eyes to head. Position as in photos. Lower edge one round above color change, between rounds 10 and 11 of head. Outer sides should be in line with upper end of arms. Leave about 5 stitches space between eyes. Pin ears to head to check if everything fits

Info :

Sew eyes with light blue sewing thread

โ€” Nose :

Info :

With dark blue, leave long tail at beginning

Starting :

5 ch, 1 turning ch

Row :

sl st in next ch, hdc in next ch, 2 dc in next ch, hdc in next ch, 1 ch, sl st in last ch. Cut yarn and weave in

Info :

Sew nose between eyes with curved side pointing down

Assembly Instructions

  • Sew head to body using mattress stitch, aligning the neck portion smoothly with the body opening
  • Attach upper part of arms between rounds 23 and 24, one stitch into the light blue section of the body
  • Attach lower part of arms between rounds 19 and 20, approximately 1-3 stitches away from light blue section
  • Sew bottom of legs starting between rounds 7 and 8, with top between rounds 15 and 16, positioned 3 stitches from light blue belly area
  • Attach ears to head with upper side ending between rounds 11 and 12, lower side one round above color change, aligned with arms and legs
  • Stuff tail and sew with lower side between rounds 5 and 6 of body
  • Pin all pieces before sewing to ensure proper alignment and symmetry

Important Notes

  • ๐Ÿ’กUse stitch markers to track your rounds especially during frequent color changes
  • ๐Ÿ’กAfter each color change, cut yarn and tie the ends together to secure them properly
  • ๐Ÿ’กStuff the head and body firmly but not too tightly for best shape and structure
  • ๐Ÿ’กPosition claws carefully so they point upward when limbs are attached to the body
  • ๐Ÿ’กPin all parts in place before sewing to ensure correct positioning and alignment
  • ๐Ÿ’กThe pattern uses multiple color changes - keep different yarn colors organized and accessible
  • ๐Ÿ’กFinished size is approximately 18cm tall with recommended yarn weight of 50g/133m

This adorable Stitch amigurumi pattern brings Disney's lovable Experiment 626 to life in the most huggable way possible. With detailed instructions for creating his signature blue coloring, oversized ears, and mischievous expression, this pattern combines straightforward amigurumi techniques with rewarding color work. Whether you're a Disney collector or simply love creating charming handmade characters, this Stitch will bring ohana spirit to your crochet collection. The approximately 18cm finished piece makes a perfect gift or display companion! ๐Ÿงถ Happy crocheting! ๐Ÿงตโœจ

You ask,

we answer.

FAQs

What size will my finished Stitch be?

The finished Stitch will be approximately 18cm (about 7 inches) tall when using the recommended yarn weight of 50g/133m and a 2.5mm crochet hook. You can adjust the size by using thicker or thinner yarn with an appropriate hook size.

How do I handle the color changes in this pattern?

After each color change, cut the yarn and tie the ends together to secure them. This prevents loose color transitions and keeps your work neat. The pattern includes detailed instructions for when and where to change colors, especially for the belly marking.

Can I use safety eyes instead of felt eyes?

While the pattern calls for felt eyes to achieve Stitch's characteristic large oval eyes, you could adapt the design to use large oval safety eyes if preferred. However, the felt method gives more control over the exact shape and expression.

How do I make sure the ears are positioned correctly?

The pattern specifies that the upper side of the ears should end between rounds 11 and 12, with the lower side one round above the color change. Pin them in place along with the eyes before sewing to ensure they align properly with the arms and legs.

Why aren't my claws pointing in the right direction?

The claws need to be positioned where the closed edge of the limb ends. For legs, they should point upward when attached; for arms, they should align with the edge closure. Carefully follow the pattern's placement instructions and refer to the photos for guidance.

Do I need to stuff the tail?

Yes, stuff the tail before sewing it to the body between rounds 5 and 6. This gives it a nice rounded shape and helps it maintain its form.