🧢 Beautiful ✨ Detailed πŸ’ Adorable

Stella the Spider Amigurumi Pattern

Stella the Spider Amigurumi Pattern
4.3β˜… Rating
7-9 Hours Time Needed
3.9K Made This
βœ‚οΈ

Intermediate Level

Ideal for those with basic knitting experience, featuring slightly more advanced stitches and techniques to expand your skills.

⏱️

All-Day Adventure

Requires 8-10 hours, ideal for a full day of immersive knitting.

πŸ•·οΈ

Whimsical Buddy

Playful characters full of personality, designed to spark imagination and become cherished playtime favorites.

About This Stella the Spider Amigurumi Pattern

Stella the Spider is an absolutely enchanting amigurumi design that transforms the typically scary spider into the cutest companion you could imagine! This pattern features six individually crafted arms that give Stella that authentic spider appearance while maintaining an adorable aesthetic. The distinctive dark grey cap with decorative bumps on the edge adds texture and visual interest, creating that classic spider head shape. What really sets Stella apart are the tiny fangs that peek out from under the chinβ€”they're more cute than creepy and add so much character to this sweet creation.

Stella the Spider Amigurumi Pattern crochet pattern - detailed view of completed project

The pattern provides detailed guidance on working with color changes and creating the special textured edge on the cap using double crochet and triple crochet increases. With purple accent feet and white eye highlights, Stella has a beautiful color palette that's both striking and friendly, perfect for any spider enthusiast.

Why You'll Love This Stella the Spider Amigurumi Pattern

I'm completely obsessed with this spider pattern because Stella manages to be both authentically spider-like and utterly adorable at the same time! Creating six little arms is such a satisfying repetitive project, and watching them all come together when you attach them creates this amazing moment where Stella truly comes alive. What I love most is how those tiny fangs add just the right amount of spooky charm without being scaryβ€”they're positioned perfectly to look endearing rather than frightening. The textured cap edge with the double and triple crochet increases is such a clever detail that adds dimension and makes Stella look extra special. I find the color combination of cream, grey, and purple to be so sophisticated and modern, moving away from traditional Halloween colors while still being perfect for the season. Plus, the white yarn highlights on the eyes give Stella the sweetest expression that makes you want to display this spider year-round, not just at Halloween!

Stella the Spider Amigurumi Pattern step 1 - construction progress Stella the Spider Amigurumi Pattern step 2 - assembly progress Stella the Spider Amigurumi Pattern step 3 - details and accessories Stella the Spider Amigurumi Pattern step 4 - final assembly and finishing

Switch Things Up

I absolutely love playing with different color combinations for Stella! While the cream and grey palette is sophisticated and modern, I've created versions with classic Halloween colors using black bodies and bright orange legs that look absolutely spectacular. For a magical touch, try using sparkly or metallic yarn for the cap to make Stella shimmer and catch the light beautifully.

You could also experiment with pastel colors for a softer, more whimsical spiderβ€”imagine lavender and mint green, or soft pink and baby blue. I've even made a galaxy-themed Stella using deep purple and navy with silver accents that looks like she came from outer space! The variegated yarn works wonderfully for this pattern too, creating a unique color pattern across all six arms.

For the fangs, instead of leaving them white, you could make them in a contrasting bright color like red or hot pink for a more playful vampire spider look. Some makers have added tiny googly eyes on top of the safety eyes for extra cartoon charm, or embroidered patterns onto the cap like a skull or stars for personalized flair.

If you want to get really creative, consider adding a tiny crocheted witch hat, a small bow between the arms, or even a miniature web accessory that Stella can hold. I've experimented with making the legs in striped patterns by changing colors every few rounds, which creates a fun candy corn effect perfect for Halloween. You could also add small crocheted spots to the cap like a ladybug-spider hybrid for something truly unique. The beauty of Stella is that with six arms, you have so many opportunities to play with color blocking and create truly one-of-a-kind designs!

Common Mistakes & How to Fix Them

βœ— Not positioning all six arms correctly on the body which can make the spider look unbalanced or cause some arms to stick out at awkward angles instead of forward βœ— Stuffing the arms too much or continuing to stuff them after the pattern indicates to stop which creates bulky stiff arms that are difficult to pose and sew properly βœ— Missing the textured detail on the cap edge in round fifteen with the hdc dc-inc tr-inc sequence which is what gives the cap its distinctive decorative spider shell appearance βœ— Sewing the tiny fangs in the wrong position instead of underneath the chin where they should peek out creating an unnatural appearance that makes them too prominent

Stella the Spider Amigurumi Pattern

Create your own adorable Stella the Spider with this charming amigurumi pattern! Standing 11 inches tall, this delightfully spooky friend features six arms, cute little fangs, and a stylish dark grey cap with decorative bumps. Perfect for Halloween decor or year-round spider lovers, Stella combines cream and grey colors with purple and white accents for a friendly, non-scary appearance. This comprehensive pattern includes detailed instructions for creating every element, from the multiple arms to those sweet embroidered eye highlights that give Stella an endearing personality that will melt even arachnophobe hearts.

Intermediate 7-9 Hours

Materials Needed for Stella the Spider Amigurumi Pattern

β€” Main Fabric

  • 01
    Worsted Weight #4 yarn approximately 50g of main color cream
  • 02
    Worsted Weight #4 yarn approximately 25-50g dark grey for body cap and arms
  • 03
    Worsted Weight #4 yarn approximately 25-50g purple for leg accents
  • 04
    Worsted Weight #4 yarn white for teeth and eye highlights
  • 05
    Big Twist Cream for main color option
  • 06
    Red Heart Charcoal for grey body and cap sections
  • 07
    Red Heart Amethyst for purple accent details
  • 08
    I love this yarn white for teeth and decorative elements

β€” Tools Required

  • 01
    D Hook or 3.25 mm crochet hook
  • 02
    12 mm safety eyes
  • 03
    14 mm oval nose
  • 04
    Scissors
  • 05
    Sewing needle
  • 06
    Stitch marker
  • 07
    Fiberfill stuffing
  • 08
    Black embroidery thread
  • 09
    White embroidery thread
  • 10
    Pipe cleaner optional for arm structure

Progress Tracker

0% Complete

β€” Head :

Round 1 :

Make 6 sc into a magic ring (6)

Round 2 :

Increase in each st around (12)

Round 3 :

(sc, inc) x 6 (18)

Round 4 :

sc, inc, (2 sc, inc) x 5, sc (24)

Round 5 :

(3 sc, inc) x 6 (30)

Round 6 :

2 sc, inc, (4 sc, inc) x 5, 2 sc (36)

Round 7 :

(5 sc, inc) x 6 (42)

Round 8 :

3 sc, inc, (6 sc, inc) x 5, 3 sc (48)

Round 9-14 :

sc in each st around (48)

Infos :

Place eyes between rounds 12 and 13, leaving 10 holes between them. Place nose in between eyes between rounds 13 and 14. You may have to adjust the eye placement depending on yarn and hook size you use.

Round 15 :

3 sc, dec, (6 sc, dec) x 5, 3 sc (42)

Round 16 :

(5 sc, dec) x 6 (36)

Info :

Start stuffing the head

Round 17 :

2 sc, dec, (4 sc, dec) x 5, 2 sc (30)

Round 18 :

(3 sc, dec) x 6 (24)

Round 19 :

(2 sc, dec) x 6 (18)

Info :

F/O and leave a tail (the tail does not need to be long)
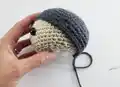
β€” Cap :

Round 1 :

Make 6 sc into a magic ring (6)

Round 2 :

Increase in each st around (12)

Round 3 :

(sc, inc) x 6 (18)

Round 4 :

sc, inc, (2 sc, inc) x 5, sc (24)

Round 5 :

(3 sc, inc) x 6 (30)

Round 6 :

2 sc, inc, (4 sc, inc) x 5, 2 sc (36)

Round 7 :

(5 sc, inc) x 6 (42)

Round 8 :

3 sc, inc, (6 sc, inc) x 5, 3 sc (48)

Round 9-13 :

sc in each st around (48)

Round 14 :

(6 sc, dec) x 6 (42)

Round 15 :

hdc, dc-inc, tr-inc, dc-inc, hdc, 23 sc (42)

Info :

F/O and leave a long tail for sewing

β€” Body :

Round 1 :

Make 6 sc into a magic ring (6)

Round 2 :

Increase in each st around (12)

Round 3 :

(sc, inc) x 6 (18)

Round 4 :

(inc, 2 sc) x 6 (24)

Round 5 :

(3 sc, inc) x 6 (30)

Round 6 :

2 sc, inc, (4 sc, inc) x 5, 2 sc (36)

Round 7-13 :

sc in each st around (36)

Round 14 :

(5 sc, dec) x 4, 8 sc (32)

Round 15 :

(4 sc, dec) x 3, 14 sc (29)

Round 16 :

(dec, 7 sc) x 2, dec, 9 sc (26)

Round 17 :

3 sc, dec, 16 sc, dec, 3 sc (24)

Info :

Start stuffing the body

Round 18 :

sc in each st around (24)

Round 19 :

8 sc, dec, 4 sc, dec, 8 sc (22)

Round 20 :

sc in each st around (22)

Round 21 :

dec, 8 sc, dec, 10 sc (20)

Round 22 :

sc in each st around (20)

Round 23 :

(dec, 8 sc) x 2 (18)

Info :

F/O and leave a long tail for sewing

β€” Arms (Make 6) :

Round 1 :

Make 6 sc into a magic ring (6)

Round 2 :

(sc, inc) x 3 (9)

Round 3-4 :

Sc in each st around (9)

Info :

Stop stuffing the arms

Round 5 :

2 sc, dec x 2, 3 sc (7)

Round 8-11 :

Sc in each st around (7)

Infos :

F/O and leave a long tail for sewing. Tip: If you fold the arms in half and sc closed, you will have an easier time when sewing them.

β€” Teeth :

Round 1 :

Make 3 sc into a magic ring (3)

Round 2 :

Inc, 3 sc (5)

Round 3 :

Inc, 4 sc (6)

Round 4 :

sc, inc, sc, dec, inc (7)

Infos :

Try not to use a stitch marker on the teeth. Round 4 will likely overlap the first stitch from the previous round. F/O and leave a long tail for sewing. I did not stuff my teeth

β€” Legs (Make 2) :

Info :

Starting with Color C: Ch 6

Round 1 :

inc in 2nd chain from hook, 3 sc, 4 sc in the last chain, working on the opposite side of the chain: 3 sc, inc (14)

Round 2 :

Inc3, 4 sc, inc3, 2 sc, inc3, 5 sc (20)

Round 3 :

inc x 3, 5 sc, inc3, 4 sc, inc3, 6 sc (27)

Round 4 :

sc, inc x 3, 8 sc, inc3, 6 sc, inc3, 7 sc (34)

Info :

Change to Color B

Round 5-7 :

sc in each st around (34)

Round 8 :

17 sc, dec x 6, 5 sc (28)

Info :

Stuff the legs as you work

Round 9 :

16 sc, dec x 4, 4 sc (24)

Round 10 :

15 sc, dec x 4, sc (20)

Round 11 :

12 sc, dec x 4 (16)

Info :

Stop stuffing the legs

Round 12 :

(dec, 6 sc) x 2 (14)

Round 13 :

sc in each st around (14)

Round 14 :

(dec, 5 sc) x 2 (12)

Round 15 :

sc in each st around (12)

Round 16 :

(dec, 4 sc) x 2 (10)

Round 17 :

sc in each st around (10)

Info :

F/O and leave a long tail for sewing

Assembly Instructions

  • Place the cap on the head positioning it near the opening of the head with the textured edge facing forward, then sew the cap securely onto the head
  • Sew the head to the body adding stuffing when you get to the last few stitches to ensure proper firmness and create a smooth neck connection
  • Pin the six arms to the side of the body placing the first one near the neck, the second one right next to the first, and the third right next to the second arm on each side
  • Sew all six arms onto the body in a forward facing angle ensuring they are evenly spaced and positioned for balanced appearance
  • Pin the tiny fangs or teeth underneath the chin where they will peek out naturally, then sew them carefully onto the head noting this will be difficult in some tight spaces
  • Turn the body upside down with the front of the face facing away from you, pin the legs onto the bottom of the body approximately between rounds 4 and 5, then sew them securely
  • Thread your needle with a long strand of white yarn and insert it into a spot on the side of the head, bring it to a lower corner of the eye, wrap the yarn to the top of the eye without pulling too tightly to create highlights
  • Add some blush to the cheeks using actual makeup blush for a sweet rosy finish that brings Stella to life

Important Notes

  • πŸ’‘Use a stitch marker consistently to mark the beginning of each round except on the teeth where it may cause overlap issues
  • πŸ’‘Do not join rounds unless specifically stated in the pattern, always work in a continuous spiral for seamless results
  • πŸ’‘All stitches are worked in both loops unless the pattern states otherwise for maintaining proper structure
  • πŸ’‘Eye and nose placement may need adjustment depending on the specific yarn brand and hook size you use for your project
  • πŸ’‘The textured edge on the cap in round fifteen using hdc dc-inc and tr-inc is crucial for the distinctive spider shell appearance
  • πŸ’‘Stop stuffing the arms at round four as indicated to ensure they remain flexible and easy to sew in proper forward facing angles
  • πŸ’‘Making six arms requires patience but folding them in half and single crocheting them closed makes sewing much easier and neater
  • πŸ’‘The teeth should not be stuffed as they need to remain flat to sit properly underneath the chin without bulking out

This enchanting Stella the Spider pattern was lovingly designed to prove that spiders can be absolutely adorable! With six carefully crafted arms and sweet little fangs, Stella brings just the right amount of spooky charm without being scary. The textured cap detail and sophisticated grey and purple color palette make this spider special enough to display year-round, not just during Halloween. Whether you're a spider enthusiast or creating spooky-cute decor, Stella is sure to steal hearts and become a treasured handmade creation. πŸ•·οΈβœ¨ Happy crocheting! πŸ§ΆπŸ’œ

You ask,

we answer.

FAQs

Why does Stella have six arms instead of eight legs?

This design features six arms for the amigurumi body structure, plus two legs at the bottom for standing stability. This gives you eight appendages total while maintaining a balanced, huggable shape!

Can I make the arms posable?

Yes! While not specified in the pattern, you could insert thin wire or pipe cleaners into the arms before sewing them closed to make them posable, just like the optional antennae treatment.

Do I have to include the fangs?

No, the fangs are optional! If you want an even sweeter, less spooky spider, you can skip them entirely. Stella will still look adorable with just the embroidered smile.

What makes the cap edge textured?

Round 15 of the cap uses a special combination of half double crochet, double crochet increases, and triple crochet increases to create decorative bumps that add dimension and visual interest to the spider's shell.

Can I use different colors for a unique spider?

Absolutely! Try black and orange for Halloween, bright rainbow colors for a funky spider, or pastels for a soft dreamy version. Just maintain the same yarn weight for consistent sizing.

Is this pattern suitable for beginners?

This is an intermediate pattern due to the multiple arms and special stitches in the cap. If you're comfortable with basic amigurumi techniques and have made a few projects, you'll do great!