About This SpongeBob SquarePants Hat Amigurumi Pattern
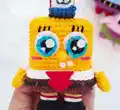
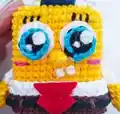
This adorable SpongeBob-inspired hat pattern is designed to be the perfect accessory for your amigurumi characters or as a standalone miniature decoration. The pattern features the classic white sailor hat with its distinctive black band and blue anchor detail, instantly recognizable from the beloved cartoon series. Using simple stitches and color changes, you'll create a charming piece that captures the nautical spirit of Bikini Bottom.
The pattern includes clear instructions for embroidering or painting the signature red lines and anchor symbol, giving you flexibility in how you finish your project. With its compact size and quick completion time, it's perfect for beginners looking to practice color changes and embellishment techniques.
Why You'll Love This SpongeBob SquarePants Hat Amigurumi Pattern
I absolutely love this pattern because it's such a quick win that delivers maximum cuteness! There's something incredibly satisfying about watching this iconic hat take shape in just a few rounds, and the moment you add that little anchor detail, it instantly becomes recognizable and full of personality. I appreciate how beginner-friendly it is while still teaching important skills like working in back loops only and creating clean color transitions. It's the perfect palette cleanser between bigger projects, and honestly, who doesn't smile when they see that classic sailor hat? Plus, it's so versatile—you can make it as an accessory for dolls, a keychain charm, or even collect a whole set in different colors!
Switch Things Up
I love experimenting with this simple hat pattern because it's such a perfect canvas for creativity! While the classic white, black, and blue combo gives you that authentic SpongeBob look, I've had so much fun making variations in different color schemes—imagine a pink and gold version for a princess theme, or red and white for a candy cane sailor look during the holidays.
You can also play with the anchor design by trying different symbols like stars, hearts, or initials to personalize each hat. I've found that adding tiny pearl beads around the black band creates an elegant touch, or you could work the entire hat in metallic yarn for a festive feel. The pattern also scales beautifully—I've made micro versions as earring charms and larger ones as actual wearable hats for babies by simply adjusting the hook size.
Another fun twist I enjoy is adding a little pom-pom or tassel to the top instead of closing it flat, which gives it a completely different character. You could even work the blue section longer to create dangling ribbons, or add embroidered details like rope patterns or compass roses to really lean into that nautical theme!
Common Mistakes & How to Fix Them
✗ Not counting stitches carefully in the magic ring can throw off the entire hat shape and symmetry
✗ Forgetting to work in back loops only during the black band section results in losing the distinctive ribbed texture
✗ Pulling the slip stitches too tight in the black band can cause unwanted puckering and distortion
✗ Skipping the chain and turn instructions in the blue anchor section leads to incorrect anchor placement and shape