🧢 Beautiful ✨ Detailed πŸ’ Adorable

Sea Unicorn Amigurumi Pattern

Sea Unicorn Amigurumi Pattern
4.9β˜… Rating
6-8 Hours Time Needed
3.0K Made This
βœ‚οΈ

Intermediate Level

Ideal for those with basic knitting experience, featuring slightly more advanced stitches and techniques to expand your skills.

⏱️

Weekend Treat

Takes 5-7 hours, making it an enjoyable project to finish over a couple of days.

🧸

Whimsical Buddy

Playful characters full of personality, designed to spark imagination and become cherished playtime favorites.

About This Sea Unicorn Amigurumi Pattern

This Sea Unicorn pattern is a delightful fusion of fantasy and marine life that will capture hearts with its magical charm. The design features a plush white body worked in soft Himalaya Dolphin Baby yarn, complemented by a spectacular rainbow mane and tail crafted from colorful semi-cotton threads. The pattern includes intricate details like embroidered eyes and eyebrows, a golden horn, and multiple flippers that give this creature its unique sea-dwelling character. With careful attention to shaping and color placement, you'll create a truly one-of-a-kind amigurumi that embodies both the grace of a unicorn and the playfulness of ocean creatures.

Sea Unicorn Amigurumi Pattern crochet pattern - detailed view of completed project

Perfect for intermediate crocheters ready to work with multiple yarn types and colors, this pattern offers a rewarding challenge with stunning results. The combination of plush and cotton yarns creates beautiful texture contrast while the rainbow color scheme brings joy and vibrancy to every stitch.

Why You'll Love This Sea Unicorn Amigurumi Pattern

I absolutely love this Sea Unicorn pattern because it brings together two of my favorite things - magical unicorns and ocean creatures! The way the colorful mane cascades down the back creates such a beautiful rainbow effect that makes every finished piece unique. I especially enjoy working with the combination of plush and cotton yarns because the texture contrast adds so much dimension and character to the final creation. The embroidered details for the eyes and the carefully crafted horn give this little friend so much personality. What really makes this pattern special is how the flippers and curved tail position create that perfect sea-dwelling pose, making it look like it's ready to swim through imaginary waters. Every time I make one, I find myself smiling at the whimsical charm it radiates!

Sea Unicorn Amigurumi Pattern step 1 - construction progress Sea Unicorn Amigurumi Pattern step 2 - assembly progress Sea Unicorn Amigurumi Pattern step 3 - details and accessories Sea Unicorn Amigurumi Pattern step 4 - final assembly and finishing

Switch Things Up

I love experimenting with different color combinations for the mane and tail! While the rainbow version is absolutely stunning, I've also created sea unicorns with ombre effects going from deep ocean blues to light aquas, which gives them a truly aquatic feel. Some makers might want to try pastel rainbow colors for a softer, more dreamy appearance that's perfect for nurseries.

You can also play with the size by using different yarn weights - try sock yarn with a smaller hook for a miniature version that's perfect as a keychain, or go bigger with super bulky yarn for a large cuddle buddy. I've even experimented with adding small iridescent sequins or beads to the horn to make it sparkle like it's catching sunlight through ocean waves.

For a more personalized touch, consider embroidering small details like scales along the body or adding tiny starfish appliquΓ©s near the flippers. Some crafters love adding a small shell charm where the mane meets the body. If you're making this for a child, you could skip the safety eyes and embroider the eyes instead for a safer, machine-washable option.

Common Mistakes & How to Fix Them

βœ— Forgetting to stuff the nose and head firmly enough before closing can result in a floppy appearance and loss of shape over time βœ— Not paying attention to stitch count changes in the body rounds can throw off the entire shaping and symmetry of the unicorn βœ— Skipping the nose contraction step or doing it incorrectly will leave the face looking flat instead of giving it a cute dimensional snout βœ— Attaching the mane tresses without pinning first often leads to uneven distribution and a messy rainbow effect that lacks visual appeal βœ— Using the wrong hook size for different yarn types can create tension issues making some parts too loose or too tight βœ— Not positioning the eyes at the correct distance between rows can make the face look cross-eyed or too widely spaced

Sea Unicorn Amigurumi Pattern

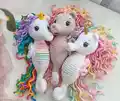
Dive into the magical world of mythical creatures with this enchanting Sea Unicorn amigurumi pattern! This whimsical design combines the charm of a unicorn with ocean-inspired elements, featuring a colorful rainbow mane, flowing tail, and adorable flippers. Standing at approximately 9.75 inches tall when made with the recommended plush yarn, this cuddly companion is perfect for anyone who loves fantasy creatures and sea life. The pattern includes detailed instructions for creating the head with an elegant horn, a plump body, cute ears, and multiple flippers. With its vibrant multi-colored mane and tail made from various shades of cotton yarn, this sea unicorn is sure to become a treasured keepsake or a delightful gift for ocean and unicorn lovers alike.

Intermediate 6-8 Hours

Materials Needed for Sea Unicorn Amigurumi Pattern

β€” Main Fabric

  • 01
    Himalaya Dolphin Baby yarn (100% polyester, 100g - 120m) in color 80301 (white) for head, body, ears and flippers
  • 02
    Alize Cotton Gold yarn (55% cotton/45% acrylic, 100g - 330m) in colors 37 (orange), 216 (yellow), 126 (green grass), 16 (ocean), 43 (purple), 187 (light yellow), 514 (icy), and tweed 682 (violet) for mane, fringe and tail
  • 03
    YarnArt Jeans yarn (55% cotton/45% acrylic, 50g - 10m) in colors 42 (dark pink), 20 (light pink), 73 (peach), 79 (mint) for mane, fringe and tail
  • 04
    Alize Cotton Gold yarn in color 110 (chick) for the horn
  • 05
    Alize Miss yarn in color 26 (brown) (100% mercerized cotton, 50g - 280m) for embroidering eyes and eyebrows

β€” Tools Required

  • 01
    Crochet hook 3.5mm or 3.25mm for plush yarn
  • 02
    Crochet hook 2.25mm or 2.0mm for semi-cotton thread
  • 03
    Needles of different lengths for attaching pieces
  • 04
    Fiberfill stuffing
  • 05
    Black safety eyes 13-14mm on legs
  • 06
    Tooth floss for eye contractions and attaching pieces
  • 07
    Stitch markers
  • 08
    Scissors
  • 09
    Long thin knitting needle to fix head while attaching

Progress Tracker

0% Complete

β€” Head :

Plush yarn, hook 3.5 mm

Round 1 :

6 sc in MR

Round 2 :

(1 sc, inc) x 3 (9)

Round 3 :

9 sc in BLO

Round 4 :

9 sc

Round 5 :

Inc, 8 sc (10)

Round 6 :

10 sc

Round 7 :

(4 sc, inc) x 2 (12)

Round 8 :

(3 sc, inc) x 3 (15)

Round 9 :

(4 sc, inc) x 3 (18)

Round 10 :

(2 sc, inc) x 6 (24)

Round 11 :

24 sc

Round 12 :

(3 sc, inc) x 6 (30)

Round 13 :

(4 sc, inc) x 6 (36)

Round 14 :

(5 sc, inc) x 6 (42)

Round 15-19 :

5 rows - 42 sc

Info :

Fill the nose with fiber

Round 20 :

(5 sc, dec) x 6 (36)

Round 21 :

(4 sc, dec) x 6 (30)

Round 22 :

(3 sc, dec) x 6 (24)

Info :

Fill the head with fiber

Round 23 :

(2 sc, dec) x 6 (18)

Round 24 :

(1 sc, dec) x 6 (12)

Info :

Tighten the hole with a needle and a tail thread, only after contractions and head decoration

β€” Horn :

Semi-cotton yarn, hook 2.25 mm

Round 1 :

6 sc in MR

Round 2 :

6 sc

Round 3 :

(2 sc, inc) x 2 (8)

Round 4 :

8 sc

Round 5 :

(3 sc, inc) x 2 (10)

Round 6 :

(4 sc, inc) x 2 (12)

Info :

Fill the horn with fiber and leave a tail thread for attaching

β€” Head Decoration :

Nose Contraction :

Make nose contraction with a needle and tooth floss: Insert a needle in the back and pull it out the center of the nose. Skip 1 row up and insert a needle again and pull it out in the back; make some knots. Repeat 1-2, but skip 1 row down the previous point to make the nose contraction in the symmetry

Eyes :

Attach the eyes between rows 12-13 of the head in the distance of 11-14 sc (choose according to your crochet density and eye size)

Details :

Embroider the eyelids, eyebrows and attach the horn between rows 16-17 of the head

Ears :

Attach the ears a bit farther (1-2 rows behind the horn)

β€” Body :

Plush yarn, hook 3.5 mm

Round 1 :

9 sc in MR

Round 2-18 :

17 rows - 9 sc

Round 19 :

(2 sc, inc) x 3 (12)

Round 20 :

(3 sc, inc) x 3 (15)

Round 21 :

(4 sc, inc) x 3 (18)

Round 22 :

4 sc, (inc, 1 sc) x 2, 2 inc, (1 sc, inc) x 2, 4 sc (24)

Round 23 :

24 sc

Round 24 :

5 sc, (inc, 2 sc) x 2, 2 inc, (2 sc, inc) x 2, 5 sc (30)

Round 25-26 :

2 rows - 30 sc

Info :

1 sc after round 26. Here is the beginning of work now. It must be exactly along the center of the back

Round 27 :

6 sc, (inc, 3 sc) x 2, 2 inc, (3 sc, inc) x 2, 6 sc (36)

Round 28-33 :

6 rows - 36 sc

Info :

1 sc after the round 33. Here is the beginning of work now

Round 34 :

6 sc, (dec, 3 sc) x 2, 2 dec, (3 sc, dec) x 2, 6 sc (30)

Round 35-36 :

2 rows - 30 sc

Info :

Fill the body with fiber

Round 37 :

5 sc, (dec, 2 sc) x 2, 2 dec, (2 sc, dec) x 2, 5 sc (24)

Round 38 :

24 sc

Round 39 :

4 sc, (dec, 1 sc) x 2, 2 dec, (1 sc, dec) x 2, 4 sc (18)

Round 40-41 :

2 rows - 18 sc

Info :

Fill the body with fiber

β€” Ears (2 pieces) :

Plush yarn, hook 3.5 mm

Row 1 :

4 ch, turn the work, 3 sc, 1 ch ↑

Row 2 :

1 sc, dec, 1 ch ↑

Row 3 :

dec is in the top of the ear

Row 4 :

Turn the ear and work 3 sc from the top to the bottom of the left side. Leave tail thread for attaching
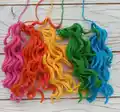
β€” Mane (5 pieces) :

Semi-cotton yarn, hook 2.25 mm

Instructions :

Work tresses by the same technique. 5 pieces - 17 tresses on each: 45, 45, 45, 45, 45, 45, 45, 40, 40, 40, 40, 40, 35, 35, 35, 35, 35. Leave tail thread for attaching

β€” Fringe (1 piece) :

Semi-cotton yarn, hook 2.25 mm

Instructions :

55 ch, turn the work, 54 sl st from the 2nd ch. The 1st tress is ready. Don't cut thread, work the rest of tresses, cast on 50 ch, 50 ch, 45 ch, 45 ch, 40 ch, 35 ch. Leave tail thread for attaching

β€” Flippers (4 pieces) :

Plush yarn, hook 3.5 mm

Big Flipper (2 pieces) :

7 ch, from the 2nd ch: 2 sc, 2 hdc, 1 dc, 6 dc in 1 stitch, turn the work, along the other side: 1 dc, 2 hdc, 2 sc. Leave tail thread for attaching

Small Flipper (2 pieces) :

5 ch, from the 2nd ch: 1 sc, 1 hdc, 1 dc, 6 dc in 1 stitch, turn the work, along the other side: 1 dc, 1 hdc, 1 sc. Leave tail thread for attaching

Info :

You can decorate flippers: work sl st with semi-cotton yarn in plush stitches

β€” Tail (5 pieces) :

Semi-cotton yarn, hook 2.25 mm

Instructions :

60 ch, turn the work, 59 sl st from the 2nd ch. The 1st tress is ready. Don't cut thread, work 2 more tresses, 55 ch and 50 ch respectively. Work 4 more pieces of different colors

Assembly Instructions

  • Fix the end of the body in a bent position using tooth floss by sewing the end of body to the main piece. Choose the attaching point based on desired tail curl: sew higher for better curl, lower for less curl.
  • Fix the head with a knitting needle and sew it to the body with tooth floss or semi-cotton thread of the same color as plush yarn. Fill some fiber during the process to avoid head hanging.
  • Attach fringe along the centre between ears, fixing the 1st stitch first, then sew from right to left across the head.
  • Pin the central yellow tress of the mane in 3 points: to the top, center and bottom of the back, then sew the tress down. Attach the rest of tresses in the same way, allocating them on both sides from the central piece.
  • Attach the tail to the back along rows 22-23 of the body. First sew the yellow tress, then the other ones. Try to attach orange and green tresses in the same place between plush sc as yellow one.
  • Attach big flippers higher to both sides of the body along rows 32-38, and position small flippers slightly lower. Fix unfixed ends of flippers with some stitches in thread of the same color as plush yarn.
  • Embroider lines along the belly with all yarn colors - 2 lines of each color to create a rainbow effect.

Important Notes

  • πŸ’‘Use stitch markers to keep track of beginning rounds especially during body shaping when the starting point shifts
  • πŸ’‘Choose hook size carefully for different yarn types - plush yarn needs larger hooks than semi-cotton threads
  • πŸ’‘Stuff the nose and head firmly before closing to maintain proper shape and prevent sagging over time
  • πŸ’‘Pin all mane and tail pieces before sewing to ensure even rainbow distribution and symmetrical appearance
  • πŸ’‘Make nose contractions before attaching eyes to achieve the proper facial structure and cute expression
  • πŸ’‘Leave long tail threads on all pieces for easier attachment and hiding ends within stuffed sections

This magical Sea Unicorn pattern was designed to bring whimsy and ocean dreams to life in the most enchanting way! Combining the mythical beauty of unicorns with playful marine elements, this pattern creates a truly unique amigurumi that stands out in any collection. The rainbow mane and tail add spectacular color while the plush body provides perfect huggability. Whether you're making it for yourself or as a gift for someone who loves fantasy and the sea, this project promises hours of enjoyable crafting and a stunning finished piece. πŸ¦„πŸŒŠ Happy crocheting! 🧢✨

You ask,

we answer.

FAQs

What yarn weight works best for this Sea Unicorn pattern?

The pattern is designed for plush yarn (like Himalaya Dolphin Baby) for the body, which is a bulky weight yarn, and sport/DK weight semi-cotton yarn (like Alize Cotton Gold or YarnArt Jeans) for the mane, tail, and horn. Using different yarn weights creates beautiful texture contrast.

Can I use different colors for the mane instead of rainbow colors?

Absolutely! While the pattern uses rainbow colors for a vibrant look, you can customize the mane and tail with any color combination you prefer. Ombre effects, pastels, or even monochromatic schemes would all look beautiful on this sea unicorn.

How do I position the body in the curved swimming pose?

The curved pose is created by bending the end of the body and sewing it to the main body section using tooth floss. Sew higher up on the body for a tighter curl, or lower for a gentler curve. This gives your sea unicorn that perfect swimming-through-water appearance.

What size safety eyes should I use if I can't find the exact size mentioned?

The pattern recommends 13-14mm safety eyes, but you can use anywhere from 12-15mm depending on your preference and yarn tension. Just make sure to position them between rows 12-13 with proper spacing to maintain the cute facial proportions.

Is this pattern suitable for beginners?

This pattern is best suited for intermediate crocheters who have experience with basic amigurumi techniques, working with multiple yarn types, color changes, and embroidery. Beginners might find the multiple components and yarn transitions challenging but can certainly try with patience.