🧶 Beautiful ✨ Detailed 💝 Adorable

Little Spark Light Bulb Amigurumi Pattern

Little Spark Light Bulb Amigurumi Pattern
4.4★ Rating
1.5-2 Hours Time Needed
2.2K Made This
✂️

Beginner Friendly Level

Perfect for those just starting their sewing journey, with clear instructions and simple techniques

⏱️

Bite-Sized Project

Complete in under 2 hours—quick, fun, and perfect for a little creative escape.

🧸

Cute Companion

An adorable friend to cherish, handcrafted with love to bring comfort and joy for years to come.

About This Little Spark Light Bulb Amigurumi Pattern

Little Spark is a whimsical light bulb amigurumi that brings a touch of brightness to any space. This charming character features expressive embroidered eyes and eyebrows, complete with a detailed metallic screw base that adds authentic character. Working in continuous rounds with simple increase and decrease techniques, you'll create a perfectly rounded bulb shape that's both satisfying and fun to make. The pattern includes helpful placement guides for safety eyes and detailed embroidery instructions to bring your little light bulb to life with personality.

Little Spark Light Bulb Amigurumi Pattern crochet pattern - detailed view of completed project

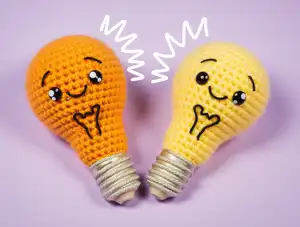
Standing at approximately 8cm tall, this pocket-sized companion uses cotton yarn in cheerful yellow and elegant silver. The pattern's straightforward construction makes it perfect for practicing your amigurumi basics while creating something truly special.

Why You'll Love This Little Spark Light Bulb Amigurumi Pattern

I absolutely love this pattern because it transforms something as simple as a light bulb into an adorable character with so much personality! There's something incredibly satisfying about watching the rounded bulb shape emerge as you work through the increases, and the moment you add those expressive embroidered features is pure magic. I find the quick completion time perfect for those evenings when I want to create something meaningful without a long-term commitment. The metallic silver screw base adds such a professional touch that makes this little spark feel extra special. Plus, it's one of those patterns that always brings a smile—whether you're keeping it on your desk for inspiration or gifting it to someone who needs a little brightness in their day!

Little Spark Light Bulb Amigurumi Pattern step 1 - construction progress Little Spark Light Bulb Amigurumi Pattern step 2 - assembly progress Little Spark Light Bulb Amigurumi Pattern step 3 - details and accessories Little Spark Light Bulb Amigurumi Pattern step 4 - final assembly and finishing

Switch Things Up

I love experimenting with this Little Spark pattern because it's so versatile! One of my favorite variations is creating a rainbow family of light bulbs by swapping the yellow for different bright colors—imagine a cheerful collection in pink, blue, mint green, or coral sitting on your shelf together. Each one develops its own unique personality!

For a more elegant look, I've tried using metallic gold yarn instead of silver for the screw base, which gives it a vintage Edison bulb vibe that's absolutely stunning. You could also experiment with adding a subtle blush to the cheeks using pink embroidery thread or colored pencil for an extra sweet touch.

If you want to make it more interactive, consider adding a small loop at the top before closing so it can hang as an ornament or bag charm. I've also seen crafters create themed versions—like a reading light with tiny embroidered glasses, or a sleepy light with closed eyes and a little nightcap.

The embroidery details are where you can really let your creativity shine! Try different eyebrow shapes to change the expression completely—arched for surprised, straight for serious, or curved for happy. You can even add a little smile or change the zig-zag pattern to your own unique design. Some makers skip the zig-zag entirely and add a tiny heart or star instead, which looks absolutely adorable for gift-giving occasions!

Common Mistakes & How to Fix Them

✗ Forgetting to use stitch markers when working continuous rounds can cause your stitch count to drift off pattern quickly ✗ Inserting safety eyes too early makes it difficult to stuff properly around them, wait until round 16-17 as instructed ✗ Over-stuffing the bulb portion creates an uneven shape instead of the smooth rounded appearance needed for realism ✗ Not working back loop only stitches on rounds 26-30 prevents the screw fitting from attaching properly to create the ribbed texture ✗ Pulling embroidery thread too tightly when adding facial features can distort the bulb shape and create unwanted puckering

Little Spark Light Bulb Amigurumi Pattern

Brighten your crochet journey with this adorable Little Spark light bulb amigurumi! This delightful beginner-friendly pattern transforms simple yarn into a charming 8cm tall companion that radiates personality. Perfect for quick crafting sessions, you'll love watching this sweet character come to life stitch by stitch. The combination of cheerful yellow and metallic silver creates an eye-catching piece that makes a wonderful gift or desk decoration. With clear step-by-step instructions and minimal materials needed, this pattern is ideal for anyone looking to add a spark of creativity to their day.

Beginner Friendly 1.5-2 Hours

Materials Needed for Little Spark Light Bulb Amigurumi Pattern

— Main Fabric

  • 01
    Cotton yarn 125m/50g - Yellow color approximately 15g
  • 02
    Cotton yarn 125m/50g - Silver color approximately under 10g
  • 03
    Paintbox Cotton yarn or Yarn & Color Must Have brand recommended
  • 04
    Small amount of black embroidery thread for facial features

— Tools Required

  • 01
    Crochet hook size 2.5mm
  • 02
    Safety eyes 8mm x 2 (or black embroidery thread for alternative)
  • 03
    Toy stuffing
  • 04
    Tapestry needle for construction and embroidery
  • 05
    Stitch marker
  • 06
    Scissors

Progress Tracker

0% Complete

— Ready, Steady, Go (Main Body):

Info:

Start in Yellow. Work in the round.

Round 1:

Sc x 6 in to a MR (6)

Round 2:

Inc x 6 (12)

Round 3:

(Sc, inc) x 6 (18)

Round 4:

(Sc x 2, inc) x 6 (24)

Round 5:

(Sc x 3, inc) x 6 (30)

Round 6:

Sc x 2, inc, (Sc x 4, inc) x 5, Sc x 2 (36)

Round 7:

(Sc x 5, inc) x 6 (42)

Round 8:

Sc x 3, inc, (Sc x 6, inc) x 5, Sc x 3 (48)

Round 9-17:

Sc x 48 (48) - 9 rounds

Round 18:

(Sc x 6, dec) x 6 (42)

Round 19:

(Sc x 5, dec) x 6 (36)

Round 20:

(Sc x 4, dec) x 6 (30)

Info:

Insert the safety eyes between round 16-17 with a space of 10 stitches visible between them. Start to add stuffing and continue to stuff as you go.

Round 21:

(Sc x 4, dec) x 5 (25)

Round 22:

Sc x 25 (25)

Round 23:

(Sc x 3, dec) x 5 (20)

Round 24:

Sc x 20 (20)

Round 25:

(Sc x 2, dec) x 5 (15)

Info:

Change to Silver yarn

Round 26-30:

BLO, Sc x 15 (15) - 5 rounds

Round 31:

(Sc, dec) x 5 (10)

Round 32:

dec x 5 (5)

Info:

Break the yarn and pull through. Weave the yarn tail through the FLO of the final round to close.

— Embroidery Details:

Eyebrows:

With black thread embroider small eyebrows above the eyes over round 11

Zig Zag Detail:

Embroider a zig zag between the eyes on round 16

Vertical Lines:

Embroider a line from the base of each eye down towards the screw base of the lightbulb (over rounds 19-25)

— The Screw Fitting:

Info:

Turn the light bulb upside down, so that the yellow bulb is at the bottom and the grey is at the top. Join Silver yarn to the first grey open front loop of round 26.

Assembly:

Ss in all open front loops of rounds 26-30

Finishing:

Cut the yarn and pull through. Weave in the loose end.

Assembly Instructions

  • After completing all rounds and stuffing the bulb, secure the top opening by weaving yarn through front loops only as instructed
  • Turn the completed light bulb upside down with the yellow bulb at the bottom and silver screw base at the top
  • Join silver yarn to the first open front loop of round 26 to begin creating the ribbed screw texture
  • Work slip stitches in all open front loops of rounds 26-30 to create the authentic screw fitting appearance
  • Embroider small expressive eyebrows above the eyes over round 11 using black embroidery thread
  • Add a playful zig-zag design between the eyes on round 16 for extra character and charm
  • Complete the facial details by embroidering vertical lines from the base of each eye down towards the screw base covering rounds 19-25

Important Notes

  • 💡Use a stitch marker to track the beginning of each round when working in continuous rounds to maintain accurate stitch counts
  • 💡Safety eyes should be inserted between rounds 16-17 with exactly 10 stitches visible between them for proper eye placement
  • 💡Begin stuffing gradually after inserting eyes and continue adding more stuffing as you decrease to achieve a smooth rounded shape
  • 💡Work back loop only stitches carefully on rounds 26-30 as this creates the ribbed texture essential for the screw base appearance
  • 💡Keep embroidery tension consistent but not too tight to avoid puckering or distorting the bulb's smooth rounded shape
  • 💡Cotton yarn is recommended for this pattern as it provides better stitch definition and holds the bulb shape more effectively
  • 💡If making this for young children, consider embroidering eyes instead of using safety eyes for additional safety

This delightful Little Spark light bulb pattern was designed to bring a cheerful glow to your crochet collection! With its expressive embroidered face and authentic metallic screw base, this pocket-sized companion combines simple techniques with charming details that make every stitch worthwhile. Perfect for beginners looking to brighten someone's day or add a spark of creativity to their own space. This quick and satisfying project proves that even the simplest objects can become the most endearing characters! 💡✨ Happy crocheting! 🧶

You ask,

we answer.

FAQs

Can I use acrylic yarn instead of cotton for this light bulb pattern?

Yes, you can substitute acrylic yarn, but cotton is recommended because it provides better stitch definition and helps maintain the smooth rounded bulb shape. If using acrylic, choose a yarn with similar weight (125m/50g) to achieve the correct size.

Is it safe to use safety eyes if making this for a young child?

Safety eyes are not recommended for children under 3 years old. For young children, the pattern suggests embroidering eyes with black thread instead, which is equally charming and completely secure.

How do I create the ribbed texture on the screw base?

The ribbed screw texture is created by working back loop only (BLO) stitches on rounds 26-30, then adding slip stitches through the remaining front loops. This two-step process creates the authentic raised ridges of a light bulb screw fitting.

What if my light bulb isn't coming out as round as the pattern shows?

Make sure you're maintaining consistent tension throughout and stuffing gradually as you decrease. Over-stuffing or under-stuffing can distort the shape. Also verify your stitch counts are accurate using a stitch marker to track rounds.

Can I make the light bulb larger or smaller than 8cm?

Absolutely! To make it larger, use a thicker yarn with a larger hook size. For a smaller version, use thinner yarn with a smaller hook. Just keep the same stitch pattern and proportions for best results.