๐Ÿงถ Beautiful โœจ Detailed ๐Ÿ’ Adorable

Mini Mouse Amigurumi Pattern

Mini Mouse Amigurumi Pattern
4.7โ˜… Rating
4-5 Hours Time Needed
3.8K Made This
โœ‚๏ธ

Intermediate Level

Ideal for those with basic knitting experience, featuring slightly more advanced stitches and techniques to expand your skills.

โฑ๏ธ

Weekend Treat

Takes 5-7 hours, making it an enjoyable project to finish over a couple of days.

๐Ÿญ

Charming Critter

Delightful animal designs with sweet details that capture the essence of your favorite woodland and farmyard friends.

About This Mini Mouse Amigurumi Pattern

This Mini Mouse pattern creates a delightful 15cm tall amigurumi using worsted weight yarn and simple construction techniques. The design features a continuous construction from head to body to legs, minimizing seams and creating a smooth, professional finish. The pattern includes color changes to create the mouse's distinctive appearance with beige fur, yellow accents on the body, and charming red details on the legs. Special attention is given to the oversized ears with orange inner details and the adorable white snout complete with embroidered nose and mouth.

Mini Mouse Amigurumi Pattern crochet pattern - detailed view of completed project

What makes this pattern special is the divided leg construction technique that creates realistic leg positioning and the layered ear assembly that adds dimension. The pattern includes helpful diagrams and symbol charts to guide you through color changes and construction steps.

Why You'll Love This Mini Mouse Amigurumi Pattern

I absolutely love this Mini Mouse pattern because it's the perfect balance between cute and achievable! The continuous construction from head through body means less sewing later, which I always appreciate. What really makes my heart sing is those oversized ears with the contrasting orange centers โ€“ they give so much personality to this little character. I also love how the pattern includes both written instructions and visual symbol patterns, making it accessible whether you're a chart reader or prefer written directions. The size is just right too โ€“ not so small that it's fiddly, but compact enough to work up in an afternoon and makes the perfect little companion or gift.

Mini Mouse Amigurumi Pattern step 1 - construction progress Mini Mouse Amigurumi Pattern step 2 - assembly progress Mini Mouse Amigurumi Pattern step 3 - details and accessories Mini Mouse Amigurumi Pattern step 4 - final assembly and finishing

Switch Things Up

I love experimenting with different color combinations when making this Mini Mouse pattern! While the original calls for beige and brown, I've created versions in soft pastels like lavender and mint green for a dreamy aesthetic, or bold combinations like navy blue with coral accents for a modern twist. You could even make a whole family of mice in different colors โ€“ imagine a rainbow collection lined up on a shelf!

Another fun modification I enjoy is adjusting the ear size. If you want even more dramatic ears, add an extra increase round to both the orange and brown pieces. For a subtler look, skip round 4 entirely for smaller, more proportionate ears. I've also experimented with adding little felt details like inner ear highlights or cheek blushes using fabric paint.

The snout is another area where you can get creative. Try embroidering different expressions โ€“ a little smile, a surprised 'o' shape, or even tiny whiskers using black embroidery thread. I've made versions with felt patches on the tummy or tiny bow ties around the neck using ribbon scraps. You could also add a little tail by chaining 10-12 stitches and working slip stitches back down for a simple cord tail attached to the back.

Common Mistakes & How to Fix Them

โœ— Forgetting to change yarn colors at the specified rounds can throw off the entire design aesthetic and body proportions of the mouse โœ— Not using stitch markers when dividing the legs often results in uneven leg placement and difficulty following the split construction accurately โœ— Overstuffing the legs and body creates a stiff unappealing shape instead of the soft cuddly form that makes this mouse adorable โœ— Skipping the front loop only and back loop only instructions during color changes creates visible color bleeding and messy transitions between sections โœ— Incorrectly counting the six stitches between legs during division leads to asymmetrical leg positioning and a wobbly unstable mouse that won't stand properly

Mini Mouse Amigurumi Pattern

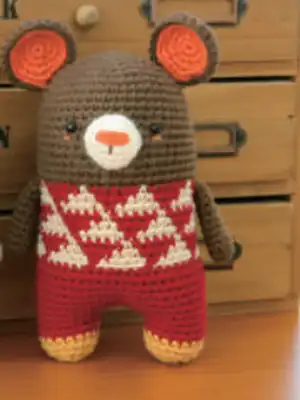
Create an adorable miniature mouse with this charming amigurumi crochet pattern! Standing approximately 15cm tall, this sweet little critter features a beige body, yellow accents, and cute oversized ears with orange inner details. Perfect for gift-giving or adding to your handmade toy collection, this pattern guides you through creating a delightful mouse character with expressive eyes and endearing proportions. The design includes detailed instructions for the head, body, legs, arms, snout, and distinctive large ears that give this mouse its irresistible charm.

Intermediate 4-5 Hours

Materials Needed for Mini Mouse Amigurumi Pattern

โ€” Main Fabric

  • 01
    Worsted weight yarn in beige color for main body
  • 02
    Worsted weight yarn in brown color for head
  • 03
    Worsted weight yarn in yellow color for body accent
  • 04
    Worsted weight yarn in red color for leg details
  • 05
    Worsted weight yarn in white color for snout
  • 06
    Worsted weight yarn in orange color for inner ears

โ€” Tools Required

  • 01
    5/0 (3mm) crochet hook
  • 02
    5mm black plastic safety eyes (2 pieces)
  • 03
    Yarn needle for weaving and sewing
  • 04
    Fiberfill stuffing
  • 05
    Stitch markers
  • 06
    Scissors
  • 07
    Craft glue for attaching eyes

Progress Tracker

0% Complete

โ€” Head / Body / Legs :

Round 1 :

sc x 6 in the yarn loop (magic ring), tighten the loop [6 sts]

Round 2 :

(2-sc inc) x 6 [12]

Round 3 :

(sc x 1, 2-sc inc) x 6 [18]

Round 4 :

(sc x 2, 2-sc inc) x 6 [24]

Round 5 :

(sc x 3, 2-sc inc) x 6 [30]

Round 6 :

(sc x 4, 2-sc inc) x 6 [36]

Round 7 :

(sc x 5, 2-sc inc) x 6 [42]

Round 8 :

(sc x 6, 2-sc inc) x 6 [48]

Rounds 9-36 :

sc in all 48 st [48]

Info :

Change yarn colors according to symbol pattern: Rounds 1-19 use Brown yarn for Head, Rounds 20-36 use Red/Beige yarn for Body, Rounds 37-42 use Red/Yellow yarn for Legs

Info :

To divide the legs: Identify the center space between legs by 6 stitches, each leg has 18 stitches. Sc at the 31st st of Round 36 to begin first leg (left leg)

Rounds 37-40 :

sc in all 18 st [18]

Round 41 :

(sc x 1, sc2tog) x 6 [12]

Round 42 :

(sc2tog) x 6 [6]

Info :

Fasten off, leaving a long tail. Stuff the leg. Using yarn needle, weave yarn tail through front loop of each remaining stitch and pull tight to close

Second Leg (Right leg) :

Rejoin Red yarn to 7th back unworked st of Round 36. This sc is the first st for second leg. Work same as first leg from Rounds 37-42. Using yarn needle, sew the 6 sts between the legs

โ€” Eyes Location :

Info :

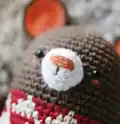
Place eyes between Round 13 and 14

โ€” Snout :

Info :

Use White yarn to make 4 chains

Round 1 :

sc x 1 in second ch from hook, sc x 1 in next chain, sc x 3 in bottom chain, working up other side - sc x 1, sc x 2 in next chain, slst [8 sts]

Round 2 :

ch 1, 2-sc inc, sc x 1, (2-sc inc) x 3, sc x 1, (2-sc inc) x 2, slst [14]

Round 3 :

ch 1, 2-sc inc, sc x 3, 2-sc inc, sc x 2, sc2tog, sc x 1, sc2tog, sc x 2, slst [14]

Round 4 :

ch 1, sc in all 14 st, slst [14]

Info :

Fasten off, leaving long tail for sewing. Fill in some stuffing to snout. Make nose and mouth on the snout. Attach snout between Round 14 and 15

โ€” Arms (Make 2) :

Round 1 :

sc x 5 in the yarn loop (magic ring), tighten the loop [5 sts]

Round 2 :

(2-sc inc) x 5 [10]

Rounds 3-11 :

sc in all 10 st [10]

Info :

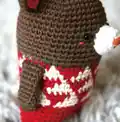
Fasten off, leaving long tail for sewing. Flatten the arm, do not stuff. Attach arms between Round 20 and 21

โ€” Ears (Make 2 sets) :

Info :

Use Orange yarn to make magic ring for inner ear

Round 1 :

sc x 6 in the yarn loop, tighten the loop [6 sts]

Round 2 :

(2-sc inc) x 6 [12]

Round 3 :

(sc x 1, 2-sc inc) x 6 [18]

Round 4 :

(sc x 2, 2-sc inc) x 6 [24]

Info :

Fasten off and make another orange ear piece. Make two brown ear pieces the same way using Brown yarn

Round 5 - Edging :

Locate orange colored ear part on brown ear, then sc together with brown yarn (Orange: stitches only through back loop / Brown: go through both loops) [24]

Info :

Fasten off, leaving long tail for sewing

Assembly Instructions

  • Attach the white snout to the face between rounds 14 and 15, adding fiberfill stuffing before closing completely
  • Position and glue the 5mm black safety eyes between rounds 13 and 14 on the head section
  • Sew the flattened arms to the body between rounds 20 and 21 on each side
  • Attach the layered ears (orange inner piece on brown outer piece) to the top of the head for maximum cuteness
  • Embroider the nose and mouth details on the white snout using brown or black yarn
  • Ensure the 6-stitch gap between the legs is securely sewn closed for stability
  • Optional: Insert wooden pins into the bottom of feet to help the mouse stand upright if desired

Important Notes

  • ๐Ÿ’กUse stitch markers to track the division point when splitting the body into two legs
  • ๐Ÿ’กChange yarn colors precisely at the indicated rounds to achieve the correct color blocking design
  • ๐Ÿ’กWork front loop only or back loop only stitches as specified to create clean color transitions
  • ๐Ÿ’กStuff the head and body firmly but keep legs moderately stuffed for better posing
  • ๐Ÿ’กThe magic ring should be pulled tight at the start to prevent holes in the work
  • ๐Ÿ’กWhen edging the ears in round 5, work through back loops only on orange piece for a layered effect

This adorable Mini Mouse pattern creates a sweet little companion that's perfect for beginners advancing their amigurumi skills! With its oversized ears, button nose, and compact size, this pattern combines straightforward construction with charming details that bring personality to life. The continuous head-to-body-to-legs construction minimizes finishing work while the color changes add visual interest without complexity. Whether you're crafting for a child, creating shelf decor, or building your handmade collection, this little mouse is sure to steal hearts! ๐Ÿญโœจ Happy crocheting! ๐Ÿงถ

You ask,

we answer.

FAQs

What size will my finished mouse be?

Using worsted weight yarn with a 3mm (5/0) crochet hook, your finished mouse will measure approximately 15cm (5.9 inches) tall. If you use fingering weight yarn instead, the finished size will be smaller.

How do I divide the body into two legs without getting confused?

Use stitch markers to identify the key points! Mark the center 6 stitches between the legs, then count 18 stitches for each leg. Start your first leg at stitch 31 of round 36, work rounds 37-42, then rejoin yarn at the 7th unworked stitch for the second leg.

Can I use different colors for my mouse?

Absolutely! While the pattern calls for beige, brown, yellow, red, orange, and white, you can customize your mouse with any color combination. Just follow the same round instructions with your chosen colors.

Why do some rounds specify front loop only or back loop only?

Working through only the front or back loops creates a ridge effect and helps achieve cleaner color transitions when changing yarns. This technique is especially important at the color change points to prevent the colors from bleeding together.

How do I attach the layered ears properly?

First complete both the orange inner ear and brown outer ear separately. Then in round 5, position the orange piece on top of the brown piece and single crochet through the back loops only of the orange piece while going through both loops of the brown piece to join them together.

Do I need to stuff the arms?

No! The pattern specifically instructs to flatten the arms without stuffing. This creates a more natural look and makes them easier to position and sew onto the body.