About This Kirby Hello Kitty Amigurumi Pattern
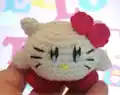
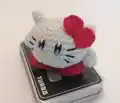
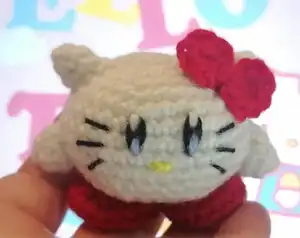
This miniature Kirby Hello Kitty pattern is designed to be straightforward and enjoyable for crocheters looking for a quick, satisfying project. The pattern uses continuous rounds without joining, making it ideal for practicing smooth amigurumi construction. With its tiny 2-inch size, this kitty works up quickly using basic stitches like single crochet, increases, and decreases. The charming details come together through simple embroidery work for the face and a sweet red bow accent.
Each component is worked separately and then assembled, giving you complete control over the final positioning and character of your creation. The pattern includes detailed instructions for the body, ears, arms, bow, and legs with clear stitch counts for every round.
Why You'll Love This Kirby Hello Kitty Amigurumi Pattern
I absolutely love this pattern because it's the perfect introduction to amigurumi without being overwhelming! The tiny scale means you can finish it in one cozy afternoon, and there's something incredibly satisfying about watching this little character come to life so quickly. I also appreciate how the pattern teaches fundamental amigurumi skills like working in the round, shaping with increases and decreases, and simple assembly techniques. Plus, the embroidered face gives you creative freedom to add your own personality to each kitty you make. It's an ideal project for using up yarn scraps, making thoughtful handmade gifts, or simply enjoying a relaxing crafting session that delivers adorable results every single time.
Switch Things Up
I love customizing this little Kirby Hello Kitty to create unique versions that match different personalities and preferences! One of my favorite variations is changing the color scheme entirely - try using pastel pink for the body with a lavender bow for an ultra-sweet version, or go bold with bright colors like turquoise and orange for a modern twist.
You can also experiment with the bow placement and style. Instead of a side bow, position it on top between the ears for a different look, or make two smaller bows for the ears themselves. I've even made versions with tiny crocheted flowers instead of a bow for a springtime feel.
For the facial features, don't be afraid to play around with the embroidery! You could give your kitty closed happy eyes by using curved lines instead of vertical stitches, or add rosy cheeks with a bit of pink thread or fabric paint. Some crafters even use tiny beads for eyes to create a different texture and shine.
If you want to make this kitty functional, consider adding a keychain attachment to the top of the head, or create a small loop during the final rounds to turn it into an ornament. You could also make several in different colors and string them together as a garland for a nursery or craft room.
Finally, I absolutely love making themed versions by changing the accessories - try a tiny crocheted scarf for winter, a miniature flower crown for spring, or even small angel wings for holiday decorations. The possibilities are truly endless with this versatile little pattern!
Common Mistakes & How to Fix Them
✗ Not using a stitch marker can cause you to lose track of round beginnings and create uneven shaping throughout the piece
✗ Stuffing too firmly or too loosely affects the final shape - aim for a gentle firmness that maintains the round body structure
✗ Skipping the back loop only instruction in Round 4 of the legs will prevent the distinctive shoe edge from forming properly
✗ Positioning facial features before stuffing makes it difficult to achieve symmetry - always embroider after the body is completely stuffed and closed