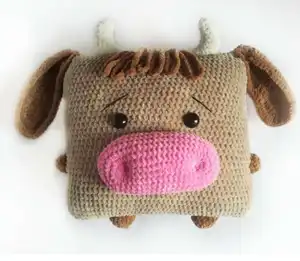
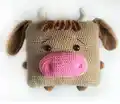
Create this irresistibly soft and charming bull-themed pillow that's perfect for both children and adults! This delightful pattern uses plush yarn to craft a cozy 28x28cm cushion featuring adorable ears, horns, and sweet facial details. The pillow combines functionality with cuteness, making it an ideal gift or a comforting addition to any bedroom or nursery. With detailed instructions for every component including the body, ears, nose, horns, and decorative hair, you'll be guided through each step to create this lovable companion.
Progress Tracker
0% Complete
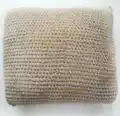
— Pillow :
Info :
Use beige plush yarn
Round 1 :
90 ch, connect with the first loop
Info :
Leave a long thread and sew the top of the pillow. Fasten the thread and hide inside the pillow. Fill tightly and evenly. Fill the corners of the pillow well. Sew and fasten the thread and hide inside the pillow.
— Ear (2 details) :
Info :
Use brown plush yarn
Round 2 :
Begin to crochet from the second loop from the hook: 1 sc, 1 hdc, 17 dc, 6 dc in 1 loop. On the back of the chain: 18 dc, 1 hdc, 1 sc, sl st, 1 ch
Round 3 :
Begin to crochet from the second loop from the hook: 1 sc, 1 hdc, 1 dc, inc, 17 dc, inc, inc, inc, 18 dc, inc, 1 dc, 1 hdc, 1 sc, sl st, 1 ch
Round 4 :
Begin to crochet from the second loop from the hook: 1 sc, 1 hdc, 19 dc, inc, 1 dc, inc, inc, inc, inc, inc, 1 dc, inc, 18 dc, inc, 1 dc, 1 hdc, 1 sc, sl st
Info :
Leave a long thread for sewing
— Leg (2 details) :
Info :
Use brown plush yarn
Round 1 :
6 sc in magic ring {6}
Round 2 :
(inc) - repeat 6 times {12}
Round 3 :
(1 sc, inc) - repeat 6 times {18}
Info :
Leave a long thread for sewing
— Arm (2 details) :
Info :
Use brown plush yarn
Round 1 :
6 sc in magic ring {6}
Round 2 :
(inc) - repeat 6 times {12}
Info :
Leave a long thread for sewing
— Nose :
Info :
Use brown plush yarn
Round 2 :
Begin to work from the second loop from the hook: 18 sc, 3 sc in 1 loop. On the back of the chain: 18 sc {39}
Round 3 :
3 sc in 1 loop, 18 sc, inc, 1 sc, inc, 17 sc, inc {45}
Round 4 :
1 sc, inc, 19 sc, inc, 2 sc, inc, 19 sc, inc {49}
Round 5 :
3 sc, inc, 20 sc, inc, 2 sc, inc, 20 sc, inc {53}
Round 6 :
4 sc, inc, 20 sc, inc, 4 sc, inc, 21 sc, inc {57}
Round 7-9 :
57 sc (3 rounds)
Info :
Leave a long thread for sewing
— Horn (2 details) :
Round 1 :
6 sc in magic ring
Round 2 :
(2 sc, inc) - repeat 2 times {8}
Round 3 :
(3 sc, inc) - repeat 2 times {10}
Round 4 :
inc, 4 sc, dec, 3 sc {10}
Round 5 :
inc, inc, 2 sc, dec, dec, 2 sc {10}
Round 6 :
inc, inc, inc, 7 sc {13}
Round 7 :
1 sc, inc, inc, inc, inc, 8 sc {17}
Round 8 :
2 sc, inc, inc, inc, inc, inc, 5 sc, dec, dec, 1 sc {20}
Round 9 :
4 sc, inc, 4 sc, inc, 6 sc, dec, dec {20}
Info :
Fill. Leave a long thread for sewing
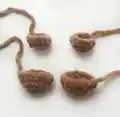
— Hair :
Round 1 :
Make 30 ch and connect with the first loop: sl st
Round 2 :
Make 30 ch and connect with the first loop in new chain: sl st
Round 3 :
Make 30 ch and connect with the first loop in new chain: sl st
Round 4-7 :
Make 30 ch and connect with the first loop in new chain: sl st
Info :
Make 7 rings total. If you want more hair, you can do more rings. Leave a long thread for sewing
This charming bull pillow pattern is designed to bring comfort and joy to any space! Perfect for nurseries, kids' rooms, or as a unique gift, this plush creation combines soft textures with adorable character details. The dimensional features like floppy ears, white horns, and a sweet expression make it both a functional pillow and a decorative piece. Working with plush yarn makes this project quick and satisfying, while the detailed assembly instructions ensure your finished pillow looks professionally made. 🐮 Happy crocheting! 🧶✨