🧶 Beautiful ✨ Detailed 💝 Adorable

Giraffe Bookmark Amigurumi Pattern

Giraffe Bookmark Amigurumi Pattern
4.7★ Rating
2-3 Hours Time Needed
4.1K Made This
✂️

Beginner Friendly Level

Perfect for those just starting their sewing journey, with clear instructions and simple techniques

⏱️

Bite-Sized Project

Complete in under 2 hours—quick, fun, and perfect for a little creative escape.

🎁

Tiny Treasure

Small, sweet, and gift-worthy creations that fit perfectly in the palm of your hand with detailed charm.

About This Giraffe Bookmark Amigurumi Pattern

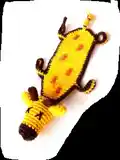
This giraffe bookmark pattern is a delightful project that combines functionality with cuteness. The design features a distinctive head with a long neck that transforms into a flat body perfect for marking your place in books. The pattern includes unique curly legs that add a playful touch and create visual interest peeking out from book pages. Using YarnArt Jeans yarn and a 2.5mm hook, you'll create a sturdy yet soft bookmark that stands up to daily use while maintaining its adorable appearance.

Giraffe Bookmark Amigurumi Pattern crochet pattern - detailed view of completed project

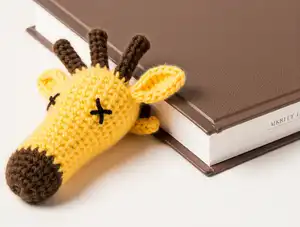
The finished bookmark measures 20cm in height, making it the perfect size for most book formats. The combination of brown and yellow colors creates a classic giraffe appearance that appeals to readers of all ages.

Why You'll Love This Giraffe Bookmark Amigurumi Pattern

I absolutely love this giraffe bookmark pattern because it's one of those projects that looks impressive but comes together so quickly! The creative curly legs are such a fun detail—they add so much personality without being complicated to make. I find myself reaching for this pattern whenever I need a last-minute gift because it works up fast and everyone loves receiving handmade bookmarks. There's something really satisfying about creating something both beautiful and functional, and this little giraffe definitely delivers on both fronts. Plus, watching the giraffe's face come to life as you embroider the features is genuinely rewarding!

Giraffe Bookmark Amigurumi Pattern step 1 - construction progress Giraffe Bookmark Amigurumi Pattern step 2 - assembly progress Giraffe Bookmark Amigurumi Pattern step 3 - details and accessories Giraffe Bookmark Amigurumi Pattern step 4 - final assembly and finishing

Switch Things Up

I love experimenting with this giraffe bookmark pattern because there are so many fun ways to make it your own! Sometimes I switch up the color scheme entirely—imagine a pink and purple giraffe for a whimsical touch, or blue and green for an ocean-inspired twist. The curly legs are my favorite part to customize; occasionally I'll make them extra long for a dramatic effect, or add tiny beads to the ends for a subtle jingling sound when the bookmark moves.

For gifting, I've created themed versions based on recipients' favorite colors or matching their book cover aesthetics. One time I made a whole set with rainbow colors for a teacher friend, and each student got their own unique color combination. You can also adjust the spots—instead of drawing them, try embroidering small French knots or even adding tiny felt patches for a 3D effect.

The face is another area where I get creative. While the pattern suggests X-shaped eyes, I sometimes embroider closed sleepy eyes for a bedtime reading vibe, or add little eyelashes for extra character. Adding a small bow between the horns or a tiny scarf around the neck transforms this from cute to absolutely irresistible. The possibilities are endless, and that's what makes this pattern so enjoyable to return to again and again!

Common Mistakes & How to Fix Them

✗ Not stuffing the head firmly enough before closing, which can cause the face to look flat and lose its shape over time ✗ Forgetting to change colors at the right row when switching from brown to yellow on the face section ✗ Making the curly legs too tight by pulling stitches when working back along the chain, causing them to curl incorrectly ✗ Skipping the instruction to fold the head in half at row 19, which is essential for creating the proper neck shape

Giraffe Bookmark Amigurumi Pattern

Create your own adorable giraffe bookmark with this charming amigurumi crochet pattern! This 20cm tall bookmark features a sweet giraffe face in brown and yellow tones with whimsical curly legs that peek out from your favorite books. Perfect for book lovers, students, or as a thoughtful handmade gift, this pattern combines simple stitches with creative details to bring your bookmark to life. The giraffe's playful design includes embroidered eyes, nose details, and hand-drawn spots that add personality to every stitch.

Beginner Friendly 2-3 Hours

Materials Needed for Giraffe Bookmark Amigurumi Pattern

— Main Fabric

  • 01
    YarnArt Jeans yarn in brown color
  • 02
    YarnArt Jeans yarn in yellow color
  • 03
    Small amount of black yarn for embroidery details

— Tools Required

  • 01
    2.5mm crochet hook
  • 02
    Yarn needle for sewing
  • 03
    Scissors
  • 04
    Silicone ball for stuffing
  • 05
    Brown colored pencil or crayon for drawing spots
  • 06
    Stitch markers (optional but helpful)

Progress Tracker

0% Complete

— Face :

Color brown

Start with brown yarn

Round 1 :

6 sc in MR (6)

Round 2 :

(inc) - repeat 6 times (12)

Round 3 :

(1 sc, inc) - repeat 6 times (18)

Round 4-5 :

18 sc (18) - 2 rounds

Info :

Change color to yellow

Round 6-8 :

18 sc (18) - 3 rounds

Round 9 :

(2 sc, inc) - repeat 6 times (24)

Round 10-16 :

24 sc (24) - 7 rounds

Round 17 :

(2 sc, dec) - repeat 6 times (18)

Info :

Stuff the head

Round 18 :

(1 sc, dec) - repeat 6 times (12)

Round 19 :

Fold head in half, join both edges: 1 ch, 6 sc (7)

Round 20 :

1 ch, inc, 5 sc, inc (9)

Round 21 :

1 ch, 9 sc (9)

Round 22 :

1 ch, inc, 7 sc, inc (11)

Round 23 :

1 ch, 11 sc (11)

Round 24 :

1 ch, inc, 9 sc, inc (13)

Round 25 :

1 ch, 13 sc (13)

Round 26 :

1 ch, inc, 11 sc, inc (15)

Round 27 :

1 ch, 15 sc (15)

Round 28 :

1 ch, 15 sc (15)

Info :

Here we make curly legs

Round 29-30 :

15 ch, turn, 14 sc along chain, 15 sc along body

Round 31-50 :

1 ch, 15 sc (15) - 20 rounds

Info :

Here we make curly legs again

Round 51-52 :

15 ch, turn, 14 sc along chain, 15 sc along body

Round 53-54 :

1 ch, 15 sc (15) - 2 rounds

Round 55 :

1 ch, dec, 11 sc, dec (13)

Round 56 :

1 ch, dec, 9 sc, dec (11)

Round 57 :

1 ch, dec, 7 sc, dec (9)

Round 58 :

1 ch, dec, 5 sc, dec (7)

Round 59 :

1 ch, dec, 3 sc, dec (5)

Info :

Edge the body and legs with single crochets using brown yarn

— Ears (make 2) :

Color yellow

Start with yellow yarn

Round 1 :

4 sc in MR (4)

Round 2 :

(inc) - repeat 4 times (8)

Round 3-6 :

8 sc (8) - 4 rounds

— Horns (make 2) :

Color brown

Start with brown yarn

Round 1 :

6 sc in MR (6)

Round 2 :

(inc) - repeat 6 times (12)

Round 3 :

(1 sc, inc) - repeat 6 times (18)

Round 4-5 :

18 sc (18)

Round 6 :

(1 sc, dec) - repeat 6 times (12)

Round 7 :

(2 sc, dec) - repeat 3 times (9)

Assembly Instructions

  • Sew the ears onto the sides of the head between rounds 6-8, positioning them symmetrically on each side
  • Attach the horns to the top of the head between rounds 2-4, spacing them evenly apart
  • Using black yarn, embroider X-shaped eyes onto the face between rounds 11-13
  • Embroider a small triangular nose with black yarn at the center of the face around round 8
  • Use a brown colored pencil or crayon to draw irregular spots on the yellow body for authentic giraffe markings
  • Weave in all loose ends securely to ensure the bookmark maintains its shape with regular use

Important Notes

  • 💡Make sure to stuff the head firmly with the silicone ball before closing to maintain a rounded, plump shape
  • 💡When creating the curly legs, work loosely along the chain to allow the leg to curl naturally
  • 💡The body should remain flat and not be stuffed, as this allows it to function properly as a bookmark
  • 💡Use stitch markers to track your rounds, especially during the long body section
  • 💡When edging the body with brown yarn, work consistently to create a neat border
  • 💡Draw the giraffe spots after assembly is complete so you can position them naturally

This charming giraffe bookmark pattern brings together functionality and adorable design in one quick project! Perfect for book lovers of all ages, this pattern features unique curly legs that peek playfully from book pages and an expressive face that makes every reading session more enjoyable. The simple construction and clear instructions make it accessible for beginners while still creating an impressive finished piece. Create one for yourself or make several as thoughtful gifts—either way, you'll love watching these sweet giraffes come to life stitch by stitch! 🧶 Happy crocheting! 🦒📚

You ask,

we answer.

FAQs

Can I use a different yarn weight for this pattern?

While the pattern calls for YarnArt Jeans yarn with a 2.5mm hook, you can substitute with any similar weight yarn. Just keep in mind that using a thicker yarn will make a larger bookmark, while thinner yarn will create a more delicate, smaller version. Adjust your hook size accordingly to match your yarn choice.

How do I make the curly legs stay curled?

The key to perfect curly legs is working loosely when crocheting back along the chain. Don't pull your stitches tight—let them remain relaxed so the natural curl forms. The difference in length between the chain and the stitches worked back creates the spiral effect automatically.

Do I need to stuff the body of the bookmark?

No, only the head should be stuffed with the silicone ball. The body and tail portion should remain flat and unstuffed so it can function properly as a bookmark and slide easily between book pages without adding bulk.

Can I use safety eyes instead of embroidering them?

While the pattern calls for embroidered X-shaped eyes, you can use small safety eyes if you prefer. Install them between rounds 11-13 before closing the head. However, embroidered eyes give the giraffe a softer, more handmade appearance that many crafters prefer.

What's the best way to draw the giraffe spots?

Use a brown colored pencil, crayon, or fabric marker to draw irregular organic shapes on the yellow body after assembly. Draw them randomly in varying sizes for a natural look. You can also use brown yarn and embroidery stitches if you prefer a textured appearance.