Create an adorable trio of farmyard companions with this charming collection featuring a cheerful yellow duck, a realistic mallard duck, and a proud rooster. Each pattern uses the innovative no-sew technique, crocheting from body to head for seamless construction. Perfect for beginners and intermediate crocheters alike, these compact projects work up quickly using super bulky yarn and create delightful little friends that fit perfectly in your palm. Whether you're building a farm scene or looking for quick gift ideas, this trio brings countryside charm to life.
Progress Tracker
0% Complete
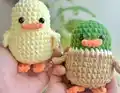
— Duck Pattern (No Sew) :
Row 3 :
(SC, INC) 6 times (18)
Row 4 :
(2 SC, INC) 6 times (24)
Row 9 :
5 INC, 14 SC, 5 INC (34)
Row 10 :
9 SC, (5 Ch, turn: SC, HDC, 2 DC), Sk 2, 12 SC, (5 Ch, turn: SC, HDC, 2 DC), Sk 2, 9 SC (34)
Row 11 :
9 SC, 2 SC (Crochet into the two skip stitches in R10), 12 SC, 2 SC (Crochet into the two skip stitches in R10), 9 SC (34)
Row 18 :
(SC, DEC) 5 times, 2 SC (12)
Info :
Weave in the yarn end and cut. Keep the yarn without cutting it. Crochet 2 Slip stitches into the body at the position of the feet.
Info :
Attach eyes on rows 7 and 8, spaced 4 stitches apart
— Legs (Make 2) :
Row 1 :
Make 3 CH. Start in the second stitch from the hook: 2 SC (2)
— Speculum (Beak) :
Row 1 :
4 Slip stitch into the 4 stitches between rows 8 and 9 (the 4 stitches between the eyes), turn
— Mallard Duck Pattern (No Sew) :
Row 3 :
(SC, INC) 6 times (18)
Row 4 :
(2 SC, INC) 6 times (24)
Info :
Change to White yarn
Row 9 :
5 INC, 14 SC, 5 INC (34)
Info :
Change to Brown yarn
Row 10 :
9 SC, (5 Ch, turn: SC, HDC, 2 DC), Sk 2, 12 SC, (5 Ch, turn: SC, HDC, 2 DC), Sk 2, 9 SC (34)
Row 11 :
9 SC, 2 SC (Crochet into the two skip stitches in R10), 12 SC, 2 SC (Crochet into the two skip stitches in R10), 9 SC (34)
Row 18 :
(SC, DEC) 5 times, 2 SC (12)
Info :
Weave in the yarn end and cut. Keep the yarn without cutting it. Crochet 2 Slip stitches into the body at the position of the feet.
Info :
Attach eyes on rows 7 and 8, spaced 4 stitches apart
— Mallard Legs (Make 2) :
Row 1 :
Make 3 CH. Start in the second stitch from the hook: 2 SC (2)
— Mallard Speculum (Beak) :
Row 1 :
4 Slip stitch into the 4 stitches between rows 8 and 9 (the 4 stitches between the eyes), turn
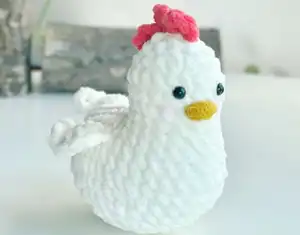
— Rooster Pattern (No Sew) :
— Wings (Make 2) :
Instructions :
Make 4 chains, start with the second chain from the hook: INC, SC, 4SC in the last stitch, SC, INC, 2CH, Picot, CH, SLST in the first stitch
Info :
Weave in the yarn end and cut
— Body to Head :
Row 3 :
(SC, INC) 6 times (18)
Row 4 :
(2 SC, INC) 6 times (24)
Row 5 :
(3 SC, INC) 6 times (30)
Row 6 :
(4 SC, INC) 6 times (36)
Row 9 :
7SC, 4SC with the 1st arm, 14SC, 4SC with the 2nd arm, 7SC (36)
Info :
Make 6CH, SLST in the first st, repeat 3 times, crochet with 2 pieces together with 10SLST
Row 13 :
(3SC, INC) 4 times (20)
Row 16 :
(2 SC, DEC) 5 times (15)
Row 17 :
(SC, DEC) 5 times (10)
Info :
Weave in the yarn end and cut
— Comb (Rooster Crest) :
Instructions :
Crochet crest from R17 to R18. The starting point is straight from the tail going up: (3CH, DC in the same st, SLST in the next stitch) 3 times
Info :
Make the mouth with yellow yarn, 3 lines like this at R13
Info :
Attach the eyes between R14-R15, apart 3 stitches
This charming farm friends collection brings the barnyard to your fingertips with three delightful characters that work up in no time! The innovative no-sew construction means less finishing work and more time enjoying your adorable creations. Whether you're new to amigurumi or an experienced crocheter looking for quick satisfying projects, these little birds offer endless possibilities for gift-giving, decoration, or starting your own miniature farm collection. 🐥🦆🐓 Happy crocheting! 🧶✨