Create this stunning 23cm plush swan with gracefully detailed wings and an elegant curved neck that captures pure sophistication in soft, luxurious yarn. This advanced pattern features intricate construction techniques including strategic shaping for the swan's signature silhouette, beautifully layered wings worked in decorative front loops, and careful marker placement throughout for precision assembly. Working with Himalaya Dolphin Baby plush yarn in white and pink creates a breathtakingly soft texture, while the detailed instructions guide you through complex increases, decreases, and slip stitch combinations that bring this majestic bird to life. Perfect for experienced crocheters ready to challenge themselves with a showstopping piece that combines technical skill with artistic beauty.
Progress Tracker
0% Complete
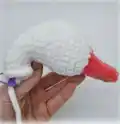
— Beak :
Infos :
Use yarn Himalaya Dolphin Baby in coral color, with a crochet hook size 4mm. Marker is in the center of the side of the beak. If necessary, crochet a shifting stitch to be in the center. Combinations highlighted in blue should be located relatively on the center of the front part of the beak.
Round 1 :
Make 4 ch. Start crocheting in the second ch from the hook – 3 sc, continue crocheting on the second side of chain – 3 sc (6)
Round 3 :
inc, 1 sc, inc, 3 sc (8)
Round 5 :
2 sc, 3 sc into 1, 5 sc (10)
Round 7 :
2 sc, 3 sc into 1, 7 sc (12)
Round 8 :
3 sc, 3 sc into 1, 4 sc, 3 slst – on this finish crocheting this row (do not crochet 1 loop from the row) (14)
Info :
When crocheting the last slst, change coral color thread to the white color thread. Put holofiber into the beak. Next move on to crochet the head.
— Head + Neck + Body :
Infos :
Crochet the head around the beak with Himalaya Dolphin Baby yarn in white color, with crochet hook size 4mm. Stuff the legs with filler as you crochet. Distribute the filler well. The lower part of the head and body has a flat shape – keep this in mind when filling! If you fill neck poorly, it may fall. Optional – you can use a wire frame. Combinations highlighted in blue should be located relatively on the center of the front part of the head. All SLST should be located relatively on the center of the bottom part of the head. The last loop of each row should be located in the center of the lower part of the head. The marker passes next to this loop. There is 5 slst in the lower part of the head: the 3rd loop from this combination is the center of the lower part of the head, on the 4th loop from this combination we set a marker. If necessary, crochet a shifting stitch with SC BEFORE COMBINATION with SLST.
Round 1 :
2 slst, inc, 2 sc, 1 hdc, 5 hdc into 1, 1 hdc, 2 sc, inc, 3 slst (20)
Round 2 :
2 slst, inc, 5 sc, 1 hdc, 5 hdc into 1, 1 hdc, 5 sc, inc, 3 slst (26)
Round 3 :
2 slst, inc, 6 sc, 7 hdc, 6 sc, inc, 3 slst (28)
Round 4 :
2 slst, inc, 9 sc, 1 hdc, 3 hdc into 1, 1 hdc, 9 sc, inc, 3 slst (32)
Round 5 :
2 slst, 11 sc, 5 hdc, 11 sc, 3 slst (32)
Round 6 :
2 slst, 11 sc, 5 hdc, 11 sc, 1 slst, remove marker (move it 1 stitch forward), crochet 3 stitch together with slst (30)
Round 7 :
1 slst, 11 sc, 5 hdc, 11 sc, remove marker (move it 1 stitch forward), crochet 3 stitch together with slst (28)
Round 8 :
1 slst, 5 sc, dec, 3 sc, 5 hdc, 3 sc, dec, 5 sc, remove marker (move it 1 stitch forward), crochet 3 stitch together with slst (24)
Round 9 :
1 slst, 8 sc, 5 hdc, 8 sc, remove marker (move it 1 stitch forward), crochet 3 stitch together with slst (22)
Round 10 :
1 slst, 4 sc, dec, 1 sc, 5 hdc, 1 sc, dec, 4 sc, remove marker (move it 1 stitch forward), crochet 3 stitch together with slst (18)
Round 11 :
1 slst, 2 sc, dec, 1 sc, 5 hdc, 1 sc, dec, 2 sc, remove marker (move it 1 stitch forward), crochet 3 stitch together with slst (14)
Round 12 :
1 slst, 3 sc, 5 hdc, 3 sc, remove marker (move it 1 stitch forward), crochet 3 stitch together with slst (12)
Round 13 :
1 slst, 2 sc, 5 hdc, 2 sc, 2 slst (12)
Round 14 :
1 slst, 2 sc, 5 hdc, 2 sc, 1 slst, back loop only – 1 slst (I advise you to put markers on the back loops so as not to lose them) (12)
Round 15 :
1 slst, 2 sc, 5 hdc, 2 sc, 2 slst (12)
Round 16 :
1 slst, 3 sc, 3 hdc, 3 sc, 2 slst (12)
Round 17 :
1 slst, 4 sc, 1 hdc, 4 sc, 1 slst, 1 slst, grabbing the back loop of the stitch, left in the 14th row (as shown in the photo) (12), remove the marker, crochet another 5-6 sc, to reach the center of the back of the neck, set the marker.
Info :
The MARKER now runs down the center of the BACK OF THE NECK, moving to the CENTER OF THE BACK. If necessary, crochet a shifting stitch to be in the center. Combinations highlighted in red should be located relatively on the center of the inner part of the neck – from the side of the head.
Round 18 :
5 sc, inc, 6 sc (13)
Round 19 :
5 sc, 3 slst, 5 sc (13)
Round 20 :
6 sc, inc, 6 sc (14)
Round 21 :
1 sc, dec, 2 sc, inc, 2 sc, inc, 2 sc, dec, 1 sc (14)
Round 22 :
6 sc, 2 inc, 6 sc (16)
Round 23 :
6 sc, 4 slst, 6 sc (16)
Round 24 :
6 sc, inc, 2 sc, inc, 6 sc (18)
Round 25 :
1 sc, dec, 5 sc, 2 inc, 5 sc, dec, 1 sc (18)
Round 27 :
1 sc, dec, 4 sc, inc, 2 sc, inc, 4 sc, dec, 1 sc (18)
Round 28 :
8 sc, 2 inc, 8 sc (20)
Round 29 :
1 sc, dec, 5 sc, inc, 2 sc, inc, 5 sc, dec, 1 sc (20)
Round 30 :
9 sc, 2 inc, 9 sc (22)
Round 31 :
9 sc, inc, 2 sc, inc, 9 sc (24)
Round 32 :
11 sc, 2 inc, 11 sc (26)
Round 33 :
1 sc, dec, 9 sc, 2 inc, 9 sc, dec, 1 sc (26)
Round 34 :
11 sc, inc, 2 sc, inc, 11 sc (28)
Round 35 :
1 sc, dec, 10 sc, 2 inc, 10 sc, dec, 1 sc (28)
Round 36 :
12 sc, inc, 2 sc, inc, 12 sc (30)
Round 37 :
1 sc, dec, 6 sc, inc, 4 sc, 2 inc, 4 sc, inc, 6 sc, dec, 1 sc (32)
Round 38 :
1 sc, dec, 9 sc, inc, 2 sc, 2 inc, 2 sc, inc, 8 sc, 1 slst, dec with slst, 1 slst (34)
Round 39 :
6 slst, 22 sc, 3 slst, back loop only – 3 slst (I advise you to put markers on the back loops so as not to lose them) (34)
Round 40 :
Back loop only – 3 slst (I advise you to put markers on the back loops so as not to lose them), for both loops – 6 sc, inc, 6 sc, 2 inc, 6 sc, inc, 6 sc, 3 slst, grabbing the back loop of the stitch, left in the 39th row (38)
Round 41 :
3 slst, grabbing the back loop of the stitch, left in the 40th row, 5 slst, 5 sc, inc, 10 sc, inc, 5 sc, 5 slst, back loop only – 3 slst (I advise you to put markers on the back loops so as not to lose them) (40)
Round 42 :
Back loop only – 3 slst (I advise you to put markers on the back loops so as not to lose them), for both loops – 5 sc, inc, 6 sc, inc, 3 sc, 2 inc, 3 sc, inc, 6 sc, inc, 5 sc, 3 slst, grabbing the back loop of the stitch, left in the 41st row (46)
Round 43 :
3 slst, grabbing the back loop of the stitch, left in the 42nd row, 7 slst, 9 sc, inc, 6 sc, inc, 9 sc, 7 slst, back loop only – 3 slst (I advise you to put markers on the back loops so as not to lose them) (48)
Round 44 :
Back loop only – 3 slst (I advise you to put markers on the back loops so as not to lose them), for both loops – 12 sc, inc, 16 sc, inc, 12 sc, 3 slst, grabbing the back loop of the stitch, left in the 43rd row (50)
Round 45 :
3 slst, grabbing the back loop of the stitch, left in the 44th row, 9 slst, 2 sc, inc, 9 sc, 2 inc, 9 sc, inc, 2 sc, 9 slst, back loop only – 3 slst (I advise you to put markers on the back loops so as not to lose them) (54)
Round 46 :
Back loop only – 3 slst (I advise you to put markers on the back loops so as not to lose them), for both loops – 48 sc, 3 slst (54)
Round 47 :
14 slst, 3 sc, inc, 18 sc, inc, 3 sc, 14 slst (56)
Round 48 :
3 slst, 7 sc, inc, 34 sc, inc, 7 sc, 3 slst (58)
Round 49 :
16 slst, 26 sc, 16 slst (58)
Round 50 :
3 inc, grabbing the back loop of the stitch, left in the 46th row, 10 inc, dec, 4 sc, (dec, 3 sc)*2, (3 sc, dec)*2, 4 sc, dec, 10 inc, 3 inc, grabbing the back loop of the stitch, left in the 45th row (78)
Round 51 :
(1 sc, inc)*5, 10 sc, (1 sc, inc)*3, dec, 22 sc, dec, (inc, 1 sc)*3, 10 sc, (inc, 1 sc)*5 (92)
Info :
Markers will be placed on the front loops of certain combinations. Wings are tied along them at the end of the crocheting of the body. Place markers for convenience and visibility of loops.
Round 52 :
13 sc, back loop only – 10 sc (place green marker on the front bow of the first and last loop of the combination), for both loops – 11 sc, dec, 3 sc, dec, (2 sc, dec)*3, 3 sc, dec, 11 sc, back loop only – 10 sc (place green marker on the front bow of the first and last loop of the combination), for both loops – 13 sc (86)
Round 53 :
(6 sc, inc)*4, 5 sc, (dec, 4 sc)*3, dec, 5 sc, (inc, 6 sc)*4 (90)
Round 54 :
5 sc, inc, 5 sc, back loop only – (inc, 5 sc)*2 (place orange marker on the front bow of the first and last loop of the combination), for both loops – inc, 5 sc, inc, (dec, 3 sc)*3, (3 sc, dec)*3, inc, 5 sc, inc, back loop only – (inc, 5 sc)*2 (place orange marker on the front bow of the first and last loop of the combination), for both loops – 5 sc, inc, 5 sc (94)
Round 55 :
(7 sc, inc)*4, (3 sc, dec)*3, (dec, 3 sc)*3, (inc, 7 sc)*4 (96)
Round 56 :
11 sc, back loop only – 14 sc (place purple marker on the front bow of the first and last loop of the combination), for both loops – 8 sc, (dec, 3 sc)*3, (3 sc, dec)*3, 8 sc, back loop only – 14 sc (place purple marker on the front bow of the first and last loop of the combination), for both loops – 11 sc (90)
Round 57 :
(6 sc, inc)*4, 2 sc, (3 sc, dec)*3, (dec, 3 sc)*3, 2 sc, (inc, 6 sc)*4 (92)
Round 58 :
9 sc, back loop only – 15 sc (place blue marker on the front bow of the first and last loop of the combination), for both loops – 7 sc, (dec, 3 sc)*3, (3 sc, dec)*3, 7 sc, back loop only – 15 sc (place blue marker on the front bow of the first and last loop of the combination), for both loops – 9 sc (86)
Round 59 :
(6 sc, inc)*4, (3 sc, dec)*3, (dec, 3 sc)*3, (inc, 6 sc)*4 (88)
Round 60 :
7 sc, back loop only – 17 sc (place pink marker on the front bow of the first and last loop of the combination), for both loops – 5 sc, (dec, 3 sc)*3, (3 sc, dec)*3, 5 sc, back loop only – 17 sc (place pink marker on the front bow of the first and last loop of the combination), for both loops – 7 sc (82)
Round 61 :
(5 sc, inc)*4, 2 sc, (3 sc, dec)*3, (dec, 3 sc)*3, 2 sc, (inc, 5 sc)*4 (84)
Round 62 :
5 sc, back loop only – 19 sc (place yellow marker on the front bow of the first and last loop of the combination), for both loops – 3 sc, (dec, 3 sc)*3, (3 sc, dec)*3, 3 sc, back loop only – 19 sc (place yellow marker on the front bow of the first and last loop of the combination), for both loops – 5 sc (78)
Round 63 :
(5 sc, inc)*4, (3 sc, dec)*3, (dec, 3 sc)*3, (inc, 5 sc)*4 (80)
Round 64 :
25 sc, (dec, 3 sc)*3, (3 sc, dec)*3, 25 sc (74)
Round 65 :
(6 sc, inc)*4, (1 sc, dec)*3, (dec, 1 sc)*3, (inc, 6 sc)*3, inc, 3 sc, (3 sc into 1)*3 (82)
Round 66 :
(3 sc into 1)*3, 29 sc, 6 dec, 38 sc (76)
Round 67 :
40 sc, 1 slst – on this we finish crocheting a row
Info :
Fix the thread, do not cut it, put a long piece of thread to the stitch the back of the body (about 50-60 cm). Add holofiber. Using the remaining piece of the thread, sew the resulting hole in the back of the toy – 38 stitches in total. Fix the thread, hide it.
— Wings (Right Wing) :
Infos :
Use yarn Himalaya Dolphin Baby in pink color, with crochet hook size 4mm. Make 2 details. Attach the pink thread to the last front bow of the loop of the 52nd row, as shown in the photo, make 5 chain. Next, in each loop crochet the following combination: (dtr, ch, dtr, 3 ch, sc in the third loop from the hook).
Layer 1 :
On the 52nd row from green to green marker, crochet this combination 10 times – under each left front loops. Turn the toy for convenience and go to the 54th row.
Layer 2 :
On the 54th row from orange to orange marker, crochet this combination 12 times – under each left front loops. Turn the toy for convenience and go to the 56th row.
Layer 3 :
On the 56th row from purple to purple marker, crochet this combination 14 times – under each left front loops. Turn the toy for convenience and go to the 58th row.
Layer 4 :
On the 58th row from blue to blue marker, crochet this combination 15 times – under each left front loops. Turn the toy for convenience and go to the 60th row.
Layer 5 :
On the 60th row from pink to pink marker, crochet this combination 17 times – under each left front loops. Turn the toy for convenience and go to the 62nd row.
Layer 6 :
On the 62nd row from yellow to yellow marker, crochet this combination 19 times – under each left front loops. Make 4 ch and attach the chain to the last slst in the 60th row with slst –as shown in the photo.
Info :
Fix, cut the thread, hide it. Optionally – threads from the crocheting of the wings (beginning and end) with a needle, bring out at 1 point, tie together into 2-3 knots and hide in the canvas. Similarly crochet the LEFT WING.
— Embroidery Details :
Infos :
Embroider eyes on the 3rd – 4th row of the head at a distance of 11 sc. Embroider nostrils between 1st and 2nd row of the beak at a distance of 1-2 sc.
— Legs :
Infos :
Use yarn Himalaya Dolphin Baby in coral color, with crochet hook size 4mm. Make 2 details.
Round 1 :
Make 5 ch. Start crocheting in the second ch from the hook – 4 sc, continue crocheting on the second side of chain – 4 sc (8)
Round 3 :
3 sc, dec, 2 sc, remove marker, crochet more 1 dec and 3 sc (6)
Info :
Fill a little leg with holofiber. Fold in half, connect by crocheting 3 sc. Leave thread for sewing. Sew the legs to the body between the 57th and 58th rows at a distance 6-7 sc.
— Flower :
Infos :
Start to crocheting with Himalaya Dolphin Baby yarn in powdery color, with crochet hook size 4mm. Leave a piece of thread at the beginning of crocheting with a length of 10-15 cm.
Round 1 :
AR, 6 sc in AR (6). When crocheting the last sc, change powdery color thread to the pink color thread
Round 2 :
Next, in each loop crochet the following combination: (2 ch, 2 trc, 2 ch, 1 slst)
Info :
Fasten the thread. Using the remaining pieces of thread, sew a flower to the head or neck of the toy.
This magnificent swan pattern represents the pinnacle of amigurumi artistry, combining advanced construction techniques with breathtaking design details that create a truly showstopping piece. The elegant curved neck, layered dimensional wings with feathered texture, and sophisticated shaping throughout showcase the beauty that's possible when technical skill meets creative vision. Working with luxurious plush yarn creates an irresistibly soft finish that makes this 23cm swan both a stunning display piece and a cherished heirloom. Every stitch in this pattern is purposeful, every marker placement strategic, and the result is pure elegance that will inspire awe in everyone who sees it. Happy crocheting and enjoy the journey of creating this masterpiece! 🦢✨