🧶 Beautiful ✨ Detailed 💝 Adorable

Mel the Snowman Amigurumi Pattern

Mel the Snowman Amigurumi Pattern
4.5★ Rating
3-4 Hours Time Needed
4.2K Made This
✂️

Beginner Friendly Level

Perfect for those just starting their sewing journey, with clear instructions and simple techniques

⏱️

Bite-Sized Project

Complete in under 2 hours—quick, fun, and perfect for a little creative escape.

❄️

Winter Warmth

Cozy layers for chilly nights that combine practical warmth with beautiful, intricate stitch patterns.

About This Mel the Snowman Amigurumi Pattern

Mel the Snowman is a delightful beginner-friendly amigurumi pattern that works up quickly using cotton aran weight yarn. The snowman is constructed in one continuous piece from head to body, eliminating the need for complex assembly. The pattern features a classic snowman design with adorable details including a carrot nose, grey top hat with a decorative brim, twig-style arms with branching details, and a cozy scarf complete with fringe. At just 6 inches tall, Mel is the perfect size for holiday displays, gift-giving, or as part of a festive collection.

Mel the Snowman Amigurumi Pattern crochet pattern - detailed view of completed project

This pattern uses simple single crochet techniques with minimal shaping, making it accessible for beginners. The back loop only technique is introduced for the hat brim and scarf, adding nice texture details while remaining easy to master.

Why You'll Love This Mel the Snowman Amigurumi Pattern

I absolutely love how approachable this pattern is for beginners while still creating an impressive finished piece! Mel's one-piece construction means less sewing and faster results, which is perfect when you're excited to see your snowman come to life. The twig arms with their little branching details are such a clever touch that adds character without complexity. I'm especially fond of the scarf with its fringe detail—it's simple to make but looks so polished and professional. What really makes my heart happy is how quickly this project works up, so you can make multiple snowmen in different color combinations for gifts or a whole winter village display. The classic design means Mel never goes out of style, and every time I make one, I'm reminded of building snowmen as a child. It's pure winter joy in crochet form!

Mel the Snowman Amigurumi Pattern step 1 - construction progress Mel the Snowman Amigurumi Pattern step 2 - assembly progress Mel the Snowman Amigurumi Pattern step 3 - details and accessories Mel the Snowman Amigurumi Pattern step 4 - final assembly and finishing

Switch Things Up

I love experimenting with Mel's design to create a whole snowman family! One of my favorite variations is making different sized snowmen by using thinner or thicker yarn with corresponding hook sizes. A fingering weight yarn creates an adorable miniature version perfect for ornaments, while bulky yarn makes a larger statement piece.

For the hat, I've tried all sorts of fun modifications—adding a pompom to the top, creating stripes with different grey shades, or even making it in festive colors like red or green with white trim. You could also add a decorative band around the hat using contrasting yarn or embroidered snowflakes.

The scarf is endlessly customizable! I've made versions with stripes, used self-striping yarn for automatic color changes, and even added tiny bells or buttons to the fringe ends. Sometimes I make the scarf extra long so it wraps around multiple times for an ultra-cozy look. Another fun idea is embroidering the snowman's name or the year on the scarf for a personalized keepsake. The arms can be positioned differently too—straight out, one up and one down, or angled for unique poses that give each Mel their own personality!

Common Mistakes & How to Fix Them

✗ Forgetting to add safety eyes before closing the head makes it impossible to insert them later properly ✗ Not stuffing the head firmly enough results in a floppy snowman that won't stand upright or hold shape ✗ Skipping the back loop only instruction on the hat brim eliminates the dimensional decorative effect entirely ✗ Placing the arms too high or low on the body throws off the proportions and classic snowman appearance ✗ Not pinning pieces before sewing leads to asymmetrical features and an unprofessional finished look

Mel the Snowman Amigurumi Pattern

Meet Mel, the adorable snowman that's perfect for your winter décor collection! This charming 6-inch amigurumi features a friendly face with safety eyes, a cozy grey top hat, and a warm burgundy scarf with fringed details. Mel's design includes twig-like brown arms with branching details and coal button accents that capture the classic snowman look. The pattern is straightforward and beginner-friendly, making it an ideal project for those new to amigurumi or anyone looking for a quick festive craft. Create this delightful winter companion to brighten your home or give as a heartwarming handmade gift!

Beginner Friendly 3-4 Hours

Materials Needed for Mel the Snowman Amigurumi Pattern

— Main Fabric

  • 01
    Paintbox Yarns Cotton Aran (1.8oz/50g balls) in Champagne White for body
  • 02
    Paintbox Yarns Cotton Aran in Granite Grey for hat and buttons
  • 03
    Paintbox Yarns Cotton Aran in Blood Orange for carrot nose
  • 04
    Paintbox Yarns Cotton Aran in Coffee Bean for twig arms
  • 05
    Paintbox Yarns Cotton Aran in Red Wine for scarf
  • 06
    Toy stuffing for head and body

— Tools Required

  • 01
    US E/4 (3.5mm) crochet hook
  • 02
    Pair of 3/8 inch (9mm) safety eyes
  • 03
    Tapestry needle for sewing
  • 04
    Pins for positioning pieces
  • 05
    Stitch markers
  • 06
    Scissors

Progress Tracker

0% Complete

— HEAD AND BODY:

Info:

Using US E/4 (3.5mm) crochet hook and yarn A (Champagne White), make an adjustable ring

Round 1:

6 sc in ring (6)

Round 2:

Inc in each st around (12)

Round 3:

[Inc in next st, 1 sc] 6 times (18)

Round 4:

[Inc in next st, 2 sc] 6 times (24)

Round 5:

[Inc in next st, 3 sc] 6 times (30)

Round 6:

[Inc in next st, 4 sc] 6 times (36)

Round 7:

[Inc in next st, 5 sc] 6 times (42)

Round 8:

[Inc in next st, 6 sc] 6 times (48)

Round 9-15:

Sc around (48)

Round 16:

[Dec, 6 sc] 6 times (42)

Round 17:

[Dec, 5 sc] 6 times (36)

Round 18:

[Dec, 1 sc] 12 times (24)

Info:

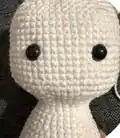
Add safety eyes between rounds 13 and 14, approximately 12 sts apart. Add toy stuffing to head and continue as you go.

Round 19:

Sc around (24)

Round 20:

[Inc in next st, 7 sc] 3 times (27)

Round 21:

[Inc in next st, 8 sc] 3 times (30)

Round 22:

[Inc in next st, 9 sc] 3 times (33)

Round 23:

[Inc in next st, 10 sc] 3 times (36)

Round 24:

[Inc in next st, 11 sc] 3 times (39)

Round 25:

[Inc in next st, 12 sc] 3 times (42)

Round 26-35:

Sc around (42)

Round 36:

[Dec, 5 sc] 6 times (36)

Round 37:

Sl st in each st around (36)

Round 38:

Sc blo around (36)

Round 39:

[Dec] 18 times (18)

Round 40:

[Dec, 1 sc] 6 times (12)

Round 41:

Dec 6 times (6)

Info:

Fasten off, leave a tail. Use a tapestry needle to pick up all front loops from the last round and pull tight to close. Weave in end.

— HAT:

Info:

Using US E/4 (3.5mm) crochet hook and yarn B (Granite Grey), make an adjustable ring

Round 1:

6 sc in ring (6)

Round 2:

Inc in each st around (12)

Round 3:

[Inc in next st, 1 sc] 6 times (18)

Round 4:

Sc blo around (18)

Round 5-7:

Sc around (18)

Round 8:

Working in blo, inc in each st around (36)

Round 9:

Sc around (18)

Info:

Fasten off, leave a tail for sewing

— NOSE:

Info:

Using US E/4 (3.5mm) crochet hook and yarn C (Blood Orange), make an adjustable ring

Round 1:

4 sc in ring (4)

Round 2:

[Inc in next st, 3 sc] (5)

Round 3:

[Inc in next st, 4 sc] (6)

Round 4:

[Inc in next st, 5 sc] (7)

Round 5:

[Inc in next st, 6 sc] (8)

Info:

Fasten off, leave a tail for sewing. Add a little bit of toy stuffing.

— ARMS (MAKE 2):

Main part (make 2):

Using US E/4 (3.5mm) crochet hook and yarn D (Coffee Bean), make an adjustable ring

Round 1:

6 sc in ring (6)

Round 2-8:

Sc around (6)

Info:

Fasten off, leave a tail for sewing

Short pieces (make 4):

Using US E/4 (3.5mm) crochet hook and yarn D (Coffee Bean), make an adjustable ring

Round 1:

6 sc in ring (6)

Round 2-3:

Sc around (6)

Info:

Fasten off, leave a tail for sewing 2 short pieces on to main part of each arm

— BUTTONS (MAKE 2):

Info:

Using US E/4 (3.5mm) crochet hook and yarn B (Granite Grey), make an adjustable ring

Round 1:

5 sc in ring (5)

Info:

Fasten off, leave a tail for sewing

— SCARF:

Info:

Using US E/4 (3.5mm) crochet hook and yarn E (Red Wine), leave a long tail before starting that will be used for sewing, ch 6

Row 1:

Skip 2 ch from hook, hdc in each of next 4 ch, turn (4)

Row 2-28:

Ch 2, 4 hdc blo, turn (4)

Info:

Next row creates fringe

Row 29:

[Ch 4, skip first ch from hook, sl st in each of next 3 ch, sl st in next st of row] 4 times (4 fringes)

Info:

Fasten off and weave in ends

Assembly Instructions

  • Use sewing pins to check the position of all pieces before sewing them in place permanently.
  • Sew hat on to the head in your preferred position. The hat can be tilted slightly for personality.
  • Sew the carrot nose between the safety eyes, centered on the face.
  • Sew the two main arm pieces to the sides of the body across rounds 26 and 27.
  • Attach 2 short branching pieces to each main arm to create the twig effect.
  • Sew the two grey buttons to the front of the snowman body at your preferred spacing.
  • Wrap the scarf around the neck area where the head meets the body, fold the side with the fringe, then stitch securely in place.

Important Notes

  • 💡The pattern is marked as easy level, perfect for beginners learning amigurumi construction techniques
  • 💡Head and body are made in one continuous piece, reducing assembly time and complexity
  • 💡Add safety eyes between rounds 13 and 14 before closing the head completely
  • 💡Continue stuffing as you work to ensure firm, even filling throughout the snowman
  • 💡Pin all pieces before sewing to check positioning and ensure symmetrical placement
  • 💡The pattern uses US terminology with UK terms provided in italics within parentheses

Mel the Snowman brings winter charm to life with this delightful beginner-friendly pattern! Designed by Ilaria Caliri for Paintbox Yarns, this adorable 6-inch snowman combines classic snowman features with modern amigurumi techniques. The one-piece construction makes it quick to create, while the charming details like twig arms and fringed scarf add personality. Perfect for holiday decorating, gift-giving, or as your first amigurumi project! ☃️❄️✨

You ask,

we answer.

FAQs

What size will the finished Mel the Snowman be?

Using the specified Paintbox Yarns Cotton Aran and US E/4 (3.5mm) hook, Mel stands at 6 inches (15cm) tall, making him a perfect desktop or shelf decoration.

Is this pattern suitable for complete beginners?

Yes! This pattern is marked as easy level and is perfect for beginners. The head and body are worked in one piece using simple single crochet, and the pattern includes clear instructions for all components.

Can I use different yarn brands for this pattern?

While the pattern specifies Paintbox Yarns Cotton Aran, you can substitute with any cotton or acrylic aran weight yarn. However, using different yarn may result in a slightly different finished size and appearance.

What does the 'blo' instruction mean in the pattern?

BLO stands for 'back loop only.' Instead of crocheting through both loops of a stitch, you only insert your hook through the back loop. This creates a ridge effect, used for the hat brim and scarf texture.

Can I make the scarf in different colors or patterns?

Absolutely! The scarf is a simple rectangle with fringe, so you can easily customize it with stripes, color changes, or even use variegated yarn for a unique look.

The pattern mentions a TOP TIP about buttons - what does it suggest?

Instead of crocheting the small grey circles for Mel's coal buttons, you can use additional safety eyes for a shiny, realistic coal-like finish. This is a quick alternative that looks great!