🧢 Beautiful ✨ Detailed πŸ’ Adorable

Disy the Bear Amigurumi Pattern

Disy the Bear Amigurumi Pattern
4.0β˜… Rating
3-4 Hours Time Needed
2.8K Made This
βœ‚οΈ

Beginner Friendly Level

Perfect for those just starting their sewing journey, with clear instructions and simple techniques

⏱️

Weekend Treat

Takes 5-7 hours, making it an enjoyable project to finish over a couple of days.

🧸

Cute Companion

An adorable friend to cherish, handcrafted with love to bring comfort and joy for years to come.

About This Disy the Bear Amigurumi Pattern

Disy the Bear is a sweet and simple amigurumi pattern that's perfect for beginners looking to create something truly special. Using bulky weight yarn and a smaller hook for tight stitches, this pattern ensures your stuffing stays secure while creating a plush, huggable texture. The bear features classic proportions with a rounded body, distinct head, and adorable details like embroidered eyebrows and an optional safety nose on the muzzle.

Disy the Bear Amigurumi Pattern crochet pattern - detailed view of completed project

Each piece is worked in continuous rounds with clear stitch counts, making it easy to track your progress. The pattern includes helpful tips for adding structural support to keep the head upright and detailed assembly instructions with visual guides.

Why You'll Love This Disy the Bear Amigurumi Pattern

I absolutely love this pattern because it's the perfect introduction to amigurumi without being overwhelming! The simple shaping techniques teach you all the fundamentals of increasing and decreasing while creating something genuinely adorable. I appreciate how quickly Disy works up with bulky yarnβ€”you can finish this sweet bear in an afternoon and have an instant handmade gift ready to go. The customizable features mean you can add your own personality through color choices and facial expressions, making each bear unique and special.

Disy the Bear Amigurumi Pattern step 1 - construction progress Disy the Bear Amigurumi Pattern step 2 - assembly progress Disy the Bear Amigurumi Pattern step 3 - details and accessories Disy the Bear Amigurumi Pattern step 4 - final assembly and finishing

Switch Things Up

I love experimenting with different yarn textures when making Disy the Bear! While the original pattern calls for bulky yarn, I've found that using chenille or velvet yarn creates an incredibly soft, plush teddy that feels luxurious to hold. You could also try working with variegated yarn to create a unique multicolored bear, or use sparkle yarn for a magical, festive version.

Color choices completely transform this patternβ€”I've made Disy in classic brown, soft pastels for baby gifts, and even bold rainbow colors for kids who love vibrant toys. Consider embroidering additional details like a heart on the chest, adding a small bow around the neck, or even crocheting a tiny scarf or hat to dress up your bear.

For a more personalized touch, I sometimes add embroidered initials or a special date on the foot pad, making it a treasured keepsake. You can also experiment with eye placement and eyebrow expressions to give each bear its own personalityβ€”slightly closer eyes create a sweeter look, while raised eyebrows add character and charm!

Common Mistakes & How to Fix Them

βœ— Forgetting to stuff as you go for the body and head, which makes it difficult to achieve proper shaping later on βœ— Using a hook that's too large for the yarn weight, causing gaps where stuffing shows through the stitches βœ— Not placing safety eyes before fully closing the head, making installation impossible without damaging your work βœ— Skipping the invisible decrease technique, which creates visible gaps and lumpy texture in the finished bear

Disy the Bear Amigurumi Pattern

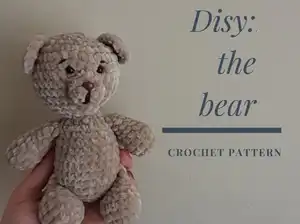
Create your own adorable Disy the Bear with this delightful amigurumi pattern! This charming teddy bear features a round, huggable body, sweet embroidered eyebrows, and cute little arms, legs, and ears that come together to form the perfect cuddle companion. Made with soft bulky yarn, Disy works up quickly and makes an ideal gift for loved ones or a cozy addition to your own collection. Whether you're crafting for a baby shower, birthday, or just because, this lovable bear brings warmth and handmade joy to any occasion.

Beginner Friendly 3-4 Hours

Materials Needed for Disy the Bear Amigurumi Pattern

β€” Main Fabric

  • 01
    100 meters of Bulky yarn (such as Soft Baby from Madame Tricote Paris, where 100 grams equals 120 meters)
  • 02
    Velvet yarn options like Bernat Velvet also work well

β€” Tools Required

  • 01
    4mm crochet hook (or 5mm for bulkier yarns like Bernat Velvet)
  • 02
    8mm safety eyes
  • 03
    9mm x 7mm safety nose (optional)
  • 04
    Scissors
  • 05
    Yarn needle
  • 06
    Toy stuffing
  • 07
    Stitch markers (recommended)
  • 08
    Optional: 3 plastic coffee stirrers or similar support for neck structure

Progress Tracker

0% Complete

β€” Body :

Round 1 :

ch 2, 6 sc in the second ch from hook [6]

Round 2 :

inc into each stitch [12]

Round 3 :

(sc in the next stitch, inc in the next stitch) x 6 [18]

Round 4 :

(inc in the next stitch, sc in the next 2 stitches) x 6 [24]

Round 5 :

(sc in the next 3 stitches, inc in the next stitch) x 6 [30]

Round 6-8 :

sc in the next 30 stitches [30]

Round 9 :

(dec in the next 2 stitches, sc in the next 3 stitches) x 6 [24]

Round 10-11 :

sc in the next 24 stitches [24]

Info :

From here add stuffing as you go

Round 12 :

(sc in the next 2 stitches, dec in the next 2 stitches) x 6 [18]

Round 13 :

sc in the next 18 stitches [18]

Round 14 :

(dec in the next 2 stitches, sc in the next stitch) x 6 [12]

Info :

If you will add an additional support to the body and head, put it after finish round 14

Round 15 :

sc in the next 12 stitches [12]

Round 16 :

(dec in the next 2 stitches, sc in the next 2 stitches) x 3 [9]

Round 17 :

sc in the next 9 stitches [9]

Info :

Fasten off and cut the yarn, you can add an extra knot and weave the end

β€” Head :

Round 1 :

ch 2, 6 sc in the second ch from hook [6]

Round 2 :

inc into each stitch [12]

Round 3 :

(sc in the next stitch, inc in the next stitch) x 6 [18]

Round 4 :

(inc in the next stitch, sc in the next 2 stitches) x 6 [24]

Round 5 :

(sc in the next 3 stitches, inc in the next stitch) x 6 [30]

Round 6 :

(inc in the next stitch, sc in the next 4 stitches) x 6 [36]

Round 7-10 :

sc in the next 36 stitches [36]

Info :

Place the safety eyes between rounds 7 and 8 with 3 stitches of separation

Round 11 :

(sc in the next 4 stitches, dec in the next 2 stitches) x 6 [30]

Info :

From here add stuffing as you go

Round 12 :

(dec in the next 2 stitches, sc in the next 3 stitches) x 6 [24]

Round 13 :

(sc in the next 2 stitches, dec in the next 2 stitches) x 6 [18]

Round 14 :

(dec in the next 2 stitches, sc in the next stitch) x 6 [12]

Info :

Fasten off and leave a long tail to sew the head to the body. Embroider the eyebrows

β€” Arms (make 2) :

Round 1 :

ch 2, 6 sc in the second ch from hook [6]

Round 2 :

inc into each stitch [12]

Round 3-4 :

sc in the next 12 stitches [12]

Round 5 :

(sc in the next 2 stitches, dec in the next 2 stitches) x 3 [9]

Round 6-8 :

sc in the next 9 stitches (add the stuffing - do not add more in the next round) [9]

Round 9 :

(sc in the next stitch, dec in the next 2 stitches) x 3 [6]

Round 10 :

To close the arm, fold it in half, 3 sc through the stitches of both parts [3]

Info :

Fasten off and leave a long tail to sew the arms to the body

β€” Tail :

Round 1 :

ch 2, 6 sc in the second ch from hook [6]

Round 2 :

sc into each stitch [6]

Round 3 :

sc in the next 4 stitches [4]

Info :

Fasten off and leave a long tail to sew the tail to the body

β€” Legs (make 2) :

Round 1 :

ch 2, 6 sc in the second ch from hook [6]

Round 2 :

inc into each stitch [12]

Round 3 :

(sc in the next 2 stitches, inc in the next stitch) x 4 [16]

Round 4-5 :

sc in the next 16 stitches [16]

Round 6 :

sc in the next 4 stitches, (dec in the next 2 stitches) x 6 [10]

Round 7-8 :

sc in the next 10 stitches (add the stuffing - do not add more in the next round) [10]

Round 9 :

to close the leg, fold it in half, 5 sc through the stitches of both parts [5]

Info :

Fasten off and leave a long tail to sew the legs to the body

β€” Ears (make 2) :

Round 1 :

ch 2, 6 sc in the second ch from hook [6]

Round 2 :

inc into each stitch [12]

Round 3 :

sc in the next 4 stitches [4]

Info :

Fasten off and leave a long tail to sew the ear to the head

β€” Muzzle :

Round 1 :

ch 2, 6 sc in the second ch from hook [6]

Round 2 :

(inc in the next stitch, sc in the next 2 stitches) x 2 [8]

Round 3 :

sc in the next 8 stitches [8]

Info :

Fasten off and leave a long tail to sew the muzzle to the head. Place the safety nose between rows 2 and 3 in one of the stitches without increase or embroider one

Assembly Instructions

  • Sew the head to round 15 of the body, making sure rounds 16 and 17 sit inside the head, taking both loops of the last round of the head
  • Attach the arms one round below the head on both sides of the body for balanced positioning
  • Sew the legs between rounds 5 and 6 on the bottom of the body, spacing them evenly apart
  • Attach the tail in the center back of the body between the legs as shown in the pattern images
  • Sew the ears between rounds 4 and 7 on the head using the 4 single crochet stitches from the last round
  • Position and sew the muzzle between rounds 8 and 11 on the front of the head
  • Embroider eyebrows above the safety eyes using yarn and a needle for added character

Important Notes

  • πŸ’‘Work with tight tension using a smaller hook than recommended for your yarn to prevent stuffing from showing through
  • πŸ’‘Use stitch markers to keep track of your rounds, especially when working continuous rounds without joining
  • πŸ’‘Install safety eyes before stuffing and closing the head completely, as they cannot be added later
  • πŸ’‘Consider adding neck support using plastic coffee stirrers or similar items tied together if you want the head to stand upright
  • πŸ’‘Stuff firmly but gradually as you work, not waiting until pieces are completely closed
  • πŸ’‘Pin all body parts in place before sewing to ensure proper positioning and balance
  • πŸ’‘Use the invisible decrease method for cleaner, more professional-looking decreases throughout the pattern

This charming Disy the Bear pattern brings together simple amigurumi techniques with adorable details to create a timeless teddy bear that's perfect for gifting or keeping. The bulky yarn makes this project work up quickly while creating a wonderfully soft and squishy texture that's irresistible to cuddle. With clear round-by-round instructions and helpful assembly guidance, even beginners can craft this sweet bear with confidence. The customizable features like embroidered eyebrows and optional safety nose let you add your own personal touch to make each Disy truly unique. 🧸 Happy crocheting! 🧢✨

You ask,

we answer.

FAQs

What yarn weight works best for this pattern?

This pattern is designed for bulky weight yarn (Category 5). The designer recommends Soft Baby from Madame Tricote Paris or Bernat Velvet. If using a bulkier velvet yarn, increase your hook size to 5mm instead of 4mm.

Can I make Disy larger or smaller?

Yes! To make a larger bear, use a thicker yarn with a larger hook, or to make a smaller version, use a lighter weight yarn with a smaller hook. Just maintain tight tension regardless of size to keep stuffing secure.

When should I insert the safety eyes?

Install the safety eyes between rounds 7 and 8 of the head with 3 stitches of separation between them. Make sure to attach them before you finish stuffing and closing the head completely.

Is the safety nose required?

No, the safety nose is optional. You can either use a 9mm x 7mm safety nose placed between rows 2 and 3 of the muzzle, or you can embroider a nose using yarn for a softer, child-safe alternative.

How do I keep the head from flopping over?

The pattern suggests using 3 plastic coffee stirrers tied together with yarn pieces as internal support. Insert this after completing round 14 of the body before continuing to the neck section.

What does 'invisible decrease' mean?

An invisible decrease creates a cleaner look by inserting your hook into the front loops only of two consecutive stitches, pulling through once for each, then yarning over and pulling through all three loops on your hook at once.