🧶 Beautiful ✨ Detailed 💝 Adorable

Crochet Donut Pillow Pattern

Crochet Donut Pillow Pattern
4.5★ Rating
6-8 Hours Time Needed
3.1K Made This
✂️

Intermediate Level

Ideal for those with basic knitting experience, featuring slightly more advanced stitches and techniques to expand your skills.

⏱️

All-Day Adventure

Requires 8-10 hours, ideal for a full day of immersive knitting.

🏡

Cozy Accent

A warm touch for your space that transforms ordinary corners into inviting nooks filled with handmade charm.

About This Crochet Donut Pillow Pattern

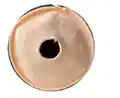
This delightful donut pillow pattern creates a realistic-looking treat that's perfect for home decoration! The pattern works in continuous rounds to create a large, plush donut shape with a hollow center, just like a real glazed donut. You'll start with a ring base and gradually increase to create the perfect circular shape, then decrease back down to form the classic donut profile. The finishing touch involves adding colorful yarn decorations to mimic sprinkles, making your donut pillow look absolutely irresistible and Instagram-worthy!

Crochet Donut Pillow Pattern crochet pattern - detailed view of completed project

This pattern requires tight crocheting to achieve the best shape and prevent stuffing from showing through. The color change technique at round 24 creates the distinctive frosting line that gives your donut its realistic glazed appearance.

Why You'll Love This Crochet Donut Pillow Pattern

I absolutely adore this donut pillow pattern because it's such a fun conversation starter in any room! There's something incredibly satisfying about watching a simple circle of stitches transform into a giant, squishy donut that looks good enough to eat. I love how the pattern is straightforward with its repetitive increase and decrease rounds, which makes it perfect for working on while watching your favorite shows. The best part is definitely adding those colorful sprinkle decorations at the end—it's like being a donut decorator but with yarn instead of frosting! The finished pillow is surprisingly substantial and makes the perfect accent piece for a craft room, kid's bedroom, or even a quirky addition to your living room couch. Plus, everyone who sees it can't resist giving it a squeeze, and the smiles it brings are absolutely priceless!

Crochet Donut Pillow Pattern step 1 - construction progress Crochet Donut Pillow Pattern step 2 - assembly progress Crochet Donut Pillow Pattern step 3 - details and accessories Crochet Donut Pillow Pattern step 4 - final assembly and finishing

Switch Things Up

I love experimenting with different color combinations for this donut pillow! Instead of the classic peach and pink combo, try making a chocolate donut by using brown yarn for the base and dark chocolate brown for the frosting section. You can even add white yarn sprinkles to mimic a chocolate donut with vanilla drizzle—it looks absolutely delicious!

For a fun twist, I sometimes create rainbow donuts by changing yarn colors every few rounds in the base section, creating a tie-dye effect that peeks through when you look at the pillow from different angles. The sprinkle decorations can also match this rainbow theme with every color imaginable creating a truly festive piece.

If you want a more sophisticated look for adult spaces, try using muted tones like dusty rose for the base with cream or beige for the frosting, then add gold metallic yarn for elegant sprinkles. I've also made seasonal versions—orange base with black frosting and orange sprinkles for Halloween, or red base with white frosting and red and green sprinkles for Christmas. The possibilities are truly endless, and each color combination gives the pillow a completely different personality and vibe that can match any room's aesthetic perfectly!

Common Mistakes & How to Fix Them

✗ Not crocheting tightly enough which causes the stuffing to show through the stitches and creates an uneven surface texture throughout the pillow ✗ Failing to stuff the donut gradually while sewing the hole closed which results in lumpy, uneven filling distribution and difficult final closure ✗ Missing the back loop only instruction in round 24 for the color change which eliminates the distinctive frosting ridge line effect ✗ Skipping stitches when working the sprinkle decorations which creates gaps and makes the topping look sparse instead of generously decorated ✗ Not folding the donut properly before sewing the center hole which causes an asymmetrical shape that doesn't look like a real donut

Crochet Donut Pillow Pattern

Create your very own adorable donut pillow with this delightful crochet pattern! This sweet home decor piece features a soft peach-colored base with colorful sprinkle decorations that look good enough to eat. Measuring approximately 12 inches in diameter, this cozy pillow is perfect for adding a playful touch to any room, nursery, or as a unique gift for donut lovers. The pattern uses soft polyester yarn and includes step-by-step instructions for creating the classic donut shape and adding those irresistible decorative toppings that make this pillow truly special.

Intermediate 6-8 Hours

Materials Needed for Crochet Donut Pillow Pattern

— Main Fabric

  • 01
    Himalaya Dolphin Baby yarn in peach color (80333) - 100% Polyester for the donut base
  • 02
    Himalaya Dolphin Baby yarn in pink color (80303) - 100% Polyester for the frosting section
  • 03
    Various colors of polyester or cotton yarn for donut sprinkle decorations and stitching

— Tools Required

  • 01
    Crochet hook size 3.5mm (Hook No: 3.5)
  • 02
    Long needle for sewing and decoration
  • 03
    Scissors
  • 04
    Fiberfill stuffing (150 grams)
  • 05
    Polyester or cotton yarns in various colors for decoration

Progress Tracker

0% Complete

— Donut Base :

Info :

Start crochet the bottom of donut pillow with peach color

Round 1 :

36 CH then connect in a ring (36)

Round 2 :

36 SC (36)

Round 3 :

(2 SC, 1 INC) *12 (48)

Round 4 :

48 SC (48)

Round 5 :

(3 SC, 1 INC) *12 (60)

Round 6 :

(4 SC, 1 INC) *12 (72)

Round 7 :

72 SC (72)

Round 8 :

(5 SC, 1 INC) *12 (84)

Round 9 :

(6 SC, 1 INC) *12 (96)

Round 10 :

96 SC (96)

Round 11 :

(7 SC, 1 INC) *12 (108)

Round 12 :

108 SC (108)

Round 13 :

(8 SC, 1 INC) *12 (120)

Round 14 :

120 SC (120)

Round 15 :

(9 SC, 1 INC) *12 (132)

Round 16 :

132 SC (132)

Round 17 :

(10 SC, 1 INC) *12 (144)

Round 18 :

144 SC (144)

Round 19 :

(11 SC, 1 INC) *12 (156)

Round 20-23 :

4 Rows 156 SC (156)

Round 24 :

CC and crochet this row with a hook only for the back loops (156)

Round 25-30 :

6 Rows 156 SC (156)

Round 31 :

(11 SC, 1 DEC) *12 (144)

Round 32 :

144 SC (144)

Round 33 :

(10 SC, 1 DEC) *12 (132)

Round 34 :

132 SC (132)

Round 35 :

(9 SC, 1 DEC) *12 (120)

Round 36 :

120 SC (120)

Round 37 :

(8 SC, 1 DEC) *12 (108)

Round 38 :

108 SC (108)

Round 39 :

(7 SC, 1 DEC) *12 (96)

Round 40 :

96 SC (96)

Round 41 :

(6 SC, 1 DEC) *12 (84)

Round 42 :

(5 SC, 1 DEC) *12 (72)

Round 43 :

72 SC (72)

Round 44 :

(4 SC, 1 DEC) *12 (60)

Round 45 :

(3 SC, 1 DEC) *12 (48)

Round 46 :

48 SC (48)

Round 47 :

(2 SC, 1 DEC) *12 (36)

Round 48 :

36 SC (36)

— Assembly :

Info :

Pass the long end of the yarn through the last loop of the stitch. Fold the donut as shown and start sewing up the hole

Info :

Sew a little and be sure to stuff the donut with fiberfill and again sew a little and stuff the donut gradually until complete

— Decoration :

Step 1 :

Insert a needle with yarn from the bottom of donut

Step 2 :

After pulling out the needle, insert it nearby, stepping back two centimeters

Step 3 :

Repeat this with different colors of yarn until you decorate the donut

Step 4 :

At the end, stick the yarn back from where you started to insert the needle

Step 5 :

Tie 2 ends of the yarn and hide inside

Assembly Instructions

  • Complete all 48 rounds of the donut body, ensuring consistent tension throughout for even shape and structure.
  • Pass the yarn end through the final loop and fold the donut carefully to align the opening edges perfectly.
  • Begin sewing the center hole closed using a long needle, working gradually around the opening in small sections.
  • Stuff the donut with fiberfill as you sew—never wait until the end—adding filling section by section for even distribution.
  • Continue alternating between sewing a few stitches and adding more stuffing until the donut is plump and the hole is completely closed.
  • Prepare various colors of yarn for sprinkle decorations and thread them onto your long needle one at a time.
  • Insert the needle from the bottom of the donut and pull through the top, stepping back about 2 centimeters each time to create realistic sprinkle lines across the frosted surface.

Important Notes

  • 💡Crochet tightly throughout the entire project to prevent fiberfill from showing through the stitches and maintain clean appearance
  • 💡The color change at round 24 must be worked in back loops only to create the frosting ridge effect
  • 💡Use approximately 150 grams of fiberfill for proper stuffing—don't skimp or the donut will look deflated and sad
  • 💡Stuff gradually while closing the center hole rather than trying to stuff through a small opening at the end
  • 💡Use multiple bright colors for the sprinkle decorations to make your donut pillow look authentically delicious and eye-catching
  • 💡The finished size is approximately 12 inches (29cm) but may vary based on yarn choice, hook size, and individual tension

This whimsical donut pillow pattern was created to bring a touch of sweet fun into your home decor! The pattern uses simple increase and decrease techniques in a continuous spiral to create that iconic donut shape, while the sprinkle decoration technique adds personality and charm. Perfect for kids' rooms, craft spaces, or anywhere you want to add a playful, handmade accent that's sure to make everyone smile. Whether you're making it for yourself or as a gift for a donut enthusiast, this pillow is guaranteed to be a showstopper! 🍩🧶 Happy crocheting! 🧵✨

You ask,

we answer.

FAQs

Can I use different yarn types for this donut pillow?

Absolutely! While the pattern uses Himalaya Dolphin Baby polyester yarn, you can substitute with cotton or acrylic yarn. Keep in mind that different yarn weights will affect the final size—bulky yarn creates a larger pillow while worsted weight will make a smaller version. Just match your hook size to your yarn weight and maintain tight tension.

How do I achieve the frosting line effect?

The frosting line is created at round 24 by changing colors and working only in the back loops of that round. This creates a distinctive ridge that separates the donut base from the frosting section, giving it that realistic glazed donut appearance. Make sure not to skip this back-loop-only instruction.

When should I start stuffing the donut?

Don't wait until the end! Start stuffing when you begin sewing the center hole closed. Work in sections—sew a little, stuff a little, then repeat. This method ensures even distribution of fiberfill and prevents lumpy areas. Trying to stuff through a small opening at the end makes it nearly impossible to achieve smooth, even filling.

How many colors should I use for the sprinkles?

Use as many colors as you like! The more variety, the more realistic and fun your donut will look. Popular combinations include pink, yellow, blue, green, orange, and white. You can also match your sprinkle colors to your room's decor scheme for a coordinated look.

What if my donut isn't holding its shape?

This usually means your tension is too loose or you haven't stuffed enough. Crochet tightly throughout the pattern—your stitches should be snug and firm. Use plenty of fiberfill (at least 150 grams) and pack it firmly but not so tight that it distorts the shape. The combination of tight crochet and proper stuffing creates that perfect, plump donut shape.

Can I make a smaller or larger version?

Yes! To make it smaller, use a lighter weight yarn with a smaller hook, or start with fewer chains in round 1 and reduce the number of increase rounds. For a larger version, start with more chains or add additional increase rounds. Just remember to balance your increases and decreases proportionally to maintain the donut shape.