🧢 Beautiful ✨ Detailed πŸ’ Adorable

Circus Elephant Amigurumi Pattern

Circus Elephant Amigurumi Pattern
4.6β˜… Rating
10-12 Hours Time Needed
1.6K Made This
βœ‚οΈ

Advanced Level

Designed for experienced knitters, these patterns involve intricate designs and complex techniques to challenge and inspire.

⏱️

Slow & Steady

A 10-12 hour projectβ€”great for savoring the process over several sessions.

🐰

Whimsical Buddy

Playful characters full of personality, designed to spark imagination and become cherished playtime favorites.

About This Circus Elephant Amigurumi Pattern

This delightful Circus Elephant pattern combines creative construction techniques with circus magic to create an unforgettable character. The elephant features a beautifully striped body in light blue, purple, and light orange that flows seamlessly from legs to torso, complete with decorative borders worked on remaining loops. The trunk is ingeniously crafted with a split design creating two separate holes that give it realistic dimension and shape. Large floppy ears made from small and large parts sewn together add to the charm, while the embroidered V-pattern hat topped with a handmade white pompom completes the circus performer look. The pattern also includes instructions for a coordinating striped ball prop in red and white that the elephant can balance on!

Circus Elephant Amigurumi Pattern crochet pattern - detailed view of completed project

With comprehensive instructions including pompom-making tutorials (both with and without a pompom maker), detailed trunk construction guidance, and clear border-working techniques, this pattern ensures success. The finished elephant sits proudly on its coordinating ball, creating a stunning circus display piece.

Why You'll Love This Circus Elephant Amigurumi Pattern

I'm absolutely in love with this pattern because the trunk construction is such a clever technique that creates amazing dimension - splitting it into two holes gives it realistic movement and shape that makes the elephant come alive! The striped circus outfit is pure joy to work on, watching those colors rotate and create that vintage circus aesthetic. What really makes my heart sing is learning to make those decorative borders on the remaining loops - it's such a professional finishing touch that elevates the entire piece. The pompom-making tutorial is incredibly helpful whether you have a maker or not, and seeing that fluffy white ball come together for the hat is so satisfying. Plus, creating the matching striped ball prop makes you feel like you're building an entire circus scene! It's one of those patterns where every new section teaches you something valuable, and the end result is a character so full of personality and charm that you can't help but smile every time you see it perched on that ball!

Circus Elephant Amigurumi Pattern step 1 - construction progress Circus Elephant Amigurumi Pattern step 2 - assembly progress Circus Elephant Amigurumi Pattern step 3 - details and accessories Circus Elephant Amigurumi Pattern step 4 - final assembly and finishing

Switch Things Up

I absolutely love customizing this elephant pattern because there are so many creative possibilities! For a different circus aesthetic, try making the striped outfit in classic red and white instead of purple and orange, or go for a more vintage look with muted pastels like dusty rose and sage green. You could even create a sparkly circus star by using metallic or glitter yarn for the costume stripes.

The elephant's color itself offers wonderful variation opportunities - make it in gray for a more realistic look, soft pink for a sweet baby elephant, or even fun colors like lavender or mint green for a whimsical fantasy circus version. I've thought about making a whole circus family with different sized elephants in coordinating colors!

For the hat, instead of embroidering V letters, you could add tiny crocheted stars, hearts, or even the elephant's initial. Try making the pompom in a contrasting color like hot pink or turquoise instead of white for extra pop, or use variegated yarn for a rainbow pompom effect.

The ball prop is perfect for customization too - make it in your favorite team colors, create a beach ball effect with multiple bright colors, or even make multiple balls in different color combinations as props. You could also add a little platform or pedestal under the ball for a more elaborate circus stage setup. For a winter theme, make the elephant in white with silver accents and a snowflake-decorated hat for a holiday circus performer!

Common Mistakes & How to Fix Them

βœ— Not marking the 12th and 20th stitches correctly on the trunk before creating the split, which results in uneven holes and poor trunk structure βœ— Forgetting to work the decorative borders on the remaining loops of rounds 14 and 25, missing the polished circus costume details entirely βœ— Sewing the small and large ear parts together incorrectly, creating asymmetrical or floppy ears that don't stand properly βœ— Stuffing the trunk too firmly, making it stiff and losing the natural curved elephant trunk appearance βœ— Not counting carefully when alternating colors in the striped ball, creating uneven or misaligned color sections throughout the sphere

Circus Elephant Amigurumi Pattern

Step right up to create this absolutely adorable Circus Elephant amigurumi pattern! This charming design features a sweet elephant performer complete with a festive striped circus outfit, an embroidered hat with a fluffy pompom, and the most endearing trunk that's cleverly constructed with a unique two-part design. Perfect for crochet enthusiasts who love circus themes and detailed characters, this pattern includes special techniques like creating dimensional borders, crafting a perfectly balanced ball prop, and constructing a trunk with realistic shaping. Whether you're making this gentle giant as a nursery decoration, circus-themed collection piece, or a treasured gift, this elephant will steal hearts with its innocent expression and playful circus charm!

Advanced 10-12 Hours

Materials Needed for Circus Elephant Amigurumi Pattern

β€” Main Fabric

  • 01
    YarnArt Jeans 75 light blue (50g, 160m) - Color A
  • 02
    YarnArt Jeans 72 purple (50g, 160m) - Color B
  • 03
    YarnArt Jeans 23 light orange (50g, 160m) - Color C
  • 04
    YarnArt Jeans 59 hot pink (50g, 160m) - Color D
  • 05
    YarnArt Jeans 26 red (50g, 160m) - Color E
  • 06
    YarnArt Jeans 73 skin color (50g, 160m) - Color F
  • 07
    YarnArt Jeans 62 white (50g, 160m) - Color G

β€” Tools Required

  • 01
    Crochet hook size 2.5mm
  • 02
    Safety eyes 8mm
  • 03
    Tapestry needles
  • 04
    Brown thread or yarn for embroidery
  • 05
    Pins
  • 06
    Stitch markers
  • 07
    Scissors
  • 08
    Polyester fiberfill
  • 09
    Pompom maker size 3.8cm (optional)
  • 10
    White yarn for pompom

Progress Tracker

0% Complete

β€” Legs & Body (yarn A, make 2 legs):

Round 1:

sc 6 into a magic loop (6)

Round 2:

[sc 1, inc] 3x (9)

Round 3:

[sc 2, inc] 3x (12)

Round 4-5:

sc 12 (2 rnds) (12)

Info:

Make the second legs in the same way, but don't break the yarn this time, crochet a chain of 6 ch. Move to the Body.

Round 6:

sc 12 (on the 1st leg), sc 6 (on the 6 chs), sc 12 (on the 2nd leg), sc 6 (on the 6 chs) (36)

Round 7:

[sc 5, inc] 6x (42)

Round 8:

[sc 6, inc] 6x (48)

Round 9:

[sc 7, inc] 6x (54)

Round 10:

[sc 8, inc] 6x (60)

Round 11-13:

sc 60 (3 rnds), change to yarn B (60)

Round 14:

(BLO) sc 60 (60)

Round 15:

sc 60, change to yarn C (60)

Round 16:

sc 60, change to yarn B (60)

Round 17-18:

sc 60 (2 rnds), change to yarn C (60)

Round 19:

[sc 8, dec] 6x, change to yarn B (54)

Round 20-21:

sc 54 (2 rnds), change to yarn C (54)

Round 22:

sc 54, change to yarn B (54)

Round 23-24:

sc 54 (2 rnds), change to yarn A (54)

Round 25:

(BLO) sc 54 (54)

Round 26-27:

sc 54 (2 rnds) (54)

Round 28:

[sc 7, dec] 6x (48)

Round 29-35:

sc 48 (7 rnds), insert safety eyes between rnd 33&34 (48)

Round 36:

[sc 6, dec] 6x (42)

Round 37:

[sc 5, dec] 6x, start stuffing (36)

Round 38:

[sc 4, dec] 6x (30)

Round 39:

[sc 3, dec] 6x (24)

Round 40:

[sc 2, dec] 6x (18)

Round 41:

[sc 1, dec] 6x (12)

Round 42:

dec 6 (6)

Info:

Break the yarn, stuff firmly, weave in the last 6 sts. Turn to the back side of the body, join yarn B on the 14th rnd, crochet sc 60 to make the border, hide the remaining yarn. Turn the body upside down, join yarn B on the 25th rnd, crochet sc 54 to make the border, hide the remaining yarn.

β€” Ears (yarn A, make 2 - Small + Large Part):

Small Part (make 2):

Round 1:

sc 5 in a magic loop (5)

Round 2:

inc 5 (10)

Round 3:

[sc 1, inc] 5x (15)

Round 4:

sc 15 (15)

Info:

Break the yarn.

Large Part (make 2):

Round 1:

sc 6 in a magic loop (6)

Round 2:

inc 6 (12)

Round 3:

[sc 1, inc] 6x (18)

Round 4-5:

sc 18 (2 rnds) (18)

Info:

Do not break the yarn, join with the small part with 1 slst, continue to crochet:

Round 6:

sc 15 (on the small part), sc 18 (on the large part) (33)

Round 7:

[sc 9, dec] 3x (30)

Round 8:

sc 30 (30)

Round 9:

[sc 8, dec] 3x (27)

Round 10:

sc 27 (27)

Round 11:

[sc 7, dec] 3x (24)

Round 12:

sc 24 (24)

Info:

Break the yarn with a long rest, use the tapestry needle to sew 2 edges together.

β€” Hat (yarn C):

Round 1:

sc 3 into a magic loop (3)

Round 2:

inc 3 (6)

Round 3:

[sc 1, inc] 3x (9)

Round 4:

[sc 2, inc] 3x (12)

Round 5:

sc 12 (12)

Round 6:

[sc 2, inc] 4x (16)

Round 7:

sc 16 (16)

Round 8:

[sc 3, inc] 4x (20)

Round 9:

sc 20 (20)

Info:

Break the yarn, use the brown thread/yarn to embroider V letter around the hat. Make the pompom with white yarn.

β€” Arms (yarn A, make 2):

Round 1-2:

Crochet rnd 1-2 of the Leg (9)

Round 3-8:

sc 9 (6 rnds) (9)

Info:

Break the yarn with a long rest, use the tapestry needle to sew 2 edges together.

β€” Cheeks (yarn D, make 2):

Round 1:

sc 6 in a magic loop (6)

Round 2:

inc 6 (12)

Info:

Break the yarn with a long rest.

β€” Trunk (yarn A):

Round 1:

ch 6, crochet on the 2nd st from the hook, sc 4, (sc 3), continue to crochet on the other side of the foundation chain, sc 3, inc (6)

Round 2:

inc, sc 3, inc 3, sc 3, inc 2 (18)

Round 3:

sc 1, inc, sc 3, [sc 1, inc] 3x, sc 3, [sc 1, inc] 2x (24)

Round 4:

sc 24 (24)

Info:

Mark 2 sts: the 12th st & 20th st of rnd 24. Crochet sc 5, slst on the 20th st (to create 2 parts for the trunk), sc 5 (total 10 sts on the small hole, the bigger hole will be 24-10=14 sts), the next st will be counted as the 1st st of the next part:

Small Hole:

Round 1-2:

inc, sc 2, dec 2, sc 2, inc (2 rnds) (10)

Round 3-8:

sc 10 (6 rnds) (10)

Round 9:

(BLO) dec 5 (5)

Info:

Break the yarn, stuff firmly, weave in the last 5 sts. Join yarn A on remaining loop of rnd 9, crochet: inc 10 = 20 sts, hide the remaining yarn.

Info:

Join yarn A to the 12th st of rnd 24 we have marked before, the next st will be counted as the 1st st of the next part:

Bigger Hole:

Round 1:

sc 14 (14)

Round 2-4:

inc, sc 4, dec 2, sc 4, inc (3 rnds) (14)

Round 5-8:

sc 14 (4 rnds) (14)

Info:

Break the yarn with a long rest, stuff.
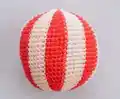
β€” Ball (yarn G):

Info:

Note: Yarn E: red letter, Yarn F: black letter

Round 1:

sc 6 in a magic loop, change to yarn E (6)

Round 2:

(sc 1, sc 1) 6x (12)

Round 3:

[sc 1, inc] 6x (18)

Round 4:

[inc, sc 2] 6x (24)

Round 5:

[sc 2, sc 1, inc] 6x (30)

Round 6:

[inc, sc 1, sc 3] 6x (36)

Round 7:

[sc 3, sc 2, inc] 6x (42)

Round 8:

[inc, sc 2, sc 4] 6x (48)

Round 9:

[sc 4, sc 3, inc] 6x (54)

Round 10:

[inc, sc 3, sc 5] 6x (60)

Round 11-22:

[sc 5, sc 5] 6x (12 rnds) (60)

Round 23:

[dec, sc 3, sc 5] 6x (54)

Round 24:

[sc 4, sc 3, dec] 6x (48)

Round 25:

[dec, sc 2, sc 4] 6x (42)

Round 26:

[sc 3, sc 2, dec] 6x (36)

Round 27:

[dec, sc 1, sc 3] 6x (30)

Round 28:

[sc 2, sc 1, dec] 6x, start stuffing (24)

Round 29:

[dec, sc 2] 6x (18)

Round 30:

[sc 1, dec] 6x, change to yarn G (12)

Round 31:

dec 6 (6)

Info:

Break the yarn, hide the remaining yarn.

Assembly Instructions

  • Turn to the back side of the body and join yarn B on the 14th round to crochet sc 60 border, then hide the yarn.
  • Turn the body upside down and join yarn B on the 25th round to crochet sc 54 border, then hide the yarn.
  • Join the small part of the ear with the large part using 1 slip stitch, then continue crocheting as instructed to complete each ear.
  • Use the tapestry needle to sew the two edges of each completed ear together.
  • Attach the trunk 1 round below the eyes in the center of the face.
  • Attach the cheeks 1 round below the eyes on each side of the trunk.
  • Attach the ears 5 stitches away from the eyes on each side of the head.
  • Use brown thread to embroider the eyebrows above the eyes.
  • Embroider V letters around the hat using brown thread or yarn, then make and attach the white pompom on top.
  • Attach the completed hat on top of the head between the ears.
  • Attach the arms to the body at the appropriate position as shown in the pattern photos.
  • Place the finished elephant on the completed ball prop for display.

Important Notes

  • πŸ’‘Pay careful attention when marking the 12th and 20th stitches on round 4 of the trunk before creating the split - accurate placement is crucial for proper trunk structure.
  • πŸ’‘Insert safety eyes between rounds 33 and 34 as you work, before the opening becomes too small.
  • πŸ’‘Work the decorative borders on the remaining loops of rounds 14 and 25 to create the polished circus costume look - don't skip this step.
  • πŸ’‘When alternating colors in the ball, follow the color coding carefully (red letter for yarn E, black letter for yarn F) to maintain even stripes.
  • πŸ’‘The pompom instructions include two methods - one with a pompom maker and one without, so you can choose based on your available tools.
  • πŸ’‘Stuff the trunk firmly but allow it to maintain a natural curve - overstuffing will make it too stiff.
  • πŸ’‘When joining ear parts, ensure the slip stitch connection is secure before continuing to crochet the combined piece.

This enchanting Circus Elephant pattern was designed to bring the magic and wonder of the big top to life through creative crochet techniques! With its clever split-trunk construction, beautifully striped circus costume, and coordinating ball prop, this amigurumi combines advanced skills with circus charm. The pattern guides you through dimensional border work, ear construction, and pompom making to create a truly show-stopping piece. Perfect as a nursery decoration, circus collection centerpiece, or treasured gift, this gentle performer will bring smiles and wonder wherever it's displayed! 🐘πŸŽͺ✨

You ask,

we answer.

FAQs

How do I create the split trunk with two holes?

After completing round 4 of the trunk, mark the 12th and 20th stitches. Crochet sc 5, then slip stitch on the marked 20th stitch to create a division. This creates a small hole (10 stitches) and a bigger hole (14 stitches) that you work separately, giving the trunk realistic dimension. The pattern includes detailed assembly photos.

Do I need a pompom maker for the hat?

No! The pattern includes instructions for making the pompom both with and without a pompom maker. If you don't have one, you can use the paper template method which works just as well.

What are the decorative borders and why are they important?

The borders are worked on the remaining loops of rounds 14 and 25 using yarn B. They create decorative trim lines that define the circus costume sections and give the elephant a polished, professional look. Don't skip this step!

How do I join the small and large ear parts correctly?

After completing the small part, don't break the yarn on the large part. Instead, use 1 slip stitch to join them together, then continue crocheting around both pieces as instructed. The pattern photos show the exact placement.

Is the ball difficult to make with the color changes?

The ball uses a systematic color alternation pattern clearly marked in the instructions (red letters for yarn E, black letters for yarn F). As long as you follow the color coding carefully and change colors cleanly, you'll create perfectly even stripes throughout the sphere.