🧶 Beautiful ✨ Detailed 💝 Adorable

Cheshire Cat Amigurumi Pattern

Cheshire Cat Amigurumi Pattern
4.5★ Rating
8-10 Hours Time Needed
4.2K Made This
✂️

Intermediate Level

Ideal for those with basic knitting experience, featuring slightly more advanced stitches and techniques to expand your skills.

⏱️

All-Day Adventure

Requires 8-10 hours, ideal for a full day of immersive knitting.

🐰

Whimsical Buddy

Playful characters full of personality, designed to spark imagination and become cherished playtime favorites.

About This Cheshire Cat Amigurumi Pattern

This Cheshire Cat pattern captures the magical essence of Wonderland's most mysterious character. With its distinctive pink and fuchsia striped pattern throughout the body, tail, arms, and legs, this amigurumi brings the iconic grinning feline to life. The pattern includes detailed instructions for creating the cat's signature wide smile complete with individual crocheted teeth, expressive yellow eyes with safety eye backing, and adorable whiskers and eyebrows that give personality to this beloved character.

Cheshire Cat Amigurumi Pattern crochet pattern - detailed view of completed project

The sitting position design makes this Cheshire Cat stable and perfect for display. Color changes throughout create the classic striped appearance that fans will instantly recognize and love.

Why You'll Love This Cheshire Cat Amigurumi Pattern

I absolutely love this Cheshire Cat pattern because it brings such a beloved character to life in the most charming way. The color-changing technique creates those iconic stripes that make the Cheshire Cat instantly recognizable, and working through the striping pattern is surprisingly meditative and fun. What really makes this pattern special is the attention to detail in the face—from the embroidered smile line to the individually crafted teeth and whiskers. The bobble stitches on the paws add a sweet textured detail that makes the finished piece even more delightful. Every time I look at the completed cat with its mischievous grin, it brings a smile to my face and reminds me why I love creating amigurumi characters.

Cheshire Cat Amigurumi Pattern step 1 - construction progress Cheshire Cat Amigurumi Pattern step 2 - assembly progress Cheshire Cat Amigurumi Pattern step 3 - details and accessories Cheshire Cat Amigurumi Pattern step 4 - final assembly and finishing

Switch Things Up

I love experimenting with this Cheshire Cat pattern to make each version uniquely mine. Sometimes I swap the traditional pink and fuchsia stripes for purple and lavender tones, or even try a classic tabby cat color scheme with brown and tan stripes for a more realistic feline look.

The bobble stitches on the paws are perfect for customization—I've tried adding tiny embroidered claws using black thread or even leaving them smooth for a simpler finish. You could also adjust the facial expression by changing the eyebrow angle or making the smile slightly smaller for a subtler grin.

For a different aesthetic, consider making the eyes larger or using different colored safety eyes like green or blue instead of the yellow with black backing. I've even added small fabric or felt details to create a bowtie or collar for a more dressed-up version.

The tail offers great flexibility too—you could make it shorter and curlier by decreasing the rounds, or create a completely different striping pattern for a unique look. Some makers like to add wire inside the tail to make it poseable, which adds wonderful display options.

Don't be afraid to adjust the sizing by using different yarn weights and hook sizes. A chunky yarn version becomes a wonderful oversized cuddle buddy, while thread weight creates an adorable miniature charm. The possibilities are truly endless with this adaptable pattern!

Common Mistakes & How to Fix Them

✗ Losing track of color changes in striped sections—use stitch markers at the beginning of each round to stay organized and maintain stripe accuracy ✗ Making the teeth too loose or uneven—ensure consistent tension when crocheting the teeth piece and pin carefully before sewing for best placement ✗ Stuffing the striped body and tail too firmly—overstuffing can distort the stripe pattern, so stuff moderately to maintain clean color transitions ✗ Misplacing the facial features—always use pins to position eyes, nose, whiskers, and eyebrows before final assembly to achieve the characteristic Cheshire expression

Cheshire Cat Amigurumi Pattern

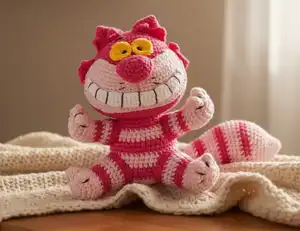
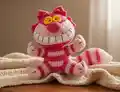
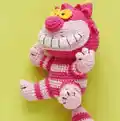
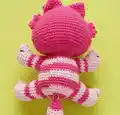
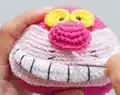
Bring the iconic grinning Cheshire Cat from Alice in Wonderland to life with this enchanting amigurumi pattern. This delightful project features the cat's signature pink and fuchsia striped body, mischievous smile with visible teeth, and that unforgettable wide grin. Perfect for fans of Lewis Carroll's classic tale, this pattern guides you through creating a charming sitting cat complete with striped tail, playful whiskers, and expressive yellow eyes that capture the character's whimsical personality.

Intermediate 8-10 Hours

Materials Needed for Cheshire Cat Amigurumi Pattern

— Main Fabric

  • 01
    Fuchsia yarn - Susan Cotton 63 (50g, 120m) or YarnArt Jeans 59 (50g, 160m)
  • 02
    Light pink yarn - YarnArt Jeans 18 (50g, 160m)
  • 03
    White yarn - YarnArt Jeans 01 (50g, 160m)
  • 04
    Yellow yarn - YarnArt Jeans 35 (50g, 160m)

— Tools Required

  • 01
    Crochet hook size 2.5mm
  • 02
    Safety eyes size 6mm (1 pair)
  • 03
    Tapestry needles
  • 04
    Black thread for embroidery
  • 05
    Pins
  • 06
    Stitch markers
  • 07
    Scissors
  • 08
    Polyester fiberfill stuffing

Progress Tracker

0% Complete

— Head (yarn A) :

Round 1 :

ch 8, start on the 2nd st from the hook, sc 6, (sc 3) in the same stitch, continue to crochet on the other side of the foundation chain, sc 5, inc (16)

Round 2 :

inc, sc 5, inc 3, sc 5, inc 2 (22)

Round 3 :

sc 1, inc, sc 5, [sc 1, inc] 3x, sc 5, [sc 1, inc] 2x (28)

Round 4 :

sc 2, inc, sc 5, [sc 2, inc] 3x, sc 5, [sc 2, inc] 2x (34)

Round 5 :

sc 3, inc, sc 5, [sc 3, inc] 3x, sc 5, [sc 3, inc] 2x (40)

Round 6 :

sc 2, inc, sc 7, [sc 2, inc, sc 2] 3x, sc 5, [sc 2, inc, sc 2] 2x (46)

Round 7 :

sc 46 (46)

Round 8 :

sc 5, inc, sc 5, [sc 5, inc] 3x, sc 5, [sc 5, inc] 2x (52)

Round 9 :

sc 52 (52)

Round 10 :

sc 21, inc 3, sc 24, inc 3, sc 1 (58)

Round 11 :

sc 58 (58)

Round 12 :

sc 21, [sc 1, inc] 3x, sc 24, [sc 1, inc] 3x, sc 1 (64)

Round 13 :

sc 64 (64)

Round 14 :

sc 21, [sc 1, inc, sc 1] 3x, sc 24, [sc 1, inc, sc 1] 3x, sc 1 (70)

Round 15-20 :

sc 70 (6 rnds) (70)

Round 21 :

[sc 5, dec] 10x (60)

Round 22 :

[sc 2, dec, sc 2] 10x (50)

Round 23 :

[sc 3, dec] 10x, stuff firmly (40)

Round 24 :

[sc 3, dec] 8x (32)

Round 25 :

[sc 1, dec, sc 1] 8x (24)

Info :

Break the yarn with a long rest, use 2 pins to locate the eyes between rnd 8&9, 3 sts apart (we will insert the eyes after)

— Pink Face (yarn B) :

Round 1 :

ch 25, start on the 2nd st from the hook, sc 6, dec, sc 7, dec, sc 6, (sc 3) in the last stitch, continue to crochet on the other side, sc 22, inc (48)

Round 2 :

sc 22, inc 3, sc 20, inc 3 (54)

Round 3 :

sc 1, dec, sc 16, dec, sc 1, inc 5, hdc 3, hdc inc in the same st, [hdc 4, hdc inc] 3x, hdc 3, inc 5 (66)

Round 4 :

sc 5, dec, sc 6, dec, sc 5, [inc, sc 2] 2x, inc, hdc 2, hdc inc, hdc 6, hdc inc, hdc 12, hdc inc, hdc 6, hdc inc, hdc 2, inc, [sc 2, inc] 2x (74)

Round 5 :

sc 4, dec, sc 6, dec, sc 4, [inc, sc 3] 3x, inc, sc 30, inc, [sc 3, inc] 3x, slst on the 1st st (80)

Info :

Break the yarn with a really long rest to sew later. Use pins to locate the face on the head (we sew the face between rnd 8-rnd 19 of the head)

— Teeth (yarn C) :

Round 1 :

ch 30, start on the 2nd st from the hook, slst 1, sc 1, hdc 2, dc 3, tr 2, (tr inc) in the same st, tr 4, tr inc, tr 4, tr inc, tr 2, dc 3, hdc 2, sc 1, slst 1 (32)

Info :

Break the yarn with a long rest to sew later. Use pins to locate the teeth on the face & use tapestry needle to sew the 1st & last st of the teeth on the face (we will use black thread to fix the teeth later)

— Eyes (yarn D, make 2) :

Round 1 :

sc 7 into a magic loop (7)

Round 2 :

inc 7, slst on the 1st st (14)

Info :

Break the yarn, insert black safety eyes on the eyes, then insert the eyes between rnd 8&9 of the head

— Nose (yarn A) :

Round 1 :

ch 6, start on the 2nd st from the hook, sc 4, (sc 3) in the last stitch, continue to crochet on the other side, sc 3, inc (12)

Round 2 :

inc, sc 3, inc 3, sc 3, inc 2 (18)

Round 3 :

sc 3, inc 2, sc 13 (20)

Round 4 :

sc 4, inc 2, sc 14 (22)

Info :

Break the yarn, sew the nose right below the eyes. Use black thread to embroider the teeth line & whiskers. Use darker pink yarn/thread to sew a line between the face

— Whiskers (yarn A, make 2) :

Round 1 :

ch 10, start on the 5th st from the hook, slst 1, [ch 4, slst on the next st] 5x

Info :

Break the yarn with a long rest to sew later

— Right Eyebrow (yarn A) :

Round 1 :

ch 5, start on the 2nd st from the hook, sc, hdc, dc, tr, ch 4, start on the 2nd st from the hook, sc, hdc, dc

Info :

Break the yarn with a long rest to sew later

— Left Eyebrow (yarn A) :

Round 1 :

ch 4, start on the 2nd st from the hook, sc, hdc, dc, ch 5, start on the 2nd st from the hook, sc, hdc, dc, tr

Infos :

Break the yarn with a long rest to sew later. Use tapestry needle to sew the Whiskers from rnd 10-rnd 14 of the head, 2 sts apart from the face. Sew the right & left eyebrow above the eyes 3-4 rnds, 3 sts apart

— Ears (yarn A, make 2) :

Round 1 :

sc 3 into a magic loop (3)

Round 2 :

inc 3 (6)

Round 3 :

[sc 1, inc] 3x (9)

Round 4 :

[sc 1, inc, sc 1] 3x (12)

Round 5 :

[sc 3, inc] 3x (15)

Round 6 :

[sc 2, inc, sc 2] 3x (18)

Info :

Break the yarn, sew 2 edges together, then sew the ears on the head, 2 rnds behind the eyebrows

— Body (yarn A and B striped) :

Info :

We will change between yarn B & yarn A 3 rnds. Yarn A: black words, yarn B: red words

Round 1 :

sc 7 into a magic loop (7)

Round 2 :

inc 7 (14)

Round 3 :

[sc 1, inc] 7x (21)

Round 4 :

[sc 1, inc, sc 1] 7x (28)

Round 5 :

[sc 3, inc] 7x (35)

Round 6 :

[sc 2, inc, sc 2] 7x (42)

Round 7-9 :

sc 42 (3 rnds) (42)

Round 10-12 :

sc 42 (3 rnds) (42)

Round 13-14 :

sc 42 (2 rnds) (42)

Round 15 :

[sc 5, dec] 6x (36)

Round 16-17 :

sc 36 (2 rnds) (36)

Round 18 :

[sc 4, dec] 6x, stuff firmly (30)

Round 19-20 :

sc 30 (2 rnds) (30)

Round 21 :

[sc 3, dec] 6x (24)

Info :

Break the yarn, sew the body on the head

— Legs (yarn B and A striped, make 2) :

Round 1 :

sc 8 into a magic loop (8)

Round 2 :

inc 8 (16)

Round 3 :

[sc 1, inc] 8x (24)

Round 4 :

sc 8, [Bobble (4 hdc on the same st), sc 2] 3x, sc 7 (24)

Round 5 :

sc 24 (24)

Round 6 :

sc 7, [sc 1, dec] 3x, sc 8 (21)

Round 7 :

sc 7, dec 3, sc 8 (18)

Round 8 :

sc 7, dec 2, sc 7, do not break yarn B, change to yarn A (16)

Round 9 :

sc 16 (16)

Round 10 :

[sc 7, inc] 2x (18)

Round 11 :

sc 18, do not break yarn A, change to yarn B (18)

Round 12 :

[sc 4, inc, sc 4] 2x (20)

Round 13 :

sc 20 (20)

Round 14 :

[sc 9, inc] 2x, change to yarn A (22)

Round 15 :

sc 22 (22)

Round 16 :

[sc 5, inc, sc 5] 2x (24)

Info :

Break the yarn, stuff firmly, sew 2 legs on the body (make sure the legs & body can touch the ground and Cheshire can sit on its own)

— Arms (yarn B and A striped, make 2) :

Round 1 :

sc 7 into a magic loop (7)

Round 2 :

inc 7 (14)

Round 3 :

[sc 1, inc] 7x (21)

Round 4 :

sc 6, [Bobble (4 hdc on the same st), sc 2] 3x, sc 6 (21)

Round 5 :

sc 21 (21)

Round 6 :

sc 6, [sc 1, dec] 3x, sc 6 (18)

Round 7 :

sc 6, dec 3, sc 6 (15)

Round 8 :

[sc 3, dec] 3x, do not break yarn B, change to yarn A (12)

Round 9 :

sc 12 (12)

Round 10 :

[sc 5, inc] 2x, do not break yarn A, change to yarn B (14)

Round 11 :

sc 14 (14)

Round 12 :

[sc 3, inc, sc 3] 2x, change to yarn A (16)

Round 13 :

sc 16 (16)

Round 14 :

[sc 7, inc] 2x (18)

Info :

Break the yarn, stuff firmly, sew 2 arms on the body. Use black thread to embroider black lines between each Bobble on arms & legs

— Tail (yarn B and A striped) :

Info :

Yarn B: black words, yarn A: red words

Round 1 :

sc 4 into a magic loop (4)

Round 2 :

[sc 1, inc] 2x (6)

Round 3 :

[sc 1, inc] 3x (9)

Round 4 :

[sc 2, inc] 3x (12)

Round 5 :

[sc 3, inc] 3x (15)

Round 6 :

[sc 4, inc] 3x (18)

Round 7 :

[sc 2, inc] 6x (24)

Round 8 :

sc 24 (24)

Round 9 :

[sc 3, inc] 6x (30)

Round 10 :

sc 30 (30)

Round 11 :

[sc 4, inc] 6x (36)

Round 12 :

sc 36, leave yarn B here, do not cut yarn B, we will continue to crochet later (36)

Round 13 :

join yarn A on the 13th st on rnd 12, ch 1, sc 1 on the same st of the ch 1, sc 11, break yarn A (12)

Round 14 :

join yarn A on the 10th st on rnd 12, ch 1, sc 1 on the same st of the ch 1, sc 17, break yarn A (18)

Round 15 :

join yarn A on the 7th st on rnd 12, ch 1, sc 1 on the same st of the ch 1, sc 23, break yarn A (24)

Round 16 :

Continue with yarn B on rnd 12, sc 36 (36)

Round 17-18 :

sc 36 (2 rnds) (36)

Round 19-21 :

Repeat rnd 13-15 (3 rnds) (24)

Round 22-23 :

sc 36 (2 rnds) (36)

Round 24 :

[sc 4, dec] 6x, leave yarn B here, do not cut yarn B, we will continue to crochet later (30)

Round 25 :

join yarn A on the 12th st on rnd 24, ch 1, sc 1 on the same st of the ch 1, sc 7, break yarn A (8)

Round 26 :

join yarn A on the 9th st on rnd 24, ch 1, sc 1 on the same st of the ch 1, sc 13, break yarn A (14)

Round 27 :

join yarn A on the 6th st on rnd 24, ch 1, sc 1 on the same st of the ch 1, sc 19, break yarn A (20)

Round 28-29 :

Continue with yarn B on rnd 24, sc 30 (2 rnds) (30)

Round 30 :

[sc 3, dec] 6x, change to yarn A (24)

Round 31-32 :

sc 24 (2 rnds), stuff firmly (24)

Round 33 :

[sc 2, dec] 6x, change to yarn B (18)

Round 34-35 :

sc 18 (2 rnds) (18)

Round 36 :

[sc 1, dec] 6x, change to yarn A (12)

Round 37-38 :

sc 12 (2 rnds) (12)

Round 39 :

dec 6 (6)

Info :

Break the yarn, weave in the last 6 sts. Use a small metal ring, pull the ring through the last st on the body's rnd 2. Use yarn A to sew the tail on the ring, hide the remaining yarn

Assembly Instructions

  • Sew the pink face piece onto the head between rounds 8-19, using pins to position it carefully before stitching securely
  • Position and sew the white teeth piece onto the pink face, pinning first and last stitches before using black thread to secure
  • Insert yellow eye pieces with safety eyes attached between rounds 8-9 of the head, spacing them 3 stitches apart
  • Attach the nose piece directly below the eyes on the pink face area
  • Sew whiskers onto head from rounds 10-14, positioning them 2 stitches apart from the face edges
  • Attach eyebrows 3-4 rounds above the eyes with 3 stitches spacing between right and left brows
  • Sew ears to the top of the head, positioning them 2 rounds behind the eyebrows for proper placement
  • Stuff the striped body firmly and sew it to the completed head, ensuring stability
  • Attach both legs to the body ensuring the cat can sit independently without tipping over
  • Sew the arms to the sides of the body at an appropriate height for a natural sitting pose
  • Use black embroidery thread to create lines on the teeth and between bobble stitches on paws
  • Attach the striped tail using a small metal ring through the last stitch of round 2 on the body

Important Notes

  • 💡Keep yarn B and yarn A attached during striping rounds rather than breaking them to maintain clean color transitions
  • 💡Use stitch markers at the start of each round when working the striped sections to avoid losing your place
  • 💡Pin all facial features before sewing to ensure the characteristic Cheshire Cat expression is achieved
  • 💡Don't overstuff the striped body and tail as this can distort the stripe pattern visibility
  • 💡When working the complex tail striping pattern, follow the color change instructions carefully and refer to photos
  • 💡Embroider the face details last after all pieces are assembled for best placement accuracy

This enchanting Cheshire Cat pattern brings the magic of Wonderland right into your hands with its signature striped design and mischievous grin. The clever color-changing technique creates those iconic pink and fuchsia stripes while the detailed facial features capture the cat's playful personality perfectly. Whether you're a fan of Alice in Wonderland or simply love creating whimsical characters, this sitting cat with its elaborate striped tail makes a wonderful display piece or gift. 🧶 Happy crocheting! ✨😸

You ask,

we answer.

FAQs

How do I keep track of the color changes in the striped sections?

Don't break the yarns between stripe changes—simply leave them attached and pick up the appropriate color every 3 rounds. Use stitch markers at the beginning of each round to help track your progress and maintain even stripes throughout the body, legs, arms, and tail.

What's the best way to create the teeth piece?

The teeth are worked in one continuous row with increasing stitch heights from slip stitches to treble increases. Use consistent tension throughout and pin the first and last stitches to the pink face before sewing. The black embroidery thread will help secure and define each tooth.

How do I work the complex striping pattern on the tail?

The tail uses an advanced technique where you temporarily join yarn A at specific stitches while keeping yarn B in place. Follow the stitch numbers carefully for where to join yarn A, work the specified stitches, then break yarn A and continue with yarn B. Reference the photos in the pattern for visual guidance.

Can I make the Cheshire Cat stand instead of sit?

This pattern is specifically designed for a sitting position to ensure stability. The leg and body construction creates balance for sitting. If you want a standing version, you would need to modify the leg length and body attachment significantly.

How do I achieve the wide grinning expression?

The characteristic grin comes from the combination of the shaped pink face piece, the curved teeth insert, and the embroidered smile line. Pin everything in place before sewing, and use the darker pink thread to create the dividing line across the face for maximum effect.