About This Adorable 2-in-1 Ladybug Amigurumi Pattern
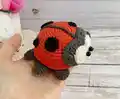
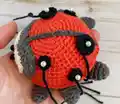
Working in continuous spirals, this pattern uses basic stitches and increases to create smooth, professional-looking results. The finished ladybug is sturdy yet huggable, with a delightful personality that shines through its beaded eyes and carefully crafted features.
Why You'll Love This Adorable 2-in-1 Ladybug Amigurumi Pattern
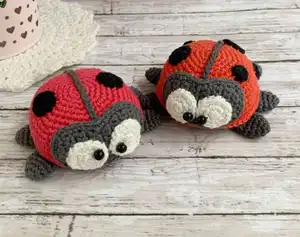
I absolutely love this pattern because it's incredibly satisfying to watch this little ladybug come to life with each round! The construction method is straightforward, making it perfect for practicing your amigurumi skills without feeling overwhelmed. I especially enjoy the creative freedom of deciding how many spots to add and where to place them, making each ladybug truly unique. The size is perfect for using up yarn scraps, and the finished project works wonderfully as a pin cushion, desk buddy, or gift for nature lovers. What I find most rewarding is how quickly you can complete this project while still achieving a polished, professional-looking result that you'll be proud to display or give away.
Switch Things Up
I love experimenting with color variations for this adorable ladybug pattern! Instead of the traditional red and black, try creating a yellow ladybug with white spots for a sunshine-bright version, or go bold with a blue body and silver spots for a fantasy-inspired look.
You could also transform this pattern into different insects by adjusting the colors and spot placement—think orange with black stripes for a beetle, or pastel colors for a whimsical garden fairy companion.
For a seasonal twist, I've made Halloween versions using orange and purple yarn with glow-in-the-dark spots, and Christmas editions with green bodies and red spots that double as festive ornaments.
If you want to add more personality, consider crocheting a tiny flower or leaf separately and attaching it near the ladybug's head, as if it's sitting on garden foliage.
Another fun variation is creating a whole family of ladybugs in different sizes by using various yarn weights—make a mama ladybug in worsted weight, a papa in bulky, and tiny babies in fingering weight yarn.
Common Mistakes & How to Fix Them
✗ Crocheting too loosely which allows stuffing to show through—use a smaller hook size to create tighter stitches and prevent gaps
✗ Forgetting to stuff the body as you join the pieces together—pause regularly to add stuffing for proper shaping
✗ Misaligning the muzzle when sewing it onto the body—use pins to position it correctly before permanently attaching it
✗ Placing the eyes unevenly or too far apart—measure the distance carefully and mark positions with pins before sewing