Create an absolutely adorable stuffed kangaroo mama standing 55cm tall with her precious 19cm baby joey tucked safely in her pouch! This comprehensive pattern guides you through crafting a lifelike kangaroo complete with posable arms using wire frames, detailed facial features with safety eyes, and that signature kangaroo pouch perfect for holding the baby. The combination of soft velvet yarn and intricate needle sculpting brings incredible personality to this Australian marsupial duo, making it an ideal gift or showpiece for any amigurumi collection.
Progress Tracker
0% Complete
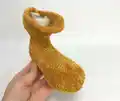
— Legs :
Round 1 :
Make foundation chain 21ch, work 2 sc into second chain from hook, work 9 sc more, next 9 hdc, work 4 hdc into one chain, turn and work on other side 9 hdc more, 9 sc, work 2 sc into one ch (44)
Round 2 :
2 inc (sc), 9 sc, 9 hdc, 4 inc (hdc), 9 hdc, 9 sc, 2 inc (sc) (52)
Round 3 :
(1 sc, 1 inc (sc))*2, 9 sc, 9 hdc, (1 hdc, 1 inc (hdc))*4, 9 hdc, 9 sc, (1 sc, 1 inc (sc))*2 (60)
Round 5 :
60 sc in BLO (60)
Round 6-8 :
60 sc (60) - repeat 3 times
Round 9 :
Crochet hook №3 (US D), 24 sc, (1 sc, 1 dec)*4, 24 sc (56)
Round 10 :
Crochet hook №3 (US D), 24 sc, 4 dec, 24 sc (52)
Info :
Position of stitches: 18 stitches on back portion, 34 stitches on front portion (toes part). Use crochet hook №3.5 (US E) from round 11. Proceed to fill toy with stuffing material.
Round 13 :
(5 sc, 1 inc)*3 (21)
Round 14 :
(6 sc, 1 inc)*3 (24)
Round 15 :
(3 sc, 1 inc)*6 (30)
Round 16 :
(4 sc, 1 inc)*6 (36)
Info :
Working thread should be at back and in middle to ensure increases on rounds 17, 18, 19 are located in front and middle of leg
Round 17 :
15 sc, 2 inc, 19 sc (38)
Round 18 :
15 sc, (1 sc, 1 inc)*2, 19 sc (40)
Round 19 :
12 sc, (1 sc, 1 inc)*6, 16 sc (46)
Info :
Fasten off, cut off, stuff it. First leg completed, crochet second leg in similar manner.
— Tail :
Info :
Stuff as you go every 3-4 cm (1-2 inch)
Round 9 :
8 sc, 1 inc (10)
Round 11 :
9 sc, 1 inc (11)
Round 13 :
10 sc, 1 inc (12)
Round 15 :
11 sc, 1 inc (13)
Round 17 :
12 sc, 1 inc (14)
Round 19 :
13 sc, 1 inc (15)
Round 21 :
14 sc, 1 inc (16)
Round 23 :
15 sc, 1 inc (17)
Round 25 :
16 sc, 1 inc (18)
Round 27 :
17 sc, 1 inc (19)
Round 29 :
18 sc, 1 inc (20)
Round 31 :
19 sc, 1 inc (21)
Round 33 :
20 sc, 1 inc (22)
Round 35 :
21 sc, 1 inc (23)
Round 37 :
22 sc, 1 inc (24)
Round 39 :
23 sc, 1 inc (25)
Round 41 :
24 sc, 1 inc (26)
Info :
Fasten off, cut off
— The Crotch :
Round 3 :
(1 sc, 1 inc)*8 (24)
Round 4 :
(2 sc, 1 inc)*8 (32)
Round 5 :
(3 sc, 1 inc)*8 (40)
Round 6 :
(4 sc, 1 inc)*8 (48)
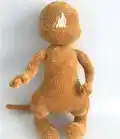
— Connect Legs and Form Body :
Info :
Use Kamtex yarn in brown color for sewing legs. Prepare four markers. Ensure legs are positioned evenly and attached at crotch area. Mark points where legs will be joined using markers. Stitch division: 8 stitches to be joined on each side. Working thread should be located at back.
Round 7-9 :
108 sc (108) repeat 3 times - crochet 10 sc on back, 38 sc on left leg, 16 sc on crotch, 38 sc on right leg, 6 sc on back
Round 10 :
32 sc, (1 sc, 1 dec)*6, 16 sc, (1 sc, 1 dec)*6, 24 sc (96)
Info :
16 sc should be in middle of front. Mark 10 stitches on tail from back and in middle. If needed, adjust position of working thread by undoing 2 stitches. Sew tail onto toy using brown Kamtex thread.
Round 11 :
96+26-10-10=102 sc (102)
Info :
Adjust position of working thread
Round 12 :
6 sc, 1 dec, (11 sc, 1 dec)*3, 55 sc (98)
Round 13 :
5 sc, 1 dec, (10 sc, 1 dec)*3, 55 sc (94)
Round 14 :
4 sc, 1 dec, (9 sc, 1 dec)*3, 55 sc (90)
Round 15 :
(13 sc, 1 dec)*6 (84)
Round 16 :
(12 sc, 1 dec)*6 (78)
Round 17 :
(11 sc, 1 dec)*6 (72)
Round 18 :
(10 sc, 1 dec)*6 (66)
Round 19 :
(9 sc, 1 dec)*6 (60)
Round 20-32 :
60 sc (60) - repeat 13 times
Info :
Ensure working thread is positioned in middle of side
Round 32 :
35 sc, (1 sc, 1 inc)*10, 5 sc (70)
Round 33-36 :
70 sc (70) - repeat 4 times
Info :
Put body aside, crochet hands next
— Hands :
Round 1 :
Foundation chain 6ch, work 1 sc into second chain from hook, work 4 sc more
Round 2 :
Make ch 6, work 1 sc into second chain from hook, work 4 sc
Round 3 :
Make ch 6, work 1 sc into second chain from hook, work 4 sc
Round 4 :
Crochet along edge 8 sc
Round 5 :
Making a ring: have round of 8 sts. Crochet 8 sc in FLO, turn, continue crocheting other side 8 sc in FLO. Round of 16 sc (16)
Round 6 :
(2 sc, 1 dec)*4 (12)
Round 7 :
(4 sc, 1 dec)*2 (10)
Info :
Insert wire: prepare two pieces of wire, each 100 cm/40 inches. Twist together to obtain wire with two strands. Wrap edge with adhesive tape and insert into hand. Loosely fill hand during crocheting.
Round 9-11 :
10 sc (10) - repeat 3 times
Round 12 :
(4 sc, 1 inc)*2 (12)
Round 13-16 :
12 sc (12) - repeat 4 times
Round 17 :
(5 sc, 1 inc)*2 (14)
Round 18-21 :
14 sc (14) - repeat 4 times
Round 22 :
(6 sc, 1 inc)*2 (16)
Round 23-27 :
16 sc (16) - repeat 5 times
Info :
Fasten off, cut off. Make 2 pieces.
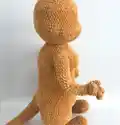
— Connect Body and Hands :
Info :
Connect hands to body using three stitches, stitching with semi-cotton thread that matches yarn color. Refer to photo for stitch distribution.
Round 37 :
Use crochet hook №3 (US D), crochet 29 sc on back, 13 sc on left arm, 2 sc, (1 sc,1 dec)*10, 2 sc on chest, 13 sc on right arm, 1 sc on back. Stuff toy as you go (80)
Round 38 :
28 sc, (3 sc, 1 dec)*3, 22 sc, (1 dec, 3 sc)*3 (74)
Round 39 :
28 sc, (2 sc, 1 dec)*3, 22 sc, (1 dec, 2 sc)*3 (68)
Round 40 :
28 sc, (1 sc, 1 dec)*3, (6 sc, 1 dec)*2, 6 sc, (1 dec, 1 sc)*3 (60)
Round 41 :
(13 sc, 1 dec)*4 (56)
Round 42 :
(5 sc, 1 dec)*8 (48)
Round 43 :
(4 sc, 1 dec)*8 (40)
Round 44 :
(3 sc, 1 dec)*8 (32)
Round 45 :
(2 sc, 1 dec)*8 (24)
— Head :
Info :
Don't cut off, continue to crochet. From 46th round use hook №3.5 (US E)
Round 47 :
(2 sc, 1 inc)*8 (32)
Round 48 :
(3 sc, 1 inc)*8 (40)
Round 49 :
(4 sc, 1 inc)*8 (48)
Round 50 :
(5 sc, 1 inc)*8 (56)
Round 51 :
(6 sc, 1 inc)*8 (64)
Round 52 :
(7 sc, 1 inc)*8 (72)
Round 53 :
(8 sc, 1 inc)*8 (80)
Round 54-57 :
80 sc (80) - repeat 4 times
Round 58 :
Position working thread on side. Use hook №3 (US D), 38 sc, (1 sc, 1 dec)*14 (66). Decreases should be positioned in middle of front.
Round 59 :
Brown color (80330): (1 sc, 1 dec)*2, 26 sc, (1 sc, 1 dec)*3, 9 sc, Color light powder (80353): 4 sc, Brown color (80330): 9 sc, 1 sc, 1 dec (60)
Round 60-63 :
Brown color: 45 sc, Color light powder: 4 sc, Brown color: 11 sc (60) - repeat 4 times
Round 64 :
Brown color: 46 sc, Color light powder: 2 sc, Brown color: 12 sc (60)
Round 65 :
Brown color: 47 sc, Color light powder: 1 sc, Brown color: 12 sc (60)
Round 66 :
From this round, crochet in brown. Stuff toy as you go. (8 sc, 1 dec)*6 (54)
Round 67 :
(7 sc, 1 dec)*6 (48)
Round 68 :
(6 sc, 1 dec)*6 (42)
Round 69 :
(5 sc, 1 dec)*6 (36)
Round 70 :
(4 sc, 1 dec)*6 (30)
Round 71 :
(3 sc, 1 dec)*6 (24)
Round 72 :
(2 sc, 1 dec)*6 (18)
Round 73 :
(1 sc, 1 dec)*6 (12)
Info :
Pull thread closed, cut off and weave in tail end
— Belly :
Row 1 :
Make foundation chain 5ch, work 1 sc into second chain from hook then work 3 sc more (5)
Row 2-4 :
Turn work, ch1, 3 sc (4) - repeat 3 times
Row 5 :
Turn work, ch1, 2 inc, 1 sc (6)
Row 6 :
Turn work, ch1, 1 inc, 2 sc, 1 inc, 1 sc (8)
Row 7-13 :
< p>Turn work, ch1, 7 sc (8) - repeat 7 timesRow 14 :
Turn work, ch1, 1 dec, 2 sc, 1 dec, 1 sc (6)
Row 15 :
Turn work, ch1, 2 dec, 1 sc (4)
Row 16 :
Turn work, ch1, 2 inc, 1 sc (6)
Row 17 :
Turn work, ch1, 1 inc, 2 sc, 1 inc, 1 sc (8)
Row 18-19 :
Turn work, ch1, 7 sc (8)
Row 20 :
Turn work, ch1, 1 inc, 4 sc, 1 inc, 1 sc (10)
Row 21-22 :
Turn work, ch1, 9 sc (10)
Row 23 :
Turn work, ch1, 1 inc, 6 sc, 1 inc, 1 sc (12)
Row 24-25 :
Turn work, ch1, 11 sc (12)
Row 26 :
Turn work, ch1, 1 inc, 8 sc, 1 inc, 1 sc (14)
Row 27-37 :
Turn work, ch1, 13 sc (14) - repeat 11 times
Row 38 :
Turn work, ch1, 1 dec, 8 sc, 1 dec, 1 sc (12)
Row 39-40 :
Turn work, ch1, 11 sc (12)
Row 41 :
Turn work, ch1, 1 dec, 6 sc, 1 dec, 1 sc (10)
Row 42-43 :
Turn work, ch1, 9 sc (10)
Row 44 :
Turn work, ch1, 1 dec, 4 sc, 1 dec, 1 sc (8)
Row 45-70 :
Turn work, ch1, 7 sc (8) - repeat 26 times
Row 71 :
Turn work, ch1, 1 dec, 2 sc, 1 dec, 1 sc (6)
Row 72-74 :
Turn work, ch1, 5 sc (6) - repeat 3 times
Row 75 :
Turn work, ch1, 2 dec, 1 sc (4)
Row 76-78 :
Turn work, ch1, 3 sc (4) - repeat 3 times
Row 79 :
Turn work, 2 dec (2)
Row 80-82 :
Turn work, ch1, 1 sc (2) - repeat 3 times
Info :
Fasten off, cut off. Using Camtex thread that matches yarn color, sew together belly and chest of toy while stuffing area slightly.
— Muzzle (Upper Part) :
Round 1 :
Make foundation chain 7ch, work 2 sc into second chain from hook, work 4 sc more, work 4 sc into one ch, turn and on other side crochet 4 sc more, work 2 sc into one ch (16)
Round 2 :
Brown color: 2 inc, Color light powder: 4 sc, Brown color: 4 inc, 4 sc, 2 inc (24)
Round 3 :
Brown color: (1 sc, 1 inc)*2, Color light powder: 4 sc, Brown color: (1 sc, 1 inc)*4, 4 sc, (1 sc, 1 inc)*2 (32)
Round 4-5 :
Brown color: 6 sc, Color light powder: 4 sc, Brown color: 22 sc (32)
Info :
Fasten off, cut off. Using Camtex thread that matches yarn color, sew between rounds 52 and 59.
— Nose :
Round 1 :
Make foundation chain 5ch, work 2 sc into second chain from hook, work 2 sc more, work 4 sc into one ch, turn and on other side crochet 2 sc more, work 2 sc into one ch (12)
Info :
Fasten off, cut off. Using black Camtex thread, sew nose onto head, positioning at distance of 2 stitches from head.
— Muzzle (Lower Part) :
1st Part - 1 pc :
Round 1: Make foundation chain 7ch, work 2 sc into second chain from hook, work 4 sc more, work 4 sc into one ch, turn and on other side crochet 4 sc more, work 2 sc into one ch (16). Round 2: 2 inc, 4 sc, 4 inc, 4 sc, 2 inc (24). Round 3: 24 sc (24). Fasten off and cut off.
2nd Part - 1 pc :
Round 1: Make foundation chain 7ch, work 2 sc into second chain from hook, work 4 sc more, work 4 sc into one ch, turn and on other side crochet 4 sc more, work 2 sc into one ch (16). Fasten off and cut off.
3rd Piece - 1 pc :
Round 1: 6 sc in MR (6). Fasten off and cut off.
Info :
Sew third part onto second part, then sew resulting piece onto first part. Use thread that matches yarn color. Additionally, sew head to body using brown Camtex thread. Embroider black line on muzzle.
— Kangaroo Bag :
Row 1 :
Make foundation chain 51ch, work 1 sc into second chain from hook, work 49 sc more (50)
Row 2-9 :
Turn work, ch1, 49 sc (50) - repeat 8 times
Row 10 :
Turn work, ch1, 1 dec, 44 sc, 1 dec, 1 sc (48)
Row 11 :
Turn work, ch1, 1 dec, 42 sc, 1 dec, 1 sc (46)
Row 12 :
Turn work, ch1, 1 dec, 40 sc, 1 dec, 1 sc (44)
Row 13 :
Turn work, ch1, 1 dec, 38 sc, 1 dec, 1 sc (42)
Row 14 :
Turn work, ch1, 1 dec, 36 sc, 1 dec, 1 sc (40)
Row 15 :
Turn work, ch1, 1 dec, 34 sc, 1 dec, 1 sc (38)
Row 16 :
Turn work, ch1, 1 dec, 32 sc, 1 dec, 1 sc (36)
Row 17 :
Turn work, ch1, 1 dec, 30 sc, 1 dec, 1 sc (34)
Row 18 :
Turn work, ch1, 1 dec, 28 sc, 1 dec, 1 sc (32)
Row 19 :
Turn work, ch1, 1 dec, 26 sc, 1 dec, 1 sc (30)
Row 20 :
Turn work, ch1, 1 dec, 24 sc, 1 dec, 1 sc (28)
Row 21 :
Turn work, ch1, 1 dec, 22 sc, 1 dec, 1 sc (26)
Row 22 :
Turn work, ch1, 1 dec, 20 sc, 1 dec, 1 sc (24)
Row 23 :
Turn work, ch1, 1 dec, 18 sc, 1 dec, 1 sc (22)
Row 24 :
Turn work, ch1, 1 dec, 16 sc, 1 dec, 1 sc (20)
Row 25 :
Turn work, ch1, 1 dec, 14 sc, 1 dec, 1 sc (18)
Row 26 :
Turn work, ch1, 1 dec, 12 sc, 1 dec, 1 sc (16)
Row 27 :
Turn work, ch1, 1 dec, 10 sc, 1 dec, 1 sc (14)
Row 28 :
Turn work, ch1, 1 dec, 8 sc, 1 dec, 1 sc (12)
Row 29 :
Turn work, ch1, 1 dec, 6 sc, 1 dec, 1 sc (10)
Row 30 :
Turn work, ch1, 1 dec, 4 sc, 1 dec, 1 sc (8)
Info :
Fasten off and cut off. Sew bag to body with brown Camtex threads.
— Ears :
1st Part :
Round 1: Make foundation chain 10ch, work 2 sc into second chain from hook, work 7 sc more, work 4 sc into one ch, turn and on other side crochet 7 sc more, work 2 sc into one ch (22). Round 2: 2 inc, 7 sc, 4 inc, 7 sc, 2 inc (30). Round 3: (1 sc, 1 inc)*2, 7 sc, (1 sc, 1 inc)*4, 7 sc, (1 sc, 1 inc)*2 (38). Round 4: (2 sc, 1 inc)*2, 7 sc, (2 sc, 1 inc)*4, 7 sc, (2 sc, 1 inc)*2 (46). Round 5: (3 sc, 1 inc)*2, 7 sc, (3 sc, 1 inc)*4, 7 sc, (3 sc, 1 inc)*2 (54). Round 6: 54 sc (54). Do not cut off.
2nd Part :
Round 1: Make foundation chain 10ch, work 2 sc into second chain from hook, work 7 sc more, work 4 sc into one ch, turn and on other side crochet 7 sc more, work 2 sc into one ch (22). Round 2: 2 inc, 7 sc, 4 inc, 7 sc, 2 inc (30). Round 3: (1 sc, 1 inc)*2, 7 sc, (1 sc, 1 inc)*4, 7 sc, (1 sc, 1 inc)*2 (38). Fasten off and cut off.
Info :
Join second pieces to first one using thinner thread such as cotton or sewing thread, so seams are not visible from back of eyelet. After sewing pieces together, use working thread of first piece or semi-cotton thread to sew three stitches together. Fasten off, cut off and weave in. First ear completed, crochet second ear in similar manner. Then use brown Camtex thread to sew ears between rounds 65 and 68.
— Eyes :
Left Eye :
Round 1: 8 sc in MR (8). Round 2: 8 inc (16). Round 3: Use yarn YarnArt Jeans color 63 (emerald), (1 sc, 1 inc)*6, 1 sc, 1 inc (first st – 1 sc, second st – 1 sl sts). Insert stitch marker. Round 4: In first st from marker, crochet with black Camtex threads in BLO, ch1, 22 sl sts. Round 5: In seventh st from marker, crochet YarnArt Jeans yarn in white, in BLO, ch1, 9 sc, 1 sl sts. Round 6: Into sixth st from marker with black Camtex threads in BLO, ch1, 4 sl sts, 1 inc (sc), 1 inc (hdc), 1 inc (dc), 1 inc (hdc), 1 inc (sc), 5 sl sts. White embroidery highlights can be made using YarnArt Jeans yarn.
Right Eye :
Round 1-5: Similarly. Round 6: Into second st from marker with black Camtex threads in BLO, ch1, 2 sl sts, 1 inc (sc), 1 inc (hdc), 1 inc (dc), 1 inc (hdc), 1 inc (sc), 7 sl sts. White embroidery highlights can be made using YarnArt Jeans yarn (symmetrically to left eye). Sew eyes to face with black threads.
— Muzzle Needle Sculpting :
Info :
Arrows provided to indicate direction for needle. Gently tug on thread. When red arrow shown, thread should go over yarn, whereas blue arrows indicate thread should go under yarn. For left part, follow instructions shown in photo by pulling thread accordingly. Repeat same process for right part, using brown Camtex threads. Needle should be inserted underneath lower lip.
Info :
Using black Camtex yarn, embroider claws on legs - two lines
— Baby Kangaroo Body :
Info :
Stuff toy as you go
Round 3 :
(1 sc, 1 inc)*8 (24)
Round 6 :
(6 sc, 1 dec)*3 (21)
Round 7 :
(5 sc, 1 dec)*3 (18)
Round 8 :
(4 sc, 1 dec)*3 (15)
Round 9 :
(3 sc, 1 dec)*3 (12)
Round 10 :
(1 sc, 1 dec)*4 (8)
— Baby Kangaroo Head :
Round 12 :
(1 sc, 1 inc)*8 (24)
Round 13 :
(2 sc, 1 inc)*8 (32)
Round 15 :
(1 sc, 1 dec)*8, 8 sc (24)
Round 18 :
(1 sc, 1 dec)8 (16)
Info :
Pull thread closed, cut off and weave in tail end
— Baby Kangaroo Legs :
Round 1 :
Make foundation chain 7ch, work 2 sc into second chain from hook, work 4 sc more, work 4 sc into one ch, turn and on other side crochet 4 sc more, work 2 sc into one ch (16)
Info :
Sew six stitches together, following instructions shown in photo (use brown Camtex threads). After completing stitching, there should be ring of four unworked stitches remaining (16-62=4).
Info :
Adjust position of working thread to return it to center. Sl st edges together. Using black Camtex thread, embroider claws on paws. Attach paws to body using brown Camtex threads between rounds 3 and 4 (when counting from bottom).
— Baby Kangaroo Hands :
Round 1 :
Foundation chain 8ch, 1 sc into second chain from hook, then work 6 sc more (7)
Info :
Fasten off and cut off. Sew hands to body with brown Camtex threads (to 10th round).
— Baby Kangaroo Ears :
Round 1 :
Foundation chain 7ch, work 2 sc into second ch from hook, work 4 sc more, work 4 sc into one chain, turn and on other side crochet 4 sc more, work 2 sc into one ch (16)
Round 2 :
2 inc, 4 sc, 4 inc, 4 sc, 2 inc (24)
Info :
Sew edges in 2-3 sts. Fasten off and cut off. Using brown Camtex threads, sew between rounds 17 and 18 (counting from bottom).
— Baby Kangaroo Tail :
Row 1 :
Foundation chain 5ch, crochet 1 sc into second ch from hook, then work 3 sc more (4)
Row 2-3 :
Turn work, ch1, 3 sc (4)
Row 4 :
Turn work, ch1, 1 dec, 1 sc (3)
Row 5-6 :
Turn work, ch1, 2 sc (3)
Row 7 :
Turn work, ch1, 1 dec (2)
Row 8-9 :
Turn work, ch1, 1 sc (2)
Info :
Fasten off and cut off. Using brown Camtex threads, sew one round above legs.
— Baby Kangaroo Muzzle :
Round 1 :
Foundation chain 4ch, crochet 2 sc into second ch from hook, work 1 sc more, work 4 sc into one ch, turn and work on other side of chain crochet 1 sc more, work 2 sc into one ch (10)
Info :
Fasten off and cut off. Sew brown Camtex threads between 15 and 17 rounds.
— Baby Kangaroo Nose :
Round 1 :
Foundation chain 7ch, crochet 2 sc into second ch from hook, work 4 sc more, work 4 sc into one ch, turn and work on other side of chain crochet 4 sc more, work 2 sc into one ch (16)
Info :
Fasten off and cut off. Sew with sewing threads of black color. Make one stitch at muzzle with black Camtex thread. Make small stitch for mouth with red yarn Himalaya Dolphin Baby.
— Baby Kangaroo Eyes :
Info :
Make 3 highlights (3 stitches) with white Camtex yarn. Sew eyes with black sewing threads.
— Baby Kangaroo Muzzle Needle Sculpting :
Info :
Arrows provided to indicate direction for needle. Gently tug on thread. When red arrow shown, thread should go over yarn, whereas blue arrows indicate thread should go under yarn. For left part, follow instructions shown in photo by pulling thread accordingly. Repeat same process for right part, using brown Camtex threads. Needle should be inserted into middle of neck. Make eyebrows (make two stitches with black Camtex thread).
This comprehensive kangaroo pattern brings the beloved Australian marsupial to life with incredible detail and personality! The combination of velvet yarn texture, posable wire-framed arms, intricate needle sculpting, and the adorable baby joey creates a truly special amigurumi that will be treasured for years. Whether you're creating this as a gift for someone who loves Australia, building your wildlife amigurumi collection, or challenging yourself with advanced techniques, this mama and baby duo will bring joy to your crafting journey. The 50-page pattern with 161 photos ensures you have all the guidance needed to create this stunning 55cm masterpiece. 🦘💕