🧢 Beautiful ✨ Detailed πŸ’ Adorable

Ragdoll Pocket Whale Amigurumi Pattern

Ragdoll Pocket Whale Amigurumi Pattern
4.1β˜… Rating
1.5-2 Hours Time Needed
3.0K Made This
βœ‚οΈ

Beginner Friendly Level

Perfect for those just starting their sewing journey, with clear instructions and simple techniques

⏱️

Bite-Sized Project

Complete in under 2 hoursβ€”quick, fun, and perfect for a little creative escape.

🐾

Pocket Pal

A mini friend to carry anywhere, providing comfort and companionship in a perfectly portable size.

About This Ragdoll Pocket Whale Amigurumi Pattern

Ragdoll Pocket Whale Amigurumi Pattern crochet pattern - detailed view of completed project

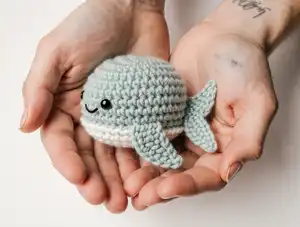
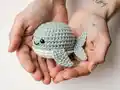
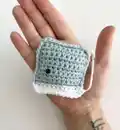
The finished whale is small enough to attach to a keyring, making it a practical and cute accessory. With minimal stuffing required and straightforward assembly instructions, you'll have your ocean companion ready to swim into hearts in no time.

Why You'll Love This Ragdoll Pocket Whale Amigurumi Pattern

I absolutely love how this pattern brings together simplicity and charm in one adorable package. There's something so satisfying about working in rows and watching the flat panels come to life, especially when you crochet them together and see that sweet ragdoll edge appear. The whale's compact size makes it perfect for using up scrap yarn, and I find myself making these in batches because they're so quick and giftable. What really gets me is how the white belly detail and those little flippers add so much personality with minimal effort. Whether you're making your first amigurumi or you're a seasoned crocheter looking for a fast, fun project, this pocket whale will steal your heart and probably end up attached to every bag you own!

Ragdoll Pocket Whale Amigurumi Pattern step 1 - construction progress Ragdoll Pocket Whale Amigurumi Pattern step 2 - assembly progress Ragdoll Pocket Whale Amigurumi Pattern step 3 - details and accessories Ragdoll Pocket Whale Amigurumi Pattern step 4 - final assembly and finishing

Switch Things Up

I love experimenting with color combinations on this pattern! Instead of the traditional blue and white whale, try creating an orca-inspired version with black and white, or go whimsical with pastel rainbow colors for each panel. You could even make a whole family of whales in graduating sizes by using different yarn weights - imagine a mama whale in chunky yarn with baby whales in fingering weight!

For added personality, I sometimes embroider tiny details like water spouts on the top or add blush cheeks with pink embroidery thread. You can also play with the tail shape by adjusting how you overlap the pieces - a wider overlap creates a more dramatic tail fin. If you're making these as gifts, consider adding a small charm or bead to the keyring alongside the whale.

Another fun variation is creating themed whales for different occasions - add a tiny crocheted Santa hat for Christmas, a flower crown for spring, or even a graduation cap for achievement celebrations. The flat ragdoll style makes it easy to add these accessories without affecting the overall structure. I've even seen makers add tiny fabric bow ties or crocheted scarves around the neck area where the white meets the main color.

Common Mistakes & How to Fix Them

βœ— Not maintaining consistent tension when working in rows can cause your whale panels to warp or become uneven in shape βœ— Forgetting to insert safety eyes before joining the panels together means you'll struggle to position them correctly through stuffing βœ— Overstuffing the whale body makes it bulky and distorts the flat ragdoll appearance that gives this pattern its unique charm βœ— Skipping the chain one and turn instructions at the end of each row results in losing stitches and misshapen panels

Ragdoll Pocket Whale Amigurumi Pattern

Create your own adorable pocket-sized whale companion with this charming ragdoll-style crochet pattern. This beginner-friendly design features a unique flat construction that makes it perfect as a keychain accessory or sweet little gift. With simple stitches worked in rows and easy assembly, you'll craft a whimsical ocean friend featuring a colorful body, white belly detail, and cute flippers. The finished whale measures perfectly for slipping into pockets or attaching to bags, making it an ideal quick project for whale enthusiasts and amigurumi lovers alike.

Beginner Friendly 1.5-2 Hours

Materials Needed for Ragdoll Pocket Whale Amigurumi Pattern

β€” Main Fabric

  • 01
    DK weight acrylic yarn in main color
  • 02
    DK weight yarn in white for belly accent
  • 03
    Cotton yarn can be substituted for acrylic if preferred

β€” Tools Required

  • 01
    3.5mm crochet hook
  • 02
    2mm safety eyes
  • 03
    Black embroidery thread
  • 04
    Stitch markers
  • 05
    Scissors
  • 06
    Metal yarn needle
  • 07
    Polyester fiberfill or yarn scraps for stuffing
  • 08
    Keyring for attachment

Progress Tracker

0% Complete

β€” BODY (MAKE 2) :

Foundation :

Slipknot, CH 12 and turn – this is the foundation row

R1 :

SC in the 2nd CH from hook and then SC until the end of row, CH 1, turn

R2 :

SC in each ST of the row, CH 1, turn

R3 to R9 :

SC in each ST of the row, CH 1, turn

R10 :

SC in each ST of the row, at the last ST pull up a loop and join the white yarn with a SC, then CH 1 and turn

R11 :

Now working with the white yarn, SC in each ST of the row, CH 1, turn

R12 :

SC in each ST of the row, fasten and cut yarn

β€” FLIPPERS and TAIL (MAKE 4) :

Foundation :

Slipknot, CH 2

R1 :

SC 6 times in the 2nd CH from hook

R2 :

SC 2 times in each ST around (12 sts total)

R3 :

SC 1, INC – all around (18 sts total)

R4 :

SC 2, INC - all around (24 sts total), don't fasten

Assembly Instructions

  • Bring the 2 body panels together with wrong sides facing
  • Starting from the right side of your main color, join new yarn in the same color and start to SC along all 3 sides
  • At every corner stitch you will need to do 2 SC to maintain shape
  • Before reaching the white part, insert the safety eyes through both panels
  • Join the white yarn and continue to SC the last side, tucking all yarn ends inside
  • Use extra stuffing as needed but not too much to maintain the flat ragdoll appearance
  • For flippers: Fold each circle, turn it with the rounded part facing your left hand and start to SC the sides together, tucking inside the starting yarn tail
  • For the tail: Sew the bottom edges of two pieces overlapping with rounded sides facing each other
  • Attach tail to the middle of the back side of the whale body
  • Attach flippers to either side right above the white stitches
  • Optional: Sew on a mouth with black embroidery thread, making sure to knot the ends and tuck them in securely

Important Notes

  • πŸ’‘Use stitch markers to keep track of your rows especially when changing colors from main to white
  • πŸ’‘Don't overstuff the whale - minimal stuffing maintains the authentic flat ragdoll appearance
  • πŸ’‘Insert safety eyes before completely closing the panels to ensure proper positioning and secure attachment
  • πŸ’‘When single crocheting the panels together, maintain even tension for consistent ragdoll edging appearance
  • πŸ’‘Tuck all yarn tails inside while assembling to avoid visible ends in the finished piece
  • πŸ’‘The flippers should be folded with rounded parts facing left before crocheting sides together for proper shaping

This charming Ragdoll Pocket Whale pattern brings ocean magic to your fingertips with its adorable flat design and simple construction. Perfect for beginners exploring beyond basic rounds, this pattern teaches color changes and panel assembly while creating the sweetest portable companion. The ragdoll-style visible stitching adds character and charm, making each whale uniquely handmade. Attach it to your keys, gift it to an ocean lover, or create a whole pod in different colors - these quick little whales are irresistibly fun to make! πŸ‹πŸ§Άβœ¨

You ask,

we answer.

FAQs

Can I use different yarn weights for this pattern?

Yes! While the pattern calls for DK weight yarn, you can use any yarn weight as long as you adjust your hook size accordingly. Just remember that thicker yarn will create a larger whale, and thinner yarn will make a smaller one. Always use a hook size that creates tight enough stitches to prevent stuffing from showing through.

How do I attach the keyring to my finished whale?

The pattern doesn't specify exact placement, but the best spot is typically at the top center of the whale's back. You can either crochet a small loop before closing the panels or sew one on afterward using matching yarn, then slip your keyring through the loop.

What if I can't find 2mm safety eyes?

You can use any small safety eyes you have available, or substitute with embroidered eyes using black embroidery thread. If using larger eyes, you may need to space them further apart for proper proportion. Safety eyes between 4-6mm would also work well for this size whale.

Can I make this whale without the white belly accent?

Absolutely! Simply continue working with your main color through rows 10-12 instead of switching to white. This creates a solid-colored whale that's just as adorable. You could also experiment with different color placement for unique variations.

How many flippers do I actually need to make?

You need to make 4 circular pieces total - 2 pieces will be joined together for the tail, and the remaining 2 pieces will be used as the side flippers (one on each side of the whale). Each individual piece follows the same rounds 1-4 instructions.