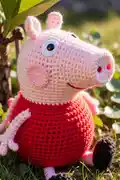
Create your own adorable Peppa Pig with this detailed amigurumi crochet pattern! This design captures Peppa's iconic look with her distinctive snout, round body, and charming personality. Perfect for fans of the beloved children's show, this pattern guides you through crafting Peppa's characteristic pink body, her sweet facial features, and all the details that make her recognizable. Whether you're making a gift for a little one or adding to your amigurumi collection, this pattern brings the magic of Peppa Pig to life in huggable form.
Progress Tracker
0% Complete
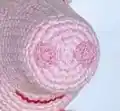
— Head :
Round 6 :
BLO sc in each st around (30)
Round 7-10 :
sc each st around (30)
Round 11 :
14 sc, inc (32)
Round 12-13 :
sc in each st around (32)
Round 14 :
7 sc, inc (36)
Round 15 :
15 sc, 6 hdc-inc, 15 sc (42)
Round 16 :
sc in each st around (42)
Round 17 :
15 sc, [sc,inc] 6 times, 15 sc (48)
Round 18 :
sc in each st around (48)
Round 19 :
15 sc, [2 sc, inc] 6 times, 15 sc (54)
Round 20-30 :
sc in each st around (54)
Info :
Attach safety eyes between row 22 and 23, 8 stitches apart
Round 31 :
7 sc, dec (48)
Info :
Stuffing the head, add more stuffing as you go
Round 32 :
6 sc, dec (42)
Round 33 :
5 sc, dec (36)
Round 34 :
4 sc, dec (30)
Round 35 :
3 sc, dec (24)
Round 36 :
2 sc, dec (18)
Round 37 :
1 sc, dec (12)
Info :
Close the opening and weave in the end
— Ear (make 2) :
Round 3-8 :
sc in each st around (10)
Info :
DO NOT stuffing. Cut the yarn leaving a tail to sew
— Nostrils (make 2) :
Info :
Cut the yarn leaving a tail to sew
— Arm (Make 2) :
Round 1-4 :
5 sc MR, then sc in each st around for 3 rows (5)
Info :
Make 3 pieces - DO NOT cut the yarn on the third piece
Round 5 :
When you finish the 3rd piece, insert your hook on the first stitch of the last row of the second piece, then join the second piece to the third. Make 2 sc. Join the first piece: make 5 sc. Make 3 sc on the other side of the second piece. Make 5 sc on the third piece (15)
Round 8-17 :
sc each in st around (5)
Info :
Fasten off leaving a long tail to sew. Do not stuff the arms or hands
— Cheek :
Round 4 :
1 sc, inc, [2 sc, inc] rep 5 times, 1 sc (24)
Round 6 :
2 sc, inc, [4 sc, inc] rep 5 times, 2 sc (36)
Info :
Make 2 pieces using smaller hook and yarn if desired
— Body :
Round 4 :
1 sc, inc, [2 sc, inc] 5 times, 1 sc (24)
Round 6 :
2 sc, inc, [4 sc, inc] 5 times, 2 sc (36)
Round 8 :
3 sc, inc, [6 sc, inc] 5 times, 3 sc (48)
Round 10 :
4 sc, inc, [8 sc, inc] 5 times, 4 sc (60)
Round 11 :
BLO sc in each stitch around (60)
Round 12-21 :
sc in each stitch around (60)
Round 22 :
8 sc, dec (54)
Round 23 :
sc in each stitch around (54)
Round 24 :
7 sc, dec (48)
Round 25 :
sc in each stitch around (48)
Round 26 :
6 sc, dec (42)
Round 27 :
sc in each stitch around (42)
Round 28 :
5 sc, dec (36)
Round 29 :
sc in each stitch around (36)
Round 30 :
4 sc, dec (30)
Round 31 :
sc each stitch around (30)
Info :
Stuffing the body firmly. Cut the yarn, leaving a long tail to sew body to the head
— Tail :
Round 2-12 :
sc in each stitch around (6)
Info :
Add toy stuffing as you go. Fasten off, leaving a long tail to sew the tail to the body
— Leg (make 2, pink yarn) :
Row :
From the second stitch from the hook, 3 sc in each chain stitch
Info :
Fasten off, leaving a long tail to sew
— Foot (make 2, black yarn) :
Round 3-6 :
sc in each stitch around (12)
Round 8 :
sc each stitch around (9)
Round 10 :
sc each stitch around (6)
Info :
Stuffing the foot. Fasten off, leaving a tail to sew the foot to the leg
— Eyes :
Info :
Cut 2 circles of white felt or make 16 double crochet MR using white yarn. For pupils: Black yarn 6 sc in a MR or use safety eyes 12mm
This charming Peppa Pig amigurumi pattern brings everyone's favorite little piggy to life in adorable crocheted form! With careful attention to her distinctive snout, sweet facial features, and iconic red dress, you'll create a huggable companion that captures Peppa's personality perfectly. The pattern includes helpful assembly instructions and tips for achieving that screen-accurate look. Whether for a Peppa-loving child or your own collection, this project is pure joy from start to finish! 🐷💕