About This Mini Parrot Amigurumi Pattern
This Mini Parrot pattern is designed for crocheters of all skill levels who want to create something adorable in minimal time. Working from top to bottom, you'll craft a charming little bird using lightweight cotton yarn in vibrant turquoise, blue, and green colors. The pattern includes detailed instructions for the body, wings, and optional tail variations, plus helpful explanatory pictures to guide you through the process. With very little sewing required and a finished size of approximately 7 cm tall, these mini parrots are perfect for keychains, decorations, or thoughtful handmade gifts.

The beauty of this pattern lies in its simplicity and versatility. You can easily customize your parrot by experimenting with different color combinations or adding creative touches to the tail. These tiny treasures work up quickly and make wonderful gifts for bird enthusiasts or anyone who appreciates handcrafted charm.
Why You'll Love This Mini Parrot Amigurumi Pattern
I absolutely love this mini parrot pattern because it delivers maximum cuteness with minimal effort! There's something incredibly satisfying about creating such an adorable little creature in just an hour or two. I appreciate how the pattern is beginner-friendly yet produces impressive results that look professionally crafted. The versatility is fantastic—you can make an entire flock in different colors, attach them to keychains, or even create a mobile for a nursery. What really won me over is the low-sew aspect; most of the parrot is worked in continuous rounds, which means less finishing work and more crocheting fun. Plus, these mini parrots are perfect stash-busters, using only small amounts of yarn, so you can finally put those leftover skeins to good use while creating something truly special!
Switch Things Up
I love how versatile this mini parrot pattern is for creative experimentation! While the original design features a beautiful turquoise and green color scheme, I've had so much fun creating parrots in completely different palettes. Try making a vibrant red and yellow macaw-inspired version, or go for a soft pastel look with pink and lavender for a whimsical touch.
The tail is where you can really let your creativity shine. I've extended mine by adding extra rounds in the blue section, creating a longer, more dramatic tail that gives the parrot an elegant look. You could even work in stripes by alternating colors every few rounds for a rainbow effect that's absolutely stunning.
For gift-giving, I attach small keyring findings to the top of the head, transforming these little birds into adorable bag charms or keychain accessories. They're perfect for party favors, stocking stuffers, or handmade gifts for bird lovers. I've even made a whole flock in team colors for a sports-loving friend!
If you want to add extra personality, consider embroidering tiny details like eyebrows or cheek blushes with embroidery floss. Some crafters add small felt pieces for wing details or use safety eyes in different sizes for varied expressions. The possibilities are truly endless with this sweet little pattern!
Common Mistakes & How to Fix Them
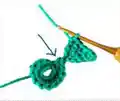
✗ Forgetting to place the stitch marker at the beginning of each round can make it difficult to track your progress and maintain accurate stitch counts throughout the pattern
✗ Not changing colors properly by completing the color change in the last stitch of the previous color can create messy transitions and an unprofessional finish on your parrot
✗ Embroidering the beak too loosely or in the wrong location between rounds can affect the parrot's facial expression and overall appearance significantly
✗ Stuffing the body too much or too little will result in an oddly shaped parrot that doesn't have the proper rounded cute appearance intended by the designer