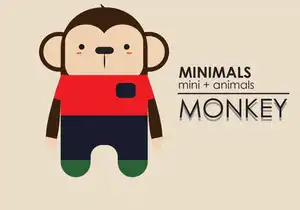
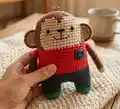
Create your own adorable mini monkey companion with this detailed amigurumi pattern. This charming little friend features a sweet beige face, expressive black eyes, and a colorful outfit complete with a tiny pocket detail. Standing at approximately 15cm tall, this pocket-sized pal is perfect for beginners looking to expand their amigurumi skills. The pattern includes clear instructions for creating the head, body, arms, legs, and distinctive monkey ears with careful color changes throughout.
Progress Tracker
0% Complete
— Head / Body / Legs :
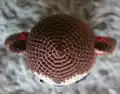
Round 1 :
Using Brown yarn, make 6 sc in magic ring, tighten the loop [6 sts]
Round 2 :
(2-sc inc) x 6 [12]
Round 3 :
(sc x 1, 2-sc inc) x 6 [18]
Round 4 :
(sc x 2, 2-sc inc) x 6 [24]
Round 5 :
(sc x 3, 2-sc inc) x 6 [30]
Round 6 :
(sc x 4, 2-sc inc) x 6 [36]
Round 7 :
(sc x 5, 2-sc inc) x 6 [42]
Round 8 :
(sc x 6, 2-sc inc) x 6 [48]
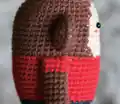
Rounds 9-36 :
sc in all 48 st [48] (Change yarn colors according to symbol pattern: Brown/Beige for head rounds 1-19, Red/Navy for body rounds 20-36)
Info :
Divide the legs - Identify center space between legs by 6 stitches, each leg identifies 18 stitches. Use stitch markers to help. Sc at the 31st st of Round 36 to begin first leg (left leg)
First Leg - Rounds 37-40 :
sc in all 18 st [18] (Change to Navy/Green yarn as shown in symbol pattern)
First Leg - Round 41 :
(sc x 1, sc2tog) x 6 [12]
First Leg - Round 42 :
(sc2tog) x 6 [6]
Info :
Fasten off leaving long tail. Stuff the leg. Using yarn needle, weave yarn tail through front loop of each remaining stitch and pull tight to close
Second Leg (Right leg) :
Rejoin Navy yarn to 7th back unworked st of Round 36. This sc is the first st for second leg. Continue working rounds 37-42 same way as first leg
Info :
Using yarn needle, sew the 6 stitches between the legs to close gap
— Arms (Make 2) :
Round 1 :
Using Beige yarn, make 5 sc in magic ring, tighten the loop [5 sts]
Round 2 :
(2-sc inc) x 5 [10]
Rounds 3-16 :
sc in all 10 st [10] (Change yarn colors: Beige, then Brown, then Red according to symbol pattern)
Info :
Fasten off leaving long tail for sewing. Flatten the arm, do not stuff
— Pocket :
Setup :
Using Navy yarn, make 5 chains
Row 1 :
hdc x 1 in third ch from hook, hdc x 2 [4 sts] (ch 2 counts as hdc x 1)
Row 2 :
ch 2, turn, hdc x 3 [4]
Info :
Fasten off leaving long tail for sewing
— Ears (Make 2 Beige, 2 Brown) :
Round 1 :
Using Beige yarn, make 6 sc in magic ring, tighten the loop [6 sts]
Round 2 :
ch 1, turn, sc, hdc, dc x 2, hdc, sc [6]
Round 3 :
ch 1, turn, sc, (2-sc inc) x 4, sc [10]
Round 4 - Edging :
Make another Beige ear and two Brown ears same way. Locate beige colored ear part on brown ear, join brown yarn into bottom right corner of both ears and sc together (Beige: stitches only through back loop / Brown: go through both loops) [10]
Info :
Fasten off leaving long tail for sewing. Fold the ears slightly
— Face Details :
Eyes :
Place 5mm black plastic safety eyes between rounds 13 and 14, separated by 8 stitches. Secure with glue
Cheeks :
Embroider or add small pink blush between rounds 14 and 15
Nose and Mouth :
Embroider nose and smile details with black yarn on beige face area
Hair Tuft :
Attach small yarn pieces at crown of head for hair detail (11 rounds up from base)
This charming Mini Monkey pattern from the beloved MINIMALS collection brings you a pocket-sized friend full of personality and charm. With thoughtful color blocking, layered details, and a sweet expression, this little companion showcases the beauty of combining simple stitches with creative design. The pattern includes helpful symbol charts and step-by-step guidance to ensure your success. Whether you're gifting it to a special someone or keeping it for yourself, this adorable monkey will bring smiles for years to come. 🐵 Happy crocheting! 🧶✨