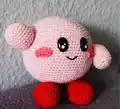
Create your own adorable pink puffball with this charming Kirby amigurumi pattern! This delightful character stands approximately 4.7 inches tall and captures Kirby's iconic round shape and cheerful expression. Perfect for Nintendo fans and crochet enthusiasts alike, this pattern uses simple worsted weight yarn in pink, red, and dark pink to bring this beloved video game character to life. With clear round-by-round instructions, you'll craft a cuddly companion complete with rosy cheeks, stubby arms, and those signature red feet that make Kirby instantly recognizable.
Progress Tracker
0% Complete
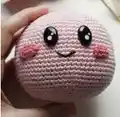
— Cheeks (Make 2) :
Setup :
In dark pink, cast on 4+1 ch, begin from the 2nd stitch from the needle
Round 1 :
In the first 3 stitches each 1 sc, in the last stitch 3 sc, continue on the other side: in the next 2 stitches each 1 sc, in the last stitch 2 sc, sl in the first sc (10 sc)
Info :
Leave a long tail for sewing
— Arms (Make 2) :
Setup :
In pink, cast on 6 sc in a magic ring
Round 1 :
Increase every stitch (12 sc)
Round 2 :
Increase every 2nd stitch (18 sc)
Round 3 :
Increase every 3rd stitch (24 sc)
Round 4-9 :
Crochet in every stitch 1 sc (24 sc)
Round 10 :
Decrease every 3rd and 4th stitch together (18 sc)
Round 11 :
Decrease every 2nd and 3rd stitch together (12 sc)
Info :
Fill the arm with stuffing
Round 12 :
Decrease each two stitches together (6 sc)
Info :
Sew up the rest hole and leave a long tail for sewing
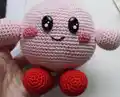
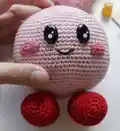
— Legs (Make 2) :
Setup :
In red, cast on 6 sc in a magic ring
Round 1 :
Increase every stitch (12 sc)
Round 2 :
Increase every 2nd stitch (18 sc)
Round 3 :
Increase every 3rd stitch (24 sc)
Round 4-13 :
Crochet in every stitch 1 sc (24 sc)
Round 14 :
Decrease every 3rd and 4th stitch together (18 sc)
Round 15 :
Decrease every 2nd and 3rd stitch together (12 sc)
Info :
Fill the leg with stuffing
Round 16 :
Decrease each two stitches together (6 sc)
Info :
Sew up the rest hole and pull the thread through to the top so that the leg can be sewn on later
— Head/Body :
Setup :
In pink, cast on 6 sc in a magic ring
Round 1 :
Increase every stitch (12 sc)
Round 2 :
Increase every 2nd stitch (18 sc)
Round 3 :
Increase every 3rd stitch (24 sc)
Round 4 :
Increase every 4th stitch (30 sc)
Round 5 :
Increase every 5th stitch (36 sc)
Round 6 :
Increase every 6th stitch (42 sc)
Round 7 :
Increase every 7th stitch (48 sc)
Round 8 :
Increase every 8th stitch (54 sc)
Round 9 :
Increase every 9th stitch (60 sc)
Round 10 :
Increase every 10th stitch (66 sc)
Round 11 :
Increase every 11th stitch (72 sc)
Round 12-26 :
Crochet in every stitch 1 sc (72 sc)
Round 27 :
Decrease every 11th and 12th stitch together (66 sc)
Round 28 :
Decrease every 10th and 11th stitch together (60 sc)
Round 29 :
Decrease every 9th and 10th stitch together (54 sc)
Round 30 :
Decrease every 8th and 9th stitch together (48 sc)
Round 31 :
Decrease every 7th and 8th stitch together (42 sc)
Round 32 :
Decrease every 6th and 7th stitch together (36 sc)
Round 33 :
Decrease every 5th and 6th stitch together (30 sc)
Round 34 :
Decrease every 4th and 5th stitch together (24 sc)
Infos :
Now attach the safety eyes, embroider a mouth with black yarn, fill the head/body with stuffing, and sew on the cheeks
Round 35 :
Decrease every 3rd and 4th stitch together (18 sc)
Round 36 :
Decrease every 2nd and 3rd stitch together (12 sc)
Info :
Refill if necessary
Round 37 :
Decrease each two stitches together (6 sc)
Info :
Sew up the rest hole and fasten off
This adorable Mini Kirby pattern was designed to bring Nintendo's most beloved character into soft, huggable form! Using simple single crochet techniques and working in continuous rounds, you'll create a perfectly spherical pink puffball complete with rosy cheeks and tiny limbs. Whether you're a gaming fan or just love cute amigurumi, this pattern delivers maximum charm in minimal time. 🧶 Happy crocheting! 🎮✨