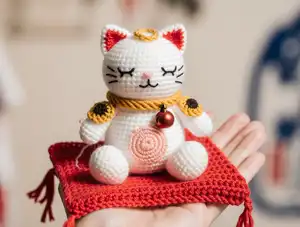
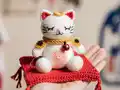
Bring the charm of Japanese tradition into your home with this adorable Lucky Cat (Maneki-neko) amigurumi pattern! This delightful 4-inch crochet cat features the classic raised paw gesture symbolizing good fortune and prosperity. Complete with a decorative collar, bell, and a cozy pillow with tassels, this pattern captures every authentic detail. The colorful spots and sweet embroidered face make this lucky cat an irresistible gift or home decor piece. Perfect for cat lovers and anyone who appreciates Japanese culture and craftsmanship.
Progress Tracker
0% Complete
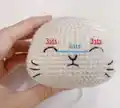
— HEAD (use white yarn, work in continuous spiral) :
Round 1 :
8sc into magic ring (8)
Round 3 :
(sc, inc)*8 (24)
Round 4 :
(2sc, inc)*8 (32)
Round 5 :
(3sc, inc)*8 (40)
Round 6 :
(4sc, inc)*8 (48)
Round 7 :
(5sc, inc)*8 (56)
Round 9 :
(6sc, inc)*8 (64)
Round 15 :
26sc, mark the point, 12sc, mark the point, 26sc (64)
Round 17 :
9sc, (sc, inc)*8, 14sc, (sc, inc)*8, 9sc (80)
Round 23 :
(8sc, dec)*8 (72)
Round 24 :
(7sc, dec)*8 (64)
Round 25 :
(6sc, dec)*8 (56)
Round 26 :
BLO (2sc, dec)*14 (42)
Infos :
Fasten off, leave a long tail for sewing. Stuff the head. Tip: separate the yarn into small yarns to have better result. Use black yarn to sew eyes on round 15, sew mouth between round 17-19 and sew whiskers between round 18-21. Use pink yarn to sew nose.
— BODY (use white yarn, work in continuous spiral) :
Starting Chain :
Make a chain of 11ch. Start in the second chain from hook
Round 1 :
9sc, 3sc into the last stitch, work on along the other side: 8sc, inc (22)
Round 2 :
inc, 8sc, 3inc, 8sc, 2inc (28)
Round 3 :
sc, inc, 8sc, (inc, sc)*3, 8sc, (inc, sc)*2 (34)
Round 4 :
inc, 10sc, (2sc, inc)*3, 8sc, (2sc, inc)*2 (40)
Round 5 :
(4sc, inc)*8 (48)
Round 7 :
(5sc, inc)*8 (56)
Round 9 :
(13sc, inc)*4 (60)
Round 19 :
(13sc, dec)*4 (56)
Round 21 :
(12sc, dec)*4 (52)
Round 22 :
(11sc, dec)*4 (48)
Round 23 :
(6sc, dec)*6 (42)
Finishing :
Fasten off, leaving a long tail for sewing. Stuff the body
— ARMS (make 2, use white yarn, work in continuous spiral) :
Round 1 :
8sc into magic ring (8)
Round 5 :
(6sc, dec)*2 (14)
Round 8 :
(5sc, dec)*2 (12)
Finishing :
Stuff the arms. Flatten and fold the top of the arm, join and sc together the 2 opposing stitches (6sc). Leave a long tail for sewing
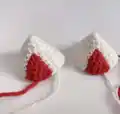
— EARS (make 2, red and white yarn, work in continuous spiral) :
Info :
Use white yarn to make MAGIC RING. Black word: white yarn. Red word: red yarn
Round 1 :
4sc into magic ring (4)
Round 3 :
(sc, inc)*4 (12)
Round 4 :
2sc, inc, 2sc, inc, (2sc, inc)*2 (16)
Round 5 :
3sc, inc, 2sc, sc, inc, (3sc, inc)*2 (20)
Round 6 :
4sc, inc, 2sc, 2sc, inc, (4sc, inc)*2 (24)
Round 7 :
5sc, inc, 2sc, 3sc, inc, (5sc, inc)*2 (28)
Round 8 :
9sc, 5sc, 14sc (28)
Finishing :
Stuff the ears. Fasten off, leave a long tail for sewing
— LEGS (make 2, use white yarn, work in continuous spiral) :
Round 1 :
6sc into magic ring (6)
Round 3 :
(sc, inc)*6 (18)
Round 4 :
(2sc, inc)*6 (24)
Round 5 :
(3sc, inc)*6 (30)
Round 9 :
(3sc, dec)*6 (24)
Finishing :
Stuff the legs. Leave a long tail for sewing
— BELLY (use pink yarn, work in continuous spiral) :
Round 1 :
6sc into magic ring (6)
Round 3 :
(sc, inc)*6 (18)
Round 4 :
(2sc, inc)*6 (24)
Round 5 :
(3sc, inc)*6 (30)
Finishing :
Fasten off, leave a long tail for sewing
— HAND SPOTS (make 2, honey and black yarn, work in round) :
Round 1 :
Use black yarn: 6sc into magic ring, slst (6)
Round 2 :
Change to honey yarn ch, 6inc, slst (12)
Finishing :
Fasten off, leave a long tail for sewing
— BODY SPOTS (make 2, honey and black yarn, work in round) :
Round 1 :
Use black yarn: 6sc into magic ring (6)
Round 2 :
Ch, 6inc, slst (12)
Round 3 :
Change to honey yarn ch, (sc, inc)*6, slst (18)
Finishing :
Fasten off, leave a long tail for sewing
— HEAD SPOT (honey and black yarn, work in round) :
Round 1 :
Use black yarn: Ch5, start in the 2nd chain from hook: 3sc, 3sc-inc, 2sc, inc, slst (10)
Round 2 :
Ch, Inc, 2sc, 3inc, 2sc, 2inc, slst (16)
Round 3 :
Change to honey yarn ch, sc, inc, 2sc, (sc, inc)*3, 2sc, (sc, inc)*2, slst (22)
Round 4 :
Ch, 2sc, inc, 2sc, (2sc, inc)*3, 2sc, (2sc, inc)*2, slst (28)
Finishing :
Fasten off, leave a long tail for sewing
— COLLAR (use honey yarn) :
Round 1 :
Make a chain of 62ch. Start in the 7th chain from hook 55sc (55)
Finishing :
Fasten off, weave in the yarn end. Sew the button and the bell through the collar. Wear collar for the cat
— TAIL (use white yarn, work in continuous spiral) :
Round 1 :
6sc into magic ring (6)
Finishing :
Don't stuff the tail. Flatten and fold the top of the tail, join and sc together the 2 opposing stitches (6sc). Leave a long tail for sewing. Sew tail to body on round 6
— PILLOW (use red yarn) :
Row 1 :
Make a chain of 40ch. Start in the 3rd chain from hook 38dc, turn (38)
Row 2-13 :
Ch2, 38dc, turn (38)
Tassels (make 4) :
Cut 20 equal yarns about 10cm. Take 5 yarns and thread needle. Thread the needle through one corner of the pillow. Knot. Separate the yarns into small yarns. Repeat the same steps for the remaining 3 corners
Finishing :
Fasten off, leave a long tail about 40cm for sewing. Stuff some fiberfill in the pillow
This Lucky Cat pattern brings centuries of Japanese tradition and symbolism into your crafting journey! The Maneki-neko is more than just a cute decoration—it's a beloved symbol of good fortune, prosperity, and positive energy. With its raised paw beckoning good luck and its sweet expression radiating charm, this 4-inch companion makes a meaningful gift or personal treasure. Every detail, from the colorful spots to the tiny pillow, has been thoughtfully designed to capture the authentic spirit of these beloved lucky charms. 🐱✨ Happy crocheting and may good fortune follow! 🍀💕