🧢 Beautiful ✨ Detailed πŸ’ Adorable

Ladybug Amigurumi Pattern

Ladybug Amigurumi Pattern
4.6β˜… Rating
8-10 Hours Time Needed
3.0K Made This
βœ‚οΈ

Intermediate Level

Ideal for those with basic knitting experience, featuring slightly more advanced stitches and techniques to expand your skills.

⏱️

All-Day Adventure

Requires 8-10 hours, ideal for a full day of immersive knitting.

🐞

Charming Critter

Delightful animal designs with sweet details that capture the essence of your favorite woodland and farmyard friends.

About This Ladybug Amigurumi Pattern

This charming ladybug pattern combines multiple techniques to create a whimsical character full of personality. From the carefully crafted head with embroidered facial features to the layered wings and striped body, every detail adds to the magic. The pattern includes instructions for adorable accessories like tiny boots with buttons and a sweet chamomile flower that your ladybug can hold, making this project truly special and gift-worthy.

Ladybug Amigurumi Pattern crochet pattern - detailed view of completed project

The alternating red and black stripes on the body create visual interest, while the white collar and skirt add a touch of elegance. Multiple color changes throughout keep the project engaging and help you practice transitioning between yarns smoothly.

Why You'll Love This Ladybug Amigurumi Pattern

I absolutely love how this pattern brings together so many delightful elements into one charming creation! The sweet beige face with those embroidered freckles and rosy cheeks gives the ladybug such personality, while the red-tipped antennas add that perfect whimsical touch. What really makes my heart sing is how the layered wings create dimension, and those little black spots scattered across the red background capture the essence of a real ladybug beautifully. The tiny details like the button-adorned boots and the handmade chamomile flower make this project feel special from start to finish. Plus, there's something incredibly satisfying about watching all those color changes come together to create the striped body pattern!

Ladybug Amigurumi Pattern step 1 - construction progress Ladybug Amigurumi Pattern step 2 - assembly progress Ladybug Amigurumi Pattern step 3 - details and accessories Ladybug Amigurumi Pattern step 4 - final assembly and finishing

Switch Things Up

I absolutely love customizing this ladybug pattern to create unique versions! One of my favorite variations is changing the color scheme entirely - imagine a gorgeous blue ladybug with silver spots, or a pastel pink one with white polka dots for a dreamy, kawaii aesthetic. You could even make a rainbow ladybug by alternating different bright colors in the body stripes instead of just red and black.

For seasonal versions, I've experimented with adding tiny accessories like a knitted scarf and hat for winter, or a miniature flower crown for spring celebrations. Halloween-inspired ladybugs with orange and purple colors are absolutely adorable too! You can also play with the facial expressions - try embroidering different mouth shapes or adding eyelashes for a more feminine look, or creating sleepy eyes for a dreamy bedtime buddy.

The wings offer incredible customization potential as well. Instead of traditional black spots, I've tried hearts, stars, or even tiny embroidered flowers. You could add sparkle by sewing on small sequins or using metallic thread for the spots. For a more realistic approach, research actual ladybug species - some have stripes, different spot patterns, or even no spots at all!

Size variations are another fun direction to explore. Make a tiny keychain version using thinner yarn and a smaller hook, or create a giant pillow-sized ladybug using chunky yarn. You could even make a whole family with different sizes! The chamomile flower can be swapped for other crocheted flowers like roses, sunflowers, or daisies to match different personalities or seasons.

Common Mistakes & How to Fix Them

βœ— Forgetting to place stitch markers correctly can cause misalignment in facial features and make eyes appear crooked or uneven βœ— Skipping the stuffing check before closing body parts leads to lumpy or poorly shaped pieces that lack structure βœ— Not controlling tension during color changes creates visible gaps between stripes and ruins the clean striped pattern effect βœ— Placing wings too far apart or at wrong angles makes the ladybug look unbalanced and affects overall appearance βœ— Rushing through decrease rounds without proper stuffing causes the head to collapse or develop flat spots instead of staying round

Ladybug Amigurumi Pattern

Create an enchanting ladybug friend with this detailed crochet pattern! This adorable design features a sweet beige face with embroidered details, a classic black hood with red-tipped antennas, and stunning red wings adorned with black spots. Complete with a charming red skirt, white collar, black boots with button accents, and a delightful chamomile flower accessory, this ladybug brings whimsy to life. Perfect for gifting or decorating your space with handmade charm!

Intermediate 8-10 Hours

Materials Needed for Ladybug Amigurumi Pattern

β€” Main Fabric

  • 01
    One ball of Jeans by Yarn Art red color (90)
  • 02
    Half ball of Jeans by Yarn Art black color
  • 03
    Half ball of Jeans by Yarn Art beige color (05)
  • 04
    Half ball of Jeans by Yarn Art white color (01 or 62)
  • 05
    Small amounts of yellow and green Jeans by Yarn Art for chamomile flower

β€” Tools Required

  • 01
    Crochet hook size 2.25mm (or 2.0mm)
  • 02
    Toy eyes 14-16mm diameter (16mm used in pattern)
  • 03
    3 small red buttons (optional)
  • 04
    White felt piece
  • 05
    Thin black thread for embroidery
  • 06
    Soft pastel for cheek tinting
  • 07
    Toy stuffing
  • 08
    Florist wire or chenille wire
  • 09
    Stitch markers
  • 10
    Yarn needle
  • 11
    Scissors
  • 12
    Fabric glue (clear)
  • 13
    Decorative ladybug for flowers (optional)

Progress Tracker

0% Complete

β€” Head :

Info :

Work in beige yarn color (05). Stitch marker goes through the middle of the back part. Control its position if stitch marker shifts left or right.

Round 1 :

Start 6 sc in a MR (6)

Round 2 :

6 inc (12)

Round 3 :

(1 sc, inc) x 6 (18)

Round 4 :

(2 sc, inc) x 6 (24)

Round 5 :

(3 sc, inc) x 6 (30)

Round 6 :

(4 sc, inc) x 6 (36)

Round 7 :

36 sc

Round 8 :

(5 sc, inc) x 6 (42)

Round 9 :

42 sc

Round 10 :

(6 sc, inc) x 6 (48)

Round 11 :

48 sc

Round 12 :

(7 sc, inc) x 6 (54)

Round 13 :

54 sc

Info :

Place eyes into felt circles, install safety eyes to the head in the 15th-16th rounds with the distance 5-6 stitches between the eyes.

Round 14 :

7 sc, (1 sc, inc) x 5, 20 sc, (inc, 1 sc) x 5, 7 sc (64) inc are placed from both sides, making the cheeks.

Round 15-18 :

64 sc

Round 19 :

7 sc, (1 sc, dec) x 5, 20 sc, (dec, 1 sc) x 5, 7 sc (54) are placed from both sides, making the cheeks.

Round 20-21 :

54 sc

Round 22 :

(7 sc, dec) x 6 (48)

Round 23 :

(6 sc, dec) x 6 (42)

Round 24 :

(5 sc, dec) x 6 (36)

Round 25 :

(4 sc, dec) x 6 (30), stuff, be sure that you stuffed the sides well.

Round 26 :

(3 sc, dec) x 6 (24)

Round 27 :

(2 sc, dec) x 6 (18)

Round 28 :

(1 sc, dec) x 6 (12)

Round 29 :

6 dec, make decreases to close the opening.

Info :

Crochet the head from top to bottom.

β€” Hood :

Info :

Work in black yarn color.

Round 1 :

Start 6 SC in a MR (6)

Round 2 :

6 inc (12)

Round 3 :

(1 sc, inc) x 6 (18)

Round 4 :

(2 sc, inc) x 6 (24)

Round 5 :

(3 sc, inc) x 6 (30)

Round 6 :

(4 sc, inc) x 6 (36)

Round 7 :

(5 sc, inc) x 6 (42)

Round 8 :

(6 sc, inc) x 6 (48)

Round 9 :

(7 sc, inc) x 6 (54)

Round 10 :

(8 sc, inc) x 6 (60)

Round 11 :

(9 sc, inc) x 6 (66)

Round 12 :

(10 sc, inc) x 6 (72)

Round 13-17 :

72 sc

Round 18 :

(7 sc, dec) x 8 (64)

Round 19 :

64 sc

Round 20 :

64 sl st

Info :

Place the head inside the hood and sew.

β€” Antennas :

Info :

Work in red yarn color.

Round 1 :

Start 6 SC in a MR (6)

Round 2 :

6 inc (12)

Round 3 :

(1 sc, inc) x 6 (18)

Round 4 :

(2 sc, inc) x 6 (24)

Round 5-6 :

24 sc

Round 7 :

(2 sc, dec) x 6 (18)

Round 8 :

(1 sc, dec) x 6 (12), stuff.

Round 9 :

(1 sc, dec) x 4 (8)

Info :

Change yarn to black color.

Round 10-25 :

8 sc

Info :

It may help to place chenille wire into the antennas. Sew on the 15-16th rounds of the hood with the distance 9 or 10 stitches between the antennas.

β€” Bow and Bangs :

Bow :

Work in red yarn color: Crochet ch4 into a MR, 4 TR, ch4, 1 sc, ch4, 4 TR, ch4, sc, sl st. Pull a MR closed.

Bangs :

Make cuts of black yarn approximately 5 cm length. Attach 1 or 2 cuts of yarn into each stitch between the antennas in the 15-16th rounds. You will use 3 stitches in total. Snip to the length you like best. Sew the bow.

β€” Decoration :

Infos :

When you installed eyes, glue pieces of felt (use clear glue). After that embroider black lines. Step 2 stitches up from the eyes and embroider eyebrows with the distance 6 or 7 stitches between the eyebrows. Embroider nose between the eyes, grabbing 4 stitches. Step 4 rounds down from the eyes and embroider red mouth, grabbing 5 stitches. It may help to use fabric marker to tint the cheeks (pink color) and draw freckles.

β€” Legs :

Info :

Start working in black color. Stitch marker goes through the middle of the back part.

Round 1 :

Ch8, from the 2nd stitch from hook crochet 6 sc, 3 sc into 1 stitch, continue into the unused loops on the opposite side of the chain: 5 sc, inc (16)

Round 2 :

inc, 5 sc, 3 inc, 5 sc, 2 inc (22)

Round 3 :

1 sc, inc, 5 sc, (1 sc, inc) x 3, 5 sc, (1 sc, inc) x 2 (28)

Round 4 :

2 sc, inc, 5 sc, (2 sc, inc) x 3, 5 sc, (2 sc, inc) x 2 (34)

Round 5 :

34 sc into BLO

Round 6-7 :

34 sc

Round 8 :

9 sc, (1 sc, dec) x 5, 10 sc (29)

Round 9 :

8 sc, 6 dec, 9 sc (23), place an insole inside.

Info :

Change yarn to beige color.

Round 10 :

7 sc, (1 sc, dec) x 3, 7 sc (20) into BLO.

Round 11 :

7 sc, (1 sc, dec) x 2, 7 sc (18)

Round 12 :

3 sc, (1 sc, dec) x 4, 3 sc (14)

Round 13-20 :

14 sc

Round 21 :

4 sc, 6 inc, 4 sc (20). inc are placed strictly in the middle.

Round 22 :

20 sc

Round 23 :

4 sc, 6 dec, 4 sc (14). dec are placed strictly in the middle.

Round 24-29 :

14 sc

Info :

Change yarn to white color.

Round 30 :

14 sc

Round 31 :

(6 sc, inc) x 2 (16) into BLO.

Round 32 :

(7 sc, inc) x 2 (18)

Round 33 :

(inc, 5 sc) x 3 (21)

Round 34-35 :

21 sc

Round 36 :

(inc, 6 sc) x 3 (24)

Info :

Work into the 31st round. Insert hook bottom up. 1 sc, hdc, dc and repeat the sequence of stitches to the end of the round.

β€” Boots :

Info :

Insert hook into the unused front loops of the 10th round and make ch9, crochet 8 sc from the 2nd stitch from hook. Sew on the opposite side. Sew a button above.

β€” Body :

Infos :

From stitch marker which is placed in the middle of the first leg step 5 sc counterclockwise and place additional stitch marker. From stitch marker of the 2nd leg crochet 7 more sc. Make ch3 and connect two legs into the place where you install additional stitch marker. Place of the connection is in the back. New starts here. Work in the round. 24+3+24+3=54. Work in white yarn color.

Round 1-3 :

54 sc

Info :

Attach black yarn color.

Round 4 :

54 sc

Round 5 :

54 sc into BLO

Round 6 :

54 sc

Info :

Attach red yarn and alternate: 3 rounds in black, 4 rounds in red color.

Round 7-9 :

54 sc

Round 10 :

(7 sc, dec) x 6 (48)

Info :

Change yarn to black color.

Round 11-12 :

48 sc

Round 13 :

(6 sc, dec) x 6 (42)

Info :

Change yarn to red color.

Round 14-16 :

42 sc

Round 17 :

(5 sc, dec) x 6 (36)

Info :

Change yarn to black color.

Round 18-20 :

36 sc

Info :

Change yarn to red color.

Round 21-22 :

36 sc

Round 23 :

(4 sc, dec) x 6 (30)

Round 24 :

30 sc

Info :

Change yarn to black color.

Round 25 :

30 sc

Round 26 :

(3 sc, dec) x 6 (24)

Round 27 :

24 sc

Round 28 :

(6 sc, dec) x 3 (21) into BLO.

Info :

Now change yarn to white color to crochet the collar. Work in the round from stitch marker which is placed. Insert hook from top to bottom. 9 hdc, 1 sc, sl st, 1 sc, 10 hdc (2 rounds). Sew a button in the middle.

β€” Head Sewing :

Info :

When you sew the head to the hood, sew the head to the body, grabbing lower loops of back part of the hood.

β€” Skirt :

Info :

Attach red yarn to the 5th round and crochet. Insert hook from top to bottom.

Round 1 :

54 inc (108)

Round 2 :

(1 sc, inc) x 54 (162)

Round 3 :

162 sc

β€” Arms :

Info :

Start working in beige yarn color (05)

Round 1 :

Start 6 SC in a MR (6)

Round 2 :

6 inc (12)

Round 3 :

(1 sc, inc) x 6 (18)

Round 4-5 :

18 sc

Round 6 :

(1 sc, dec) x 6 (12)

Round 7 :

12 sc

Round 8 :

(2 sc, dec) x 3 (9), stuff the hand.

Round 9-19 :

9 sc

Info :

Change yarn to black color.

Round 20 :

9 sc

Round 21 :

(2 sc, inc) x 3 (12) into BLO

Round 22 :

12 sc

Info :

Change yarn to red color.

Round 23 :

(1 sc, inc) x 6 (18)

Round 24 :

18 sc

Round 25 :

(4 sc, dec) x 3 (15)

Round 26 :

(3 sc, dec) x 3 (12), add some stuffing.

Round 27 :

Put together and crochet 6 sc through the loops of both sides.

Info :

Attach red yarn color to the 21st round and crochet. Insert hook from top to bottom.

Round 1 :

9 inc (18)

Round 2 :

(1 sc, inc) x 9 (27)

Info :

Sew the arms on the 25th round.

β€” Wings :

Info :

Crochet 2 parts in red yarn color.

Round 1 :

Start 6 SC in a MR (6)

Round 2 :

6 inc (12)

Round 3 :

(1 sc, inc) x 6 (18)

Round 4 :

(2 sc, inc) x 6 (24)

Round 5 :

(3 sc, inc) x 6 (30)

Round 6 :

(4 sc, inc) x 6 (36)

Round 7 :

(5 sc, inc) x 6 (42)

Round 8 :

(6 sc, inc) x 6 (48)

Round 9-12 :

48 sc

Round 13 :

(6 sc, dec) x 6 (42)

Round 14-15 :

42 sc

Round 16 :

(5 sc, dec) x 6 (36)

Round 17-18 :

36 sc

Round 19 :

(4 sc, dec) x 6 (30)

Round 20 :

30 sc

Round 21 :

(3 sc, dec) x 6 (24)

Round 22-24 :

24 sc

Round 25 :

(2 sc, dec) x 6 (18)

Round 26 :

18 sc

Info :

Put together and crochet 9 sc through the loops of both sides. Sew on the 21st-24th rounds with the distance 4 or 5 stitches between the wings as pictured.

Info :

Crochet 2 parts in white color.

Round 1 :

Start 6 SC in a MR (6)

Round 2 :

6 inc (12)

Round 3 :

(1 sc, inc) x 6 (18)

Round 4 :

(2 sc, inc) x 6 (24)

Round 5 :

(3 sc, inc) x 6 (30)

Round 6 :

(4 sc, inc) x 6 (36)

Round 7-8 :

36 sc

Round 9 :

(4 sc, dec) x 6 (30)

Round 10-12 :

30 sc

Round 13 :

(3 sc, dec) x 6 (24)

Round 14 :

24 sc

Round 15 :

(2 sc, dec) x 6 (18)

Round 16-17 :

18 sc

Round 18 :

(1 sc, dec) x 6 (12)

Round 19 :

12 sc

Info :

Put together and crochet 6 sc through the loops of both sides. Sew white wings on the 13th-14th rounds with the distance 4-5 stitches between the wings.

β€” Black Spots :

Make 1 :

Start 6 SC in a MR (6), 6 inc (12), (1 sc, inc) x 6 (18)

Make 2 :

Start 6 SC in a MR (6), 6 inc (12)

Make 4 :

Start 6 SC in a MR (6), (1 sc, inc) x 3 (9)
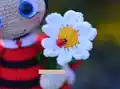
β€” Chamomile :

Info :

Start working in yellow yarn color.

Round 1 :

Start 6 SC in a MR (6)

Round 2 :

6 inc (12)

Round 3 :

(1 sc, inc) x 6 (18)

Info :

Change yarn to green color.

Round 4 :

18 sc into BLO

Round 5 :

(1 sc, dec) x 6 (12)

Round 6 :

6 dec (6) stuff.

Round 7-13 :

6 sc

Leaf :

Make ch8 and from the 2nd stitch from hook crochet 2 TR into 1 stitch, 2 TR, 2 dc, 2 hdc. Now continue working in the round.

Round 14-17 :

6 sc

Round 18 :

3 sc, crochet the leaf again. Ch7, from the 2nd stitch from hook crochet 2 TR into 1 stitch, 1 TR, 2 dc, 2 hdc, crochet 3 sc.

Round 19-27 :

6 sc

Info :

Install wire and close the opening. On the 4th round: attach white color and crochet petals into the unused loops. Make ch6, from the 2nd stitch from hook crochet 5 hdc, 1 sc into the nearest stitch and make ch6 again, from the 2nd stitch from hook crochet 5 hdc. Continue working to the end. As a result you made 18 petals.

Assembly Instructions

  • Place the completed head inside the black hood and sew them together securely around the opening.
  • Sew the head-and-hood assembly to the body by grabbing the lower loops of the back part of the hood.
  • Attach the arms to the body at round 25, ensuring they are positioned symmetrically on both sides.
  • Sew the red wings onto the back of the body between rounds 21-24 with 4-5 stitches distance between them.
  • Attach the white wings on top of the red wings at rounds 13-14, maintaining the same spacing.
  • Distribute and sew the black spots across the red wings: attach the largest spot, two medium spots, and four small spots in a natural pattern.
  • Sew the chamomile flower accessory to one of the ladybug's hands for a sweet finishing touch.

Important Notes

  • πŸ’‘Use stitch markers throughout the project to track your position, especially on the head and body where placement is critical.
  • πŸ’‘Install safety eyes with felt backing before closing the head completely, as they cannot be adjusted later.
  • πŸ’‘Stuff each piece gradually and firmly but not too tightly to maintain proper shape and avoid distortion.
  • πŸ’‘When making color changes between red and black stripes, carry yarn inside to avoid weaving in numerous ends.
  • πŸ’‘Pin all components in place before final sewing to ensure correct positioning and symmetry.
  • πŸ’‘Insert wire into antennas before closing to make them posable and able to hold their shape.
  • πŸ’‘Embroider facial features carefully using the specified stitch counts to ensure a balanced, expressive face.

This enchanting Ladybug Amigurumi pattern brings together intricate details and charming accessories to create a truly special handmade companion! From the sweet embroidered face with rosy cheeks to the layered wings adorned with black spots, every element has been thoughtfully designed. The striped body, elegant white collar, and adorable chamomile flower add personality and whimsy. Whether you're creating a gift for someone special or adding to your own collection, this ladybug is sure to bring smiles and joy! 🐞🧢✨

You ask,

we answer.

FAQs

What yarn weight works best for this ladybug pattern?

The pattern is designed for Jeans by Yarn Art, which is a DK weight (light worsted) yarn. You can substitute with any similar weight yarn, but your finished size may vary slightly. Make sure to match your hook size to your yarn for best results.

Can I make the ladybug without the wire in the antennas?

Yes, you can skip the wire if you prefer! The wire helps the antennas stay upright and be posable, but they'll still look cute without it. Just make sure to stuff them lightly so they maintain some structure.

How do I attach the wings so they look symmetrical?

Use pins to position both wings before sewing them permanently. Count the stitches carefully on each side to ensure they're placed at equal distances from the center back. The pattern specifies rounds 21-24 for red wings with 4-5 stitches between them.

What size will the finished ladybug be?

Using the recommended Jeans by Yarn Art with a 2.25mm hook, the finished ladybug will be approximately 25-30cm tall. Size may vary depending on your tension and yarn substitutions.

Is this pattern suitable for beginners?

This is an intermediate pattern due to multiple color changes, embroidery details, and various components that need assembly. Beginners with some amigurumi experience who are comfortable with basic stitches and shaping can tackle it with patience.

Can I skip making the chamomile flower accessory?

Absolutely! The chamomile is an optional decorative element. Your ladybug will still be complete and adorable without it, though the flower does add a sweet finishing touch.