🧢 Beautiful ✨ Detailed πŸ’ Adorable

Island Time Blanket Pattern

Island Time Blanket Pattern
4.2β˜… Rating
40-50 Hours Time Needed
2.6K Made This
βœ‚οΈ

Advanced Level

Designed for experienced knitters, these patterns involve intricate designs and complex techniques to challenge and inspire.

⏱️

Slow & Steady

A 10-12 hour projectβ€”great for savoring the process over several sessions.

🏑

Cozy Accent

A warm touch for your space that transforms ordinary corners into inviting nooks filled with handmade charm.

About This Island Time Blanket Pattern

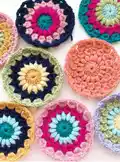
The Island Time Blanket is a sophisticated crochet project that showcases the beauty of continuous join-as-you-go construction. Each of the 99 squares features a large sunburst motif worked in four coordinating colors, creating stunning visual depth and texture. The pattern uses twelve different color combinations arranged strategically across the blanket to create an eye-catching gradient effect that evokes tropical island sunsets and ocean breezes.

Island Time Blanket Pattern crochet pattern - detailed view of completed project

This blanket pattern includes detailed instructions for creating sunburst motifs, joining them seamlessly, and finishing with an elegant pompom border. The comprehensive color chart ensures your blanket matches the designer's vision perfectly.

Why You'll Love This Island Time Blanket Pattern

I absolutely love this pattern because it challenges your crochet skills while keeping you engaged with constant color changes and intricate stitch work. The continuous join-as-you-go method means you're assembling as you create, eliminating hours of tedious seaming at the end. I appreciate how the designer provides such detailed color placement guidance, taking the guesswork out of creating that perfect gradient effect. The finished blanket is truly a showstopper that showcases your dedication and skill, making it perfect for displaying proudly in your home or gifting to someone special who deserves an heirloom-quality piece.

Island Time Blanket Pattern step 1 - construction progress Island Time Blanket Pattern step 2 - assembly progress Island Time Blanket Pattern step 3 - details and accessories Island Time Blanket Pattern step 4 - final assembly and finishing

Switch Things Up

I love experimenting with color combinations in this pattern, and there are so many ways to make it uniquely yours. Instead of the tropical island palette, you could create a moody autumn version using deep burgundies, burnt oranges, forest greens, and golden yellows for a cozy fall aesthetic. Or go completely modern with a monochromatic gradient using shades of grey from charcoal to silver with pops of mustard yellow.

For a baby blanket version, I'd recommend scaling down to a 6x7 grid of squares using softer pastel colors like mint, blush pink, lavender, and cream. You could even make this pattern more scrappy by using up leftover yarn from your stash - just maintain some color consistency in your main background color to tie everything together.

I've also thought about adding embellishments between the sunburst motifs during the join-as-you-go phase, like tiny crocheted flowers or French knots for extra texture. Another fun variation would be working the sunburst centers in a metallic or sparkly yarn for an elegant evening throw. The pompom border could be replaced with tassels, fringe, or even a simple shell stitch border if you prefer a more understated finish.

Common Mistakes & How to Fix Them

βœ— Not checking gauge before starting can result in a blanket that's significantly larger or smaller than the intended 48x61 inch finished size βœ— Running out of yarn mid-project because some colors use nearly the entire skein with only grams to spare, always purchase extra of the same dye lot βœ— Losing track of color placement without referencing the numbered square chart, which leads to an incorrect gradient pattern throughout the blanket βœ— Forgetting to fasten off after each round of the sunburst motif before joining the next color, creating messy color transitions and loose ends βœ— Skipping the continuous join-as-you-go method and attempting to seam squares later, which requires purchasing additional yarn and adds hours of finishing work

Island Time Blanket Pattern

Create a stunning Island Time Blanket that brings vibrant coastal colors into your home. This beautiful granny square blanket features a continuous join-as-you-go technique with colorful sunburst motifs arranged in a mesmerizing pattern. With 99 unique squares in cheerful shades of cloud, blossom, dragonfruit, and marina, you'll craft a cozy masterpiece that measures 48x61 inches after blocking. Perfect for experienced crocheters ready to tackle a rewarding project that combines technical skill with creative color work.

Advanced 40-50 Hours

Materials Needed for Island Time Blanket Pattern

β€” Main Fabric

  • 01
    WeCrochet Wool of the Andes Worsted (110yds/50g) in Cloud - 14 skeins (1481yds/673g)
  • 02
    WeCrochet Wool of the Andes Worsted in Blossom Heather - 2 skeins (216yds/98g)
  • 03
    WeCrochet Wool of the Andes Worsted in Dragonfruit - 3 skeins (246yds/112g)
  • 04
    WeCrochet Wool of the Andes Worsted in Caution - 3 skeins (233yds/106g)
  • 05
    WeCrochet Wool of the Andes Worsted in Crème Brulee - 3 skeins (229yds/104g)
  • 06
    WeCrochet Wool of the Andes Worsted in Green Tea Heather - 3 skeins (235yds/107g)
  • 07
    WeCrochet Wool of the Andes Worsted in Wonderland Heather - 3 skeins (235yds/107g)
  • 08
    WeCrochet Wool of the Andes Worsted in Marina - 3 skeins (249yds/113g)
  • 09
    WeCrochet Wool of the Andes Worsted in Solstice Heather - 3 skeins (246yds/112g)
  • 10
    WeCrochet Wool of the Andes Worsted in Haze Heather - 3 skeins (227yds/103g)
  • 11
    WeCrochet Wool of the Andes Worsted in Conch - 2 skeins (132yds/60g)
  • 12
    WeCrochet Wool of the Andes Worsted in Papaya Heather - 1 skein (103yds/47g)

β€” Tools Required

  • 01
    US 5.00 mm crochet hook
  • 02
    Needle for weaving in ends
  • 03
    Scissors
  • 04
    Stitch markers

Progress Tracker

0% Complete

β€” Pattern Large Sunburst Motif:

Round 1:

Ch 5, sl st into 5th chain from hook to create centre ring. Ch 2, work 15 DC into centre of ring (16 sts). Join with sl st to the top of the first DC (not the ch 2), Fasten off.

Round 2:

Join new colour into top of any st. Ch 1, puff into same st, ch 1. [Puff, ch 1] into each st around (16 puffs). Sl st into the ch-1 sp between the first two puff sts (not into the top of the first puff st), Fasten off.

Round 3:

Join new colour into any ch-1 sp. Ch 2, into same sp work a [4 DC cl, ch 2]. Work [4 DC cl, ch 2] into each ch-1 sp around (16 cl sts). Sl st into the ch-2 sp between the first two cls (not into the top of the cl st), Fasten off.

Round 4:

Join new colour into any ch-2 sp. Ch 2, into the same sp work a [5 DC cl, ch 3]. Work [5 DC cl, ch 3] into each ch-2 sp around (16 cl sts). Sl st into the ch-3 sp between the first two cl sts (not into the top of the first cluster st). Fasten off.

Info:

Only Complete the following Round 5 IF you do not plan on using the CJAYG to join the motifs. Round 5 is written out for anyone who wishes to seam their squares together separately at the end of their project.

Round 5:

Join Colour Cloud into any ch-3 sp and ch 3. [3 tr, ch 2, 4 tr] into same sp (1st corner). *4 DC into next ch-3 sp. 4 HDC into next ch-3 sp. 4 DC into next ch-3 sp. [4 tr, ch 2, 4 tr] into next ch-3 sp.* Repeat from * to * 2 more times. 4 DC into next ch-3 sp. 4 HDC into next ch-3 sp. 4 DC into next ch-3 sp. Join rnd with sl st into top of first tr (not the ch 3), Fasten off.

β€” Assembling Motifs with Continuous Join-As-You-Go (CJAYGO):

Info:

With RS of sunbursts face up, lay out all motifs in the arrangement from the colour graph above. Using colour Cloud, start in top right-hand corner to join squares across the rows. Example: First row will be joined from square number 9 across to square number 1. The second row will start with square number 18 and be worked across to square number 10. Following along with the video tutorial, crocheting squares together until blanket is complete. Once back to the start of the blanket (in the top right-hand corner)- DO NOT FASTEN OFF. You are now ready to start border Round 1.

β€” Border:

Round 1:

Sl st over the next 2 sts, into the ch-2 corner space. Ch 2; work [3 DC, ch 2, 4 DC] into the corner sp (completes 1st corner of blanket). Continue working 4 DC into each sp between granny clusters of the squares. Into each join (where two squares meet); work 3 DC on either side. In blanket corners work [4 DC, ch 2, 4 DC]. To join border rnd: sl st into the top of the first DC (not into the ch 2), Do not fasten off.

Round 2:

Repeat rnd 1 (in between the granny clusters of "3 DC" from previous round, work 4 DC), Do not fasten off.

Round 3:

Work pom-pom border all the way around blanket. Sl st into beginning st to join rnd. Fasten off, weave in all ends.

Assembly Instructions

  • Lay out all 99 completed sunburst motifs with right side facing up according to the numbered color chart provided in the pattern.
  • Starting in the top right corner with square 9, use the continuous join-as-you-go method with Cloud yarn to connect squares across each row.
  • Work from right to left across row 1 (squares 9 through 1), then continue with row 2 starting at square 18 and working to square 10.
  • Follow the CJAYG video tutorial carefully to ensure proper joining technique that creates seamless connections between all motifs.
  • Continue joining all rows until you return to the starting point in the top right corner, keeping yarn attached for the border.
  • Work three rounds of border using Cloud yarn, with double crochet clusters and chain-2 corners to frame the blanket.
  • Finish with a decorative pom-pom border around the entire perimeter, then weave in all remaining ends securely.

Important Notes

  • πŸ’‘Gauge is critical for this project - your 4-round large sunburst must measure 4.75 inches unblocked to ensure correct finished dimensions
  • πŸ’‘Purchase all yarn from the same dye lot as some colors use nearly every gram with minimal leftover
  • πŸ’‘Chain 2 counts as a double crochet throughout the entire pattern, and chain 3 counts as a treble crochet
  • πŸ’‘Always slip stitch into the space between stitches rather than into the top of stitches when joining rounds
  • πŸ’‘The continuous join-as-you-go method saves time and yarn compared to making squares separately and seaming later
  • πŸ’‘Reference the numbered square color combo chart constantly to ensure correct color placement for the gradient effect
  • πŸ’‘Block your finished blanket to achieve the full 48x61 inch dimensions and to even out all stitches

This stunning Island Time Blanket pattern brings together advanced crochet techniques with gorgeous coastal-inspired colors to create a true heirloom piece. The continuous join-as-you-go construction method keeps you engaged throughout the entire project while eliminating tedious finishing work. With 99 unique colorful sunburst squares arranged in a carefully planned gradient, you'll create a blanket that showcases both your technical skill and artistic eye. The finished 48x61 inch blanket is perfect for displaying as a throw or gifting to someone who appreciates handcrafted luxury. 🧢 Happy crocheting! 🌺✨

You ask,

we answer.

FAQs

Can I substitute different yarn brands for this pattern?

Yes, you can use any worsted weight yarn, but make sure to check your gauge carefully. The pattern requires specific yardage for each color, so calculate your needs based on the yardage listed rather than skein count. Different yarn brands may have different yardage per skein.

What is continuous join-as-you-go and why should I use it?

CJAYG is a technique where you join motifs as you create them rather than seaming them together later. This method saves time, uses less yarn, and creates seamless joins. The pattern includes video tutorial references to help you master this technique.

How do I keep track of which color combination goes in each square?

The pattern includes a detailed numbered square color combo chart that lists the four colors for each of the 99 squares. It's helpful to print this chart and check off squares as you complete them, or lay out your squares according to the pattern graph as you work.

Why is gauge so important for this blanket pattern?

Because you're making 99 squares, even a small gauge difference multiplies significantly. If your gauge is off, your blanket could end up several inches larger or smaller than the intended 48x61 inches. Additionally, incorrect gauge affects yarn quantities needed.

Can I make this blanket larger or smaller?

Yes, you can adjust the size by adding or removing squares from the grid. The pattern uses a 9x11 grid (99 squares). You could make it 10x12 for a larger blanket or 8x10 for a smaller one. Recalculate your yarn needs based on the number of squares you plan to make.

What should I do if I run out of a specific color?

The pattern warns that some colors are used almost completely with only grams to spare. If you run out, try to source more yarn from the same dye lot. If that's impossible, you might substitute a similar color in less prominent squares or work extra carefully to maximize your yarn usage.