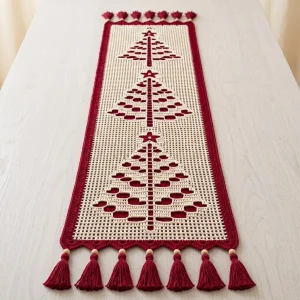
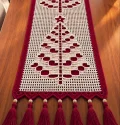
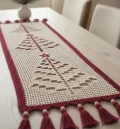
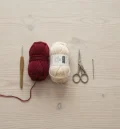
There’s something so calming about filet crochet. You pick up a spool of fine thread, settle into your favorite chair, and the design quietly appears row after row. This runner is exactly that kind of project, a long-weekend companion that rewards you each time a new tree takes shape. Put on a movie, pour something warm, and let the rhythm of chain one, double crochet carry you along. By the time the last tassel is tied, you’ll have a piece that feels like it came out of a family heirloom chest.
Progress Tracker
0% Complete
— 1. Center Panel - Lead-In Rows :
Info :
Finished size is approximately 8 x 22 in (20 x 56 cm) including the border, with about 3 in (8 cm) of tassels at each short end. The panel is 33 squares wide and 100 rows long, worked flat in cream with red blocks added in the trees. The foundation chain is always 2 x the number of squares + 3. To make it longer, add 32 rows per repeat (one 20-row tree plus a 12-row gap). To make it wider, add 2 chains to the foundation for every extra square and add the same number of ms to each side of the trunk so it stays centered.
Info :
Order of work: Section 1 (8 rows), Tree 1 (Section 2), Plain Mesh Rows Between Trees (Section 3), Tree 2, Plain Mesh Rows Between Trees, Tree 3, then Closing Mesh Rows (Section 4). That adds up to 100 rows (8 + 20 + 12 + 20 + 12 + 20 + 8). At the end of every row, work the last dc of the final ms into the 3rd ch of the previous row’s turning ch.
Row 1 :
With cream, ch69. Dc in 5th ch from hook (square 1), then 32 ms across the chain (1 + 32 = 33 squares).
Row 2-8 :
Turn, ch4, skip first dc and next ch-1 sp, dc in next dc (square 1), 32 ms (1 + 32 = 33 squares).
— 2. Tree Chart Rows (work 3 times, once for each tree) :
Info :
Each tree is 20 rows. Every row starts with: turn, ch4, skip first dc and next ch-1 sp, dc in next dc (square 1). The remaining squares are listed after that. All ms are cream and all bl are red. Switch to red on the last yarn over of the stitch before a block, carry the unused color loosely along the top of the row and stitch over it, then switch back to cream the same way. The trunk is always square 17 and every row totals 33 squares. The star is made separately in Section 7 and sewn on top of Tree Rows 1-3.
Tree Row 1-3 :
Turn, ch4, skip first dc and next ch-1 sp, dc in next dc, 32 ms, all cream (1 + 32 = 33 squares).
Tree Row 4-5 :
Turn, ch4, skip first dc and next ch-1 sp, dc in next dc, 15 ms, 1 bl in red, 16 ms (1 + 15 + 1 + 16 = 33 squares).
Tree Row 6 :
Turn, ch4, skip first dc and next ch-1 sp, dc in next dc, 15 ms, 1 bl in red, 16 ms (1 + 15 + 1 + 16 = 33 squares).
Tree Row 7 :
Turn, ch4, skip first dc and next ch-1 sp, dc in next dc, 13 ms, 1 bl in red, 1 ms, 1 bl in red, 1 ms, 1 bl in red, 14 ms (1 + 13 + 1 + 1 + 1 + 1 + 1 + 14 = 33 squares).
Tree Row 8 :
Turn, ch4, skip first dc and next ch-1 sp, dc in next dc, 12 ms, 2 bl in red, 1 ms, 1 bl in red, 1 ms, 2 bl in red, 13 ms (1 + 12 + 2 + 1 + 1 + 1 + 2 + 13 = 33 squares).
Tree Row 9 :
Turn, ch4, skip first dc and next ch-1 sp, dc in next dc, 15 ms, 1 bl in red, 16 ms (1 + 15 + 1 + 16 = 33 squares).
Tree Row 10 :
Turn, ch4, skip first dc and next ch-1 sp, dc in next dc, 11 ms, 2 bl in red, 2 ms, 1 bl in red, 2 ms, 2 bl in red, 12 ms (1 + 11 + 2 + 2 + 1 + 2 + 2 + 12 = 33 squares).
Tree Row 11 :
Turn, ch4, skip first dc and next ch-1 sp, dc in next dc, 13 ms, 5 bl in red, 14 ms (1 + 13 + 5 + 14 = 33 squares).
Tree Row 12 :
Turn, ch4, skip first dc and next ch-1 sp, dc in next dc, 10 ms, 2 bl in red, 3 ms, 1 bl in red, 3 ms, 2 bl in red, 11 ms (1 + 10 + 2 + 3 + 1 + 3 + 2 + 11 = 33 squares).
Tree Row 13 :
Turn, ch4, skip first dc and next ch-1 sp, dc in next dc, 15 ms, 1 bl in red, 16 ms (1 + 15 + 1 + 16 = 33 squares).
Tree Row 14 :
Turn, ch4, skip first dc and next ch-1 sp, dc in next dc, 9 ms, 3 bl in red, 3 ms, 1 bl in red, 3 ms, 3 bl in red, 10 ms (1 + 9 + 3 + 3 + 1 + 3 + 3 + 10 = 33 squares).
Tree Row 15 :
Turn, ch4, skip first dc and next ch-1 sp, dc in next dc, 13 ms, 5 bl in red, 14 ms (1 + 13 + 5 + 14 = 33 squares).
Tree Row 16 :
Turn, ch4, skip first dc and next ch-1 sp, dc in next dc, 8 ms, 3 bl in red, 4 ms, 1 bl in red, 4 ms, 3 bl in red, 9 ms (1 + 8 + 3 + 4 + 1 + 4 + 3 + 9 = 33 squares).
Tree Row 17 :
Turn, ch4, skip first dc and next ch-1 sp, dc in next dc, 15 ms, 1 bl in red, 16 ms (1 + 15 + 1 + 16 = 33 squares).
Tree Row 18 :
Turn, ch4, skip first dc and next ch-1 sp, dc in next dc, 7 ms, 4 bl in red, 4 ms, 1 bl in red, 4 ms, 4 bl in red, 8 ms (1 + 7 + 4 + 4 + 1 + 4 + 4 + 8 = 33 squares).
Tree Row 19 :
Turn, ch4, skip first dc and next ch-1 sp, dc in next dc, 12 ms, 7 bl in red, 13 ms (1 + 12 + 7 + 13 = 33 squares).
Tree Row 20 :
Turn, ch4, skip first dc and next ch-1 sp, dc in next dc, 15 ms, 1 bl in red, 16 ms (1 + 15 + 1 + 16 = 33 squares). Fasten off red and keep working with cream.
— 3. Plain Mesh Rows Between Trees (work twice, after Tree 1 and after Tree 2) :
Info :
These 12 cream rows give each tree breathing room. Work them once after the first tree and once after the second.
Row 1-12 :
Turn, ch4, skip first dc and next ch-1 sp, dc in next dc, 32 ms, all cream (1 + 32 = 33 squares).
— 4. Closing Mesh Rows :
Row 1-8 :
After Tree 3, turn, ch4, skip first dc and next ch-1 sp, dc in next dc, 32 ms, all cream (1 + 32 = 33 squares). Fasten off after Row 8.
— 5. Red Border Rounds :
Info :
The border is worked in red around the whole panel. Along the short ends you’ll work into the dc stitches and ch-1 spaces of the last row, and along the long sides into the row-ends. Place a stitch marker in the middle sc of each corner group to keep the corners tidy.
Round 1 :
Join red with a sl st in a corner dc at one short end, ch1. 3 sc in the corner dc, sc in each of the next 65 stitches and ch-1 spaces across the end, 3 sc in the next corner dc, 2 sc in each of the 98 row-ends along the first long side, 3 sc in the corner dc, sc in each of the next 65 stitches and ch-1 spaces across the other short end, 3 sc in the corner dc, 2 sc in each of the 98 row-ends along the second long side, sl st to first sc (3 + 65 + 3 + 196 + 3 + 65 + 3 + 196 = 534).
Round 2 :
Ch1, sc in each stitch around, working 3 sc in the middle sc of each 3-sc corner group, sl st to first sc (534 + 8 = 542).
Round 3 :
Ch1, sc in each stitch around, working 3 sc in the middle sc of each corner group, sl st to first sc, fasten off (542 + 8 = 550). Each short end now has 79 stitches, counting the 7-sc corner group at each side.
— 6. End Edging (make 2, one on each short end) :
Info :
This pointed edging is worked along the short ends only. The long sides keep the plain border. Each peak has a ch-3 space at the tip where a tassel will hang.
Edging Row :
Join red with a sl st in the first sc of the corner group at one end of a short side, ch1, sc in same stitch. *Sc in next 2 stitches, hdc in next 2 stitches, dc in next stitch, (dc, ch3, dc) in next stitch, dc in next stitch, hdc in next 2 stitches, sc in next 2 stitches; repeat from * 7 times in total (11 stitches per repeat), sc in the last stitch of the end. Fasten off (1 + 77 + 1 = 79 stitches used; 86 stitches and 7 ch-3 spaces).
— 7. Crochet Stars (make 3) :
Round 1 :
With red, make a mr. Ch1, 10 sc in the ring, sl st to first sc, pull the ring closed (10).
Round 2 :
*Sl st in next sc, ch3, sc in 2nd ch from hook and in next ch, sl st in next sc; repeat from * 4 more times to make 5 points (5 repeats x 2 sc = 10). Fasten off and leave a 10 in (25 cm) tail for sewing.
Info :
The pearl bead is sewn to the center of each star after the star is attached to the runner. See the assembly steps for exact placement.
— 8. Beaded Tassels (make 14, 7 for each short end) :
Info :
Use the red tassel thread held together in several strands. Exact wrap counts depend on how thick your thread is, so wind until the tassel looks full and round.
Wrap :
Wrap red tassel thread about 60 times around a piece of cardboard roughly 3.5 in (9 cm) tall.
Tie Top :
Slide a 12 in (30 cm) length of red thread under all the wraps at the top edge of the cardboard. Tie it in a tight double knot and leave the tails long.
Cut :
Cut through the loops at the bottom edge of the cardboard and slide the bundle off.
Neck :
About 0.75 in (2 cm) below the top knot, wrap a separate 20 in (50 cm) strand of red around the bundle 8 times. Tie it off tightly and tuck the tails inside the tassel.
Trim :
Trim the bottom of the tassel evenly so it measures about 3 in (8 cm) long.
Bead :
Thread both top tails through a wooden bead so it sits snugly on top of the tassel, then knot the tails together right above the bead. Keep them long enough to attach the tassel to the runner.
Your runner is finished, the tassels are swinging, and the trees look right at home on the table. 🧶 Take a moment to admire the crisp cream mesh against that deep cranberry border, because you stitched every single square. Set a candle nearby, tuck in a few pinecones, and watch how the red catches the light. Next December you’ll pull it from the drawer and remember the evenings you spent making it. Happy stitching, and merry everything! ✨