About This Crochet Hanging Toilet Paper Holder Pattern
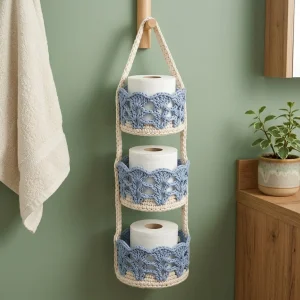
Hang it beside the toilet, in a laundry nook, or on the back of a door. It also makes a lovely housewarming gift for anyone with a freshly painted bathroom.
Ideal for those with basic crocheting experience, featuring slightly more advanced stitches and techniques to expand your skills.
Fits nicely into a free afternoon — 2 to 5 hours of focused, enjoyable crocheting.
An elegant detail to elevate any look, combining traditional techniques with contemporary design sensibilities.
Hang it beside the toilet, in a laundry nook, or on the back of a door. It also makes a lovely housewarming gift for anyone with a freshly painted bathroom.
I’m slightly obsessed with how forgiving this one is. Once you’ve nailed the fan round, the other two baskets practically make themselves, and every finished tier gives you a tiny hit of satisfaction. I love that it’s genuinely useful, too. It’s rare to crochet something that solves a real storage headache and still looks like decor.

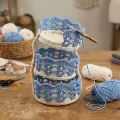
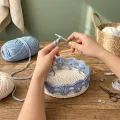
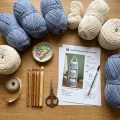
I made my first hanging holder because I was tired of tripping over a stack of toilet rolls beside the tub. I’d seen the plastic wire ones and thought, surely yarn can do better. The blue fan band was the part I kept fiddling with. My first try used a single color for everything and it looked flat, so I switched the walls to a dusty blue and suddenly the whole thing popped against the cream bases. The straps were the surprise: two plain flat strips, and yet they give the hanger that sturdy, handmade charm.
Here’s a tip I wish I’d had: make all three bases first, then all three blue bands. By the third basket your hands know the rhythm of the shells and the sl st walk to the center dc, and you stop counting out loud. Mine took a couple of evenings with a podcast on.
If blue isn’t your color, try sage with oatmeal, or blush with warm gray. I’ve also hung one in a laundry nook for dryer sheets and clothes pegs, and honestly it looked even sweeter there.
Picture a slim, three-tiered hanger that keeps spare rolls right where you need them instead of crammed into a cabinet. You’ll work sturdy cream bases and soft blue fan-stitch bands, then join everything with two flat straps and a loop that slips over a peg or hook. Each basket repeats the same simple rounds, so by the second tier you’ll be flying along. Your bathroom wall gets a pretty piece of storage, and you get to say you made it yourself.
Each basket is about 11 cm (4.3 in) wide and 10 cm (3.9 in) tall, and the finished hanger measures roughly 58 cm (22.8 in) from the top of the loop to the bottom. This is worked with chunky cotton cord and a hook of about 4.5 mm, at roughly 14 sc per 10 cm (3.9 in). Rounds 1 to 10 are worked in a continuous spiral, so don’t join, and keep a marker in the first st of each round. Start with cream.
6 sc in MR, pull the ring tight (6)
inc in each st around (12)
(1 sc, inc) x 6 (18)
(2 sc, inc) x 6 (24)
(3 sc, inc) x 6 (30)
(4 sc, inc) x 6 (36)
(5 sc, inc) x 6 (42)
(6 sc, inc) x 6 (48)
sc BLO in each st around (48). This turns the corner and starts the wall.
sc in each st around (48)
sc in each st around, then sl st in the first sc to join (48). Fasten off the cream, leaving a 15 cm (6 in) tail to weave in later.
The fan band is worked on the cream wall and is joined at the end of every round without turning. The shells sit between single crochets, and the arches in Round 14 make the airy look.
Join blue in any st with a sl st, ch1, sc in the same st and in each st around, sl st in the first sc to join (48)
ch1, sc in the same st as the join (this is st 1). (sk 3 sts, 7 dc in the next st, sk 3 sts, sc in the next st) x 5. Then sk 3 sts, 7 dc in the next st, sk 3 sts, sl st in the first sc to join. (6 shells of 7 dc and 6 sc, 48 sts)
sl st in each of the next 4 dc so you are on the center dc of the first shell, ch1, sc in the same dc. (ch5, sk the next 7 sts, sc in the center dc of the next shell) x 5. Then ch5, sk the last 7 sts, sl st in the first sc to join. (6 sc and 6 ch5 arches)
ch3 (counts as the first dc), 6 dc in the next ch5 arch (7 dc made). (sc in the next sc, 7 dc in the next ch5 arch) x 5. Sc in the first sc of the previous round, then sl st in the top of the ch3 to join. (6 shells of 7 dc and 6 sc, 48 sts). Fasten off and weave in the blue ends.
Both straps are identical flat strips of cream. If you’d like a fourth tier, add 22 ch to the foundation (107 ch in total) and sew the fourth basket at strap st 69. Keep your tension snug so the strap doesn’t stretch.
With cream, ch85
sc in the 2nd ch from the hook and in each ch across (84)
ch1, turn, sc in each st across (84). Fasten off, leaving a 40 cm (15.7 in) tail for sewing.
There’s something so satisfying about finishing the last fan on that third basket and finally lifting the whole hanger onto its peg. 🧶 Take your time with the base rounds, enjoy the rhythm of the shells, and don’t worry if your first strap looks a little wavy, because it will block out beautifully. Once it’s up on the wall, step back and enjoy the soft pop of color. Happy crocheting, and enjoy every cozy stitch! ✨
Yes, but the pattern was designed around chunky cotton cord and a 4.5 mm hook. Thinner yarn makes the baskets too small for a roll, and thicker cord makes them bulky. Make a quick swatch of the base rounds and check that Round 8 measures about 11 cm (4.3 in) across before you commit.
Add 22 ch to each strap, so the foundation becomes ch107 and Row 1 has 106 sc. Make a fourth basket and sew it to strap sts 69 to 80 on both straps. The existing baskets stay at sts 3, 25, and 47.
Standard rolls fit perfectly. For larger rolls, go up to a hook about 1 mm bigger for the base and wall rounds, and keep the same stitch counts. The fan band will stretch slightly to wrap around the bigger roll.
It helps. Blocking opens up the fans and flattens the scalloped edge, and a quick press keeps the straps from curling. Pin the straps flat to 60 cm (23.6 in) and let them dry fully before sewing.
If you’re comfortable with sc, dc, and working in the round, you can do it. The only tricky bit is the slip stitch walk to the center dc at the start of Round 14. Take your time there and you’ll be fine.