About This Crochet Flower Granny Square Bedspread Pattern
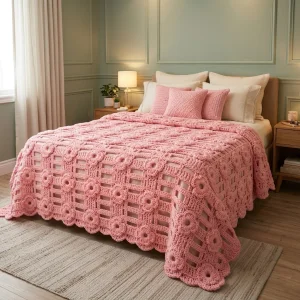
A lovely wedding, housewarming, or new-home gift, and it looks gorgeous draped over the foot of a bed or folded across a guest room blanket chest.
Ideal for those with basic crocheting experience, featuring slightly more advanced stitches and techniques to expand your skills.
A 10-12 hour project—great for savoring the process over several sessions.
A comforting piece for home or gifts that brings handmade warmth to everyday moments and special occasions.
A lovely wedding, housewarming, or new-home gift, and it looks gorgeous draped over the foot of a bed or folded across a guest room blanket chest.
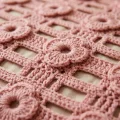
I'm a sucker for any project where I can make one little piece, admire it, and then make fifty more. These flowers are so satisfying, with that chunky raised petal that pops right off the square. And the open gaps mean the blanket stays light, so you're not wrestling a heavy mountain of yarn in your lap by the end. Every time I join a new square I can't help but smile.

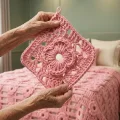
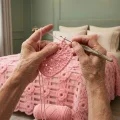
I made my first flower square bedspread for my sister's wedding, and I still remember how nervous I felt starting the petal round. It looked a little wobbly at first, but by the third square my hands knew exactly what to do. That's the magic of motif projects: you get better with every single one.
My biggest tip is to keep your tension relaxed in the spoke round. If it's too tight, the petals bunch up and the center looks puckered. Loosen up, take a breath, and let the yarn flow through your fingers.
I also love picking a soft rosy shade like this one, but a creamy ivory or a dusty sage green would look just as dreamy in a spare room. If you want a bit of contrast, try working the final border round in a slightly deeper shade so the scallops frame the whole bed like a soft ribbon.
When I finished mine and laid it over the bed for the first time, my sister cried happy tears. That's what I hope this pattern gives you too.
Picture a bedroom that feels like a warm hug, with a soft pink bedspread draped over the bed and little flowers blooming across every square. This pattern gives you a classic joined-motif bedspread with an open, airy ladder lattice between the blooms. You'll work one flower square at a time, which makes it easy to carry along on the sofa or in the car. Join them as you go, add the scalloped flower edging, and you'll have a showpiece that looks heirloom-worthy.
Each square measures approximately 18 cm (7 in). The finished bedspread shown is about 180 cm (71 in) by 220 cm (87 in) before the border, made from about 10 by 12 squares. Make as many squares as you need for your bed size. To lengthen or widen, add one square per 18 cm (7 in) and adjust your join rows accordingly.
Make a MR, ch2 (counts as hdc), work 11 hdc into the ring, sl st to the top of the beginning ch2 to join (12)
ch3 (counts as dc), dc in same st, 2 dc in each remaining st around, sl st to top of beginning ch3 to join (24)
ch1, sc in same st, ch3, skip 1 st, sc in next st, repeat from * to * around ending with ch3, sl st to first sc to join (12 sc, 12 ch3 sps)
sl st into the next ch3 sp, ch3, 4 dc in the same sp, sl st into the next sc, then 5 dc in the next ch3 sp, sl st into the next sc, repeat around to form petals; you should have 6 petals, sl st to close (6 petals of 5 dc each)
ch1, sc in the same st, ch3, sl st in the back of the next sc between petals, ch3, repeat around to join (6 sc, 12 ch3 sps)
sl st into the first ch3 sp, ch3, 2 dc in same sp, ch2, 3 dc in the next ch3 sp, ch1, repeat for the remaining sps, sl st to join (36 dc, 6 ch2 sps, 6 ch1 sps)
sl st to next 2 dc, sl st into the ch2 sp, ch3, 2 dc in same sp, ch3, 3 dc in same sp for corner, ch1, 3 dc in next ch1 sp, ch1, repeat around making 4 corners with 3 dc, ch3, 3 dc; sl st to join (48 dc, 4 corner ch3 sps, 8 ch1 sps)
sl st to the next 2 dc and into the first ch3 corner sp, ch3, 2 dc, ch3, 3 dc into the corner, dc in each dc across, working ch1 sp as dc; at each corner work 3 dc, ch3, 3 dc; sl st to join (square has 11 dc per side plus corner groups)
ch3, work 1 dc in each dc around, at each corner work 3 dc, ch3, 3 dc; sl st to join and fasten off (square finished at approximately 18 cm (7 in))
Lay your squares out in a grid and join them with a continuous sl st join on the wrong side, working through the back loops of both squares at the same time. The ladder-style gaps appear naturally at the ch1 sps between squares.
Join squares across the first row by slip stitching through both back loops from corner to corner, working one sl st into each dc across (11 sl sts per join)
Join the second row of squares to the first, matching corners, and sl st across each long join in the same way
Continue until all rows are joined. Sew in loose ends as you go to avoid a pile-up at the end
The border adds petal-shaped scallops that echo the center flowers. Mark every corner and work evenly along each side.
Join yarn at any corner ch3 sp, ch1, 3 sc in the corner sp, sc in each st along the edge, 3 sc in each corner, sl st to join
ch1, sc in the same st, skip 2 sts, 5 dc in the next st, skip 2 sts, sc in the next st, repeat around to make shell scallops, sl st to join
sl st to the center dc of the first shell, ch1, sc in same st, ch3, sc in the center dc of the next shell, repeat around, sl st to join
sl st into the first ch3 sp, ch3, 6 dc in the same sp, sl st in the next sc, repeat around to form raised petals that look like open flower edges, sl st to join and fasten off
There's something deeply comforting about watching a pile of little pink flowers grow into a full bedspread. Take your time, enjoy each square, and let your stitches tell their own story. Whether it ends up on your own bed or in the hands of someone you love, it's going to bring warmth to the room for years. Grab your yarn, settle into your favorite chair, and start blooming one petal at a time! 🧶✨
For a double bed, plan on roughly 10 squares wide by 12 squares long at 18 cm (7 in) each, which gives about 180 by 216 cm (71 by 85 in) before the border. Add or remove rows to suit your mattress and desired drop.
Yes, a DK weight cotton works well and makes a lighter bedspread, but your squares will be smaller. Make a swatch, measure your square, and recalculate how many you need to reach your bed size.
Blocking is strongly recommended. It flattens the raised petals, squares up the corners, and makes joining much easier because every square is the same size.
Absolutely. Make 5 by 6 squares for a lap throw of about 90 by 108 cm (35 by 43 in), then add the same scalloped border.
If you're comfortable with dc, hdc, and working into a magic ring, you can handle it. The petal round is the trickiest part, so practice it on a spare square first.