About This Crochet Butterfly Motif Bedspread Pattern
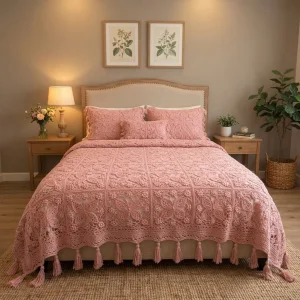
Lay it across a guest bed or the foot of your own and it instantly gives the room a soft, romantic feel. It also makes a gorgeous wedding or housewarming gift.
Designed for experienced crocheters, these patterns involve intricate designs and complex techniques to challenge and inspire.
A 10-12 hour project—great for savoring the process over several sessions.
A comforting piece for home or gifts that brings handmade warmth to everyday moments and special occasions.
Lay it across a guest bed or the foot of your own and it instantly gives the room a soft, romantic feel. It also makes a gorgeous wedding or housewarming gift.
I'll admit the butterfly wings had me hooked from the first sample. There's something so satisfying about watching the little veins of chain spaces fill in and suddenly look like real wings. Making the corner flowers is my favorite break, because they work up fast and the pearls make me grin every single time. Join as you go and you'll never face a giant pile of loose squares at the end.

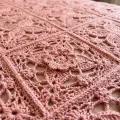
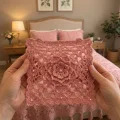
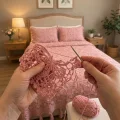
I made my first butterfly square on a rainy afternoon, and honestly I wasn't sure the wings would work. The veins looked like a tangle until I blocked the piece, and then everything opened up and I actually gasped. That's when I knew this was going to be a long project I'd love every minute of.
My biggest tip is to make a handful of squares before joining anything. It's easy to feel like you've made a mistake when one square looks a little off, but compare it to the others and you'll see they settle into the same rhythm. I also like to block in small batches so I'm never stuck with a pile of unblocked work.
If you want to play with color, try a soft ivory for a bridal feel, or a deep sage for a woodland look. I'd keep the pearls in ivory either way, because they catch the light so nicely. Whatever shade you choose, give yourself permission to go slowly and enjoy it.
Picture a bed dressed in soft dusty rose lace, with delicate butterflies fluttering across every square. You'll make one airy butterfly motif at a time, then join them into a bedspread that feels like a family heirloom. Each square has its own little flower corners and a pearl or two for a touch of sparkle. It's a patient project, but every finished motif gives you a lovely little win.
Each finished square measures approximately 20 cm (8 in). Make as many squares as you need. A bedspread about 5 squares wide and 7 long measures roughly 100 cm by 140 cm (39 in by 55 in), and you can add more repeats to reach your bed size. The motif is worked in the round.
Ch 6, sl st in the first ch to form a ring. Ch 3 (counts as dc), 15 dc in ring, sl st in top of the beginning ch 3 to join (16 dc)
Ch 4 (counts as dc and ch 1), dc in the next st, *ch 1, dc in the next st; repeat from * around, ch 1, sl st in the 3rd ch of the beginning ch 4 (16 dc, 16 ch-1 sps)
Sl st into the first ch-1 sp, ch 3, 2 dc in same sp, sk 1 ch-1 sp, *3 dc in the next ch-1 sp, sk 1 ch-1 sp; repeat from * around, sl st to join (8 groups of 3 dc, 24 dc)
Ch 1, sc in each of the 24 sts around, sl st to join (24 sc)
The wings are worked on the center, one upper wing and one lower wing on each side. Work the upper wings first, then the lower ones. The fine veining is built from chain spaces, so keep your tension relaxed.
Join yarn in any sc, ch 1, sc in the next 5 sts, turn (5 sc)
Ch 1, 2 sc in the first st, sc in the next 3 sts, 2 sc in the last st, turn (7 sc)
Ch 4, sk 1 st, dc in the next st, *ch 1, sk 1 st, dc in the next st; repeat from * across, turn (4 dc, 3 ch sps)
Ch 3, dc in the next 3 dc, working 2 dc in each ch-1 sp, sc in last dc, turn (8 sts)
Ch 1, sc in the first 2 sts, hdc in the next 4 sts, 2 hdc in the next st, sc in the last st, turn (9 sts)
Ch 1, sc in the first 2 sts, dc in the next 5 sts, sc in the last 2 sts, turn (9 sts)
Ch 1, sc in each st across, finish with ch 3 and sl st in the final st, then fasten off (9 sc)
Join yarn 6 sc to the right of the upper wing, ch 1, sc in the next 4 sts, turn (4 sc)
Ch 1, 2 sc in the first st, sc in the next 2 sts, 2 sc in the last st, turn (6 sc)
Ch 3, dc in the next 5 sts, turn (6 sts)
Ch 1, sc in each st across, finish with ch 2 and sl st into the last st, then fasten off (6 sc)
Repeat the upper and lower wings on the opposite side of the center so they mirror each other. The two sides are worked 4 sts apart at the center, which leaves room for the body.
Join yarn at the top of the center between the wings, ch 8, sc in the 2nd ch from the hook and in each ch across, then sl st into the center (7 sc)
Ch 8, sl st in the 2nd ch from the hook, sc in the next 2 ch, sl st in the remaining 4 ch, sl st into the body
Work the second antenna on the opposite side the same way, then fasten off
Join yarn at the tip of an upper wing, ch 1, sc in the same st, *ch 5, sk 3 sts, sc in the next st; repeat from * around the butterfly, ending with ch 5 and sl st to join (12 ch-5 sps)
Sl st into the first ch-5 sp, ch 3, 4 dc in same sp, *5 dc in the next ch-5 sp; repeat from * around, sl st to join (60 dc)
Ch 1, sc in the first dc, *ch 3, sk 2 dc, sc in the next dc; repeat from * around, ch 3, sl st to join (20 ch-3 sps)
Sl st into the first ch-3 sp, ch 3, 2 dc in the same sp, *3 dc in the next ch-3 sp; repeat from * around, sl st to join (60 dc)
Ch 1, sc in each of the 60 dc around, sl st to join (60 sc)
Ch 1, sc in the first st, *ch 3, sk 2 sts, sc in the next st; repeat from * around, ch 3, sl st to join (20 ch-3 sps)
Sl st into the first ch-3 sp, ch 3, 2 dc in the same sp, *3 dc in the next ch-3 sp; repeat from * around, sl st to join and fasten off (60 dc)
Make 4 flowers per motif, one at each corner. They are worked separately and then sewn or joined in place. Count the corner flowers as separate pieces with 5 petals each.
Ch 4, sl st into the first ch to form a ring. Ch 1, 10 sc in the ring, sl st to join (10 sc)
Ch 1, sc in the first st, *ch 3, sk 1 st, sc in the next st; repeat from * around, ending with ch 3 and sl st to join (5 ch-3 sps)
In each ch-3 sp work sl st, ch 3, 3 dc, ch 3, sl st to make a petal (5 petals)
Fasten off and weave in ends
Once all the squares are joined, work the edging around the entire bedspread. A shell edge is used here, which gives a soft scalloped finish. Swap in a different scallop if you prefer.
Join yarn in any corner, ch 1, sc evenly around the entire outside edge, working 3 sc in each corner, sl st to join
Ch 1, sc in the first st, *sk 2 sts, 5 dc in the next st, sk 2 sts, sc in the next st; repeat from * around, sl st to join (shell edging)
Sl st into the first dc of the shell, ch 1, sc in the first dc, *picot, sc in the next dc; repeat across each shell, sc between shells, sl st to join and fasten off
Wrap yarn around the cardboard about 12 times, tie one end with a short strand, cut the other end, and wrap a strand near the top to form the head. Make as many as you need along the bottom edge, approximately 14 for a 100 cm (39 in) width
There's something really special about a bedspread that grew one square at a time under your hands. By the time you add the last tassel, you'll have a piece that looks like a treasured heirloom. Take your time, enjoy the rhythm of each butterfly, and don't be surprised if friends ask you to make one for them next. Grab your thread, settle into your favorite chair, and let the stitches carry you along. Happy crocheting! 🧶✨
A twin bed needs roughly 5 squares wide by 9 long, a double about 7 by 9, and a queen about 8 by 10 with a little overhang. Each square is about 20 cm (8 in), so measure your mattress and divide.
You can, but the lace will lose its fine detail. A DK weight would make each square much bigger, so you'd need fewer squares and a larger hook. Swatch first to confirm your size.
It's advanced because of the wing shaping and the chain-space veining. If you're comfortable with dc, sc, and working in the round, start with one practice motif and take it slowly.
Wet block each motif and pin the wing tips out. Let it dry fully before unpinning, and the wings will lie flat and keep their shape.
No, both are optional. The bedspread is lovely with just the flowers and the scalloped edge, and you can skip the tassels for a cleaner look.
