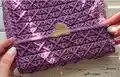
Create your own stylish and functional canvas handbag with this detailed crochet pattern! This beautiful bag features a structured design with embroidered details, a professional lock closure, and an elegant chain strap. Perfect for everyday use or special occasions, this intermediate-level project combines traditional crochet techniques with modern finishing touches. The finished handbag measures approximately 8.5 inches long, 7.5 inches high, and 2.5 inches wide, making it the perfect size for carrying your essentials in style.
Progress Tracker
0% Complete
— Canvas :
Starting Chain :
Crochet 26 CH
Row 1 :
25 SC from the 2nd loop from the hook on the back loop of the chain only, CH
Info :
When crochet SC, pull the working loop to the level of the hook (17-18 mm). Then the canvas will be without holes. Then tighten the loop on the hook back. Insert the hook through the last SC, over hook the end of the thread and pull out. Crochet in the end of the thread in the next row.
Row 3 :
25 SC, CH. Cut the end of the beginning of the crocheting, process with fire. From the 3rd row crochet the 1st SC on the legs of the last SC and skip the 1st loop of the row.
Row 67 :
25 SC. Don't cut the thread.
— Base Trim :
Step 1 :
Crochet 2 SC in the last SC of the 67th row
Step 2 :
Next crochet 65 SC in each row
Step 6 :
Next 65 SC in each row
Step 7 :
Then 1 SC in the 1st SC of the 67th row. Cut the thread, insert the hook under 1st SC of the row, pull the thread. Tighten back in the last loop. Tighten the end through few loops, process with fire.
Step 8 :
Insert the hook in any SC of the base trim. Pull the loop, insert the hook in the next SC, crochet SlSt. Next crochet SlSt in each SC of the base trim.
Step 9 :
Cut the thread and pull out the end. Close the row: insert the hook under 1st SlSt of the row, pull the thread. Tighten back in the last loop. Tighten the ends through few loops, process with fire.
Info :
Now, after the base trim, the canvas consists of 68 rows.
— Embroidery :
Info :
Start embroidery from the top left corner. The top is the future valve, where the crocheting of the fabric is finished (67th row). Cut the thread about 4.4 yards (4m) long, so there are fewer knots.
Step 1 :
Insert the needle under the base trim. Count 4 rows and 4 SC and insert the needle between the 4th and 5th SC.
Step 2 :
Insert the needle after 4th row again, then up under the base trim
Step 3 :
Next embroider from left to right, down and right to left. Repeat rapport until the end of the canvas. Don't tighten the seams, but should not hang out.
Step 4 :
Tie the knot when the thread runs out. Then join the threads with the lighter. Hide the ends. Steam with the iron through a damp cloth.
Info :
Embroidery looks like squares on the wrong side.
— Side Part (Make 2) :
Starting Chain :
Crochet 7 CH
Row 1 :
6 SC from the 2nd loop from the hook on the back loop of the chain only, CH. Insert the hook through the last SC. Over hook the end of the thread and pull out. Crochet in the end of the thread in the next row.
Row 3 :
6 SC, CH. From the 3rd row crochet the 1st SC on the legs of the last SC and skip the 1st loop of the row.
Row 19 :
6 SC, don't cut the thread
Finishing :
Pull out the loop to the front side. Crochet 5 SlSt in the last row. Leave the end about 60 inches (1.5m) long for sewing. Cut the thread, pull out the end. Pull out the end to the wrong side again.
Info :
Similarly crochet the 2nd side part. Crochet the base trim with 5 SlSt in the other way. That is, the ends of the side parts will be on opposite sides. Steam the side parts with an iron through a damp cloth.
— Assembly :
Step 1 :
Turn the side of the canvas to himself, where the additional row of the base trim. Count 10 rows (or 5 squares). Place the marker between the rows in the loop of the base trim.
Step 2 :
Then count 4 rows (or 2 squares). Place the markers between the rows. There should be 7 loops between the 1st and the 2nd markers.
Step 3 :
Count 10 rows (or 5 squares) again. Place the markers. It should be in the 19th loops from the 2nd markers.
Step 4 :
Also, count 19 loops from the 1st markers. Place the markers in the 19th loops on the rounding.
Step 5 :
Take the right side part. The side with the chain of the base trim with SlSt - front. The end of the thread on the left. Put on the corners of the side part to the canvas. Take the plastic needle.
Step 6 :
Make the securing stitches at the beginning. Next sew the side part with the canvas in each loop of the canvas and each row of the side part. Sew to the marker, remove, make the stitch in the corner.
Step 7 :
At down, sew 6 loops in the chain of the side part, make the 7th stitch in the knot. Remove the marker, make the stitch in the corner. Then sew to the next marker.
Step 8 :
Make securing stitches at the finish. Strengthen and hide the end, process with fire.
Step 9 :
Similarly sew the 2nd side part. Shape the bag with your hands.
— Install the Lock :
Top Part :
Insert the canvas in the hole. First the front side. Help with the screwdriver carefully. Slowly so as not to scratch the lock or injure your skin. It is necessary to insert the entire base trim in the hole.
Step 2 :
Similarly insert the canvas from the wrong side. Check that the right and the left have the same number of loops. Align the top of the lock to the centre. Tighten the screws.
Lower Part :
Cut the overlay on the lower part, so that it does not look out from below. Cut 5 pieces of 8 inches (20cm) long. Process with fire. Put the pieces on the lock, between the antennae.
Step 4 :
Put on the overlay and bend the antennae. Close the valve and try on where the lower part of the lock should be. Pull all ends to the wrong side. There must be an indent between the ends.
Step 5 :
Turn the bag inside out. Tie the knots IN PAIRS! Tighten the pieces well. Check how the lock is fastened.
Step 6 :
Process the knots with fire, hide the ends between the loops and process with fire again. Turn the bag back, shape with hands.
— Handle :
Starting :
Leave the end about 32 inches (80cm) long. Crochet 2 CH.
Round 1 :
Crochet 6 SC in the 2nd loop from the hook. Pull the end folded together in the hole. Next, crochet a spiral so that the end is in the middle.
Round 2 :
Next crochet 6 SC
Continuing :
Then 6 SC on the left leg only of the SC of the previous row. Crochet to the required length of the handle, which is about 14 inches (35cm). Stretch the cord in the middle of the handle.
Finishing :
Then, tighten the hole with (2 SC together) x 3. Strengthen the end at the beginning. Process with fire. Cut the thread at the finish. Tie the knot, hide the ends, process with fire.
Installing Handle Holders :
Put the holder of the handle. Insert the end into the holder and gently push inward with the screwdriver. Make the hole with the small Phillips screwdriver, insert the screws. Tighten two screws with the small Phillips screwdriver. Similarly put the 2nd holder of the handle.
Attaching O-rings :
Attach the snap hook O-rings to the side parts. Put on the handle to the snap hook O-rings.
— Decorate the Chain :
Step 1 :
Take the piece of the cord 3 yards (2.7m) long. Tie the chain with the cord in one side with the plastic needle.
Step 2 :
Pull the cord through the snap hook. Tie the chain on the other side.
Step 3 :
Join the ends and process with fire. Put on the chain to the bag.
— Lining :
Measuring :
It is better to take cotton or linen so that the lining keeps its shape well. Measure the distance from the middle to the middle of the side parts inside the handbag. In example, 11 inches (28cm). Then measure the distance from the edge to the middle of the bottom. In example, 7 inches (17.5cm).
Cutting :
Take the piece of the fabric. Fold in half. Cut out the rectangle according to your measurements 11x7 inches (28x17.5cm) with the seam allowances 10-15mm. The seam allowance is not needed on the fold.
Sewing :
Sew the side seams. Fold the edge, sew.
Creating Dimension :
Next, measure the width of the side part inside the bag. In example 2 3/8 inches (6cm). Measure this distance at the corners of the lining. Sew the corners. We have the three-dimensional rectangle.
Installing Lining :
Put the lining inside. Straighten the lining inside with your hands. You can also pin with the pins. Sew in the lining to the bag with the hidden stitches. Thread the needle over the edge of the lining. Make the securing stitches in the corners.
Finishing :
If necessary, steam the seam of the lining with an iron through a damp cloth.
This sophisticated Canvas Handbag pattern transforms simple crochet techniques into a professional accessory you'll treasure for years! The combination of structured cord work, elegant embroidery details, and quality hardware creates a bag that rivals store-bought designs. Whether you're making it for yourself or as a thoughtful handmade gift, this pattern teaches valuable skills while producing a truly functional and beautiful result. The satisfaction of installing professional hardware and creating your own fashion accessory is absolutely unmatched! 🧶✨ Happy crocheting! 🎀