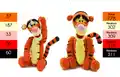
Create your very own bouncy Tigger with this delightful amigurumi pattern! This cheerful character from Winnie the Pooh comes to life with his signature orange and black stripes, springy tail, and infectious smile. Perfect for Disney fans and crochet enthusiasts, this pattern guides you through crafting Tigger's distinctive features including his posable tail with wire support, cheerful facial expressions, and adorable striped belly. Whether you're making him as a gift or adding to your Disney collection, this lovable tiger will bring joy and nostalgia to your crafting journey.
Progress Tracker
0% Complete
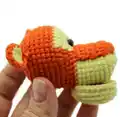
— Lower Jaw :
Inner Part (Red Yarn):
Round 0 :
Chain 6, work in spiral without turning chain and slip stitch
Round 1 :
Start in 2nd chain from hook: 4 SC, 3 SC into last chain from hook, on other side: 3 SC, INC (12)
Round 2 :
INC, 3 SC, 3 INC, 3 SC, 2 INC (18)
Round 3 :
SC, INC, 3 SC, (SC, INC) x 3, 3 SC, (SC, INC) x 2 (24)
Outer Part + Assembly (Light Yellow Yarn):
Round 0 :
Chain 6, work in spiral
Round 1 :
Start in 2nd chain from hook: 4 SC, 3 SC into last chain from hook, on other side: 3 SC, INC (12)
Round 2 :
INC, 3 SC, 3 INC, 3 SC, 2 INC (18)
Round 3 :
SC, INC, 3 SC, (SC, INC) x 3, 3 SC, (SC, INC) x 2 (24)
Infos :
Fix and cut thread. Mark 6 SC on top of oval. Attach light yellow thread in next stitch after marker on left and work 18 SC until next marker. Attach red inner part face up and work two parts together with 24 SC, stuff detail slightly in process. Fix thread and hide inside. Put markers at distance of 6 SC in same place on top of oval (this will be place for attaching jaw to head)
— Ears :
Inner Part (Light Yellow Yarn) - Make 2:
Outer Part + Assembly (Orange Yarn):
Infos :
Don't fasten off, attach yellow inner part face up and work together with 12 SC. Work additional round of 12 SC. Fold detail in half and work next and previous stitches from hook together with SC. Fix thread and leave long end to sew
— Stripe on Muzzle :
Orange Yarn (Make turn and work turning chain at end of each row):
Row 1 :
Start in 2nd chain from hook: 4 SC
Row 2 :
INC, 2 SC, INC (6)
Row 3 :
INC, 4 SC, INC (8)
Info :
Fix thread and leave long end to sew
— Head :
Start with Light Yellow Yarn, Stuff in Process:
Round 2 :
(SC, 3 SC in same St) x 3 (12)
Round 3 :
2 SC, (3 SC in same St, 3 SC) x 2, 3 SC in same St, SC (18)
Round 4 :
3 SC, (3 SC in same St, 5 SC) x 2, 3 SC in same St, 2 SC (24)
Rounds 5-10 :
6 rounds of 24 SC
Infos :
In next round lower jaw and stripe are attached to muzzle. Position muzzle so triangle at base has one sharp angle down. Mark 8 SC on top for stripe and 6 SC at bottom for lower jaw (distance on sides between upper and lower attaching areas is 5 SC). Change thread color to orange
Round 11 :
5 SC, 8 SC together with stripe, 5 SC, 6 SC together with lower jaw (24)
Info :
Place stitch marker in middle of lower jaw attachment area (in third SC)
Round 12 :
9 SC, INC HDC, change to light yellow, 4 INC HDC, change to orange, INC HDC, 9 SC (30)
Round 13 :
9 SC, HDC, INC HDC, change to light yellow, (HDC, INC HDC) x 4, change to orange, HDC, INC HDC, 9 SC (36)
Round 14 :
9 SC, 2 HDC, INC HDC, change to light yellow, (2 HDC, INC HDC) x 4, change to orange, 2 HDC, INC HDC, 9 SC (42)
Info :
Insert eyes in Round 12 at distance of 3-4 SC
Rounds 15-20 :
6 rounds of 42 SC
Infos :
In Round 21 ears are attached. Mark a SC on sides at distance of 18 SC between them
Round 21 :
11 SC, SC together with ear, 18 SC, SC together with ear, 11 SC (42)
Round 22 :
(5 SC, DEC) x 6 (36)
Round 23 :
(4 SC, DEC) x 6 (30)
Round 24 :
(3 SC, DEC) x 6 (24)
Round 25 :
(2 SC, DEC) x 6 (18)
Round 26 :
(SC, DEC) x 6 (12)
Infos :
Tighten hole, fix thread and hide inside. Sew sides of stripe to middle of muzzle and fix ears if required
— Nose :
Pink Yarn:
Round 2 :
(SC, 3 SC in same St) x 3 (12)
Round 3 :
2 SC, (INC, 3 SC) x 2, INC, SC (15)
Info :
Fix thread and leave long end to sew. Sew on tip of muzzle so it is raised up, can be slightly stuffed
— Eyebrows :
Black Yarn - Make 2, Leave long thread end at beginning:
Row 1 :
Start in 4th chain from hook: DC, HDC, 5 SC
Infos :
Fix thread and leave long end to sew. Place eyebrows as shown in photo and sew to head at opposite ends. Embroider eyelids. Embroider stripes on muzzle on sides. Embroider stripes on head
— Arms :
Orange Yarn - Make 2 (Left and Right), Stuff in Process:
Round 0 :
Chain 5, work in spiral
Round 1 :
Start in 2nd chain from hook: 3 SC, 3 SC into last chain from hook, on other side: 2 SC, INC (10)
Round 2 :
INC, 2 SC, 3 INC, 2 SC, 2 INC (16)
Rounds 3-6 :
4 rounds of 16 SC
Info :
Place stitch marker exactly on side
Round 9 Left Arm :
4 DEC, 2 SC, 4 INC, 2 SC (16)
Round 9 Right Arm :
2 SC, 4 INC, 2 SC, 4 DEC (16)
Rounds 10-17 :
8 rounds of 16 SC
Info :
Fold detail in half along palm, place stitch marker 2 SC to left of fold line (fold line is on opposite side of thumb)
Round 18 Left Arm :
12 SC, 4 INC (20)
Round 18 Right Arm :
4 INC, 12 SC (20)
Round 19 Left Arm :
12 SC, 4 DEC (16)
Round 19 Right Arm :
4 DEC, 12 SC (16)
Rounds 20-29 :
10 rounds of 16 SC
Info :
Stretch elbow area to form bend
Round 30 :
(2 SC, DEC) x 4 (12)
Round 31 :
(SC, DEC) x 4 (8)
Infos :
If using joints to mount arms, insert them on one line with thumb between Rounds 28 and 29. Tighten hole, fix thread and hide end inside. Embroider stitches/stripes with black thread
— Legs :
Orange Yarn, Stuff in Process:
Round 0 :
Chain 8, work in spiral
Round 1 :
Start in 2nd chain from hook: 6 SC, 3 SC into last chain from hook, on other side: 5 SC, INC (16)
Round 2 :
INC, 5 SC, 3 INC, 5 SC, 2 INC (22)
Round 3 :
SC, INC, 5 SC, (SC, INC) x 3, 5 SC, (SC, INC) x 2 (28)
Rounds 5-6 :
2 rounds of 28 SC
Info :
Align stitch marker exactly in middle of heel and ensure it stays in middle behind until end of working
Round 7 :
7 SC, 7 DEC, 7 SC (21)
Round 8 :
5 SC, 6 DEC, 4 SC (15)
Round 9 :
6 SC, 3 INC, 6 SC (18)
Round 10 :
DEC, 14 SC, DEC (16)
Round 11 :
5 SC, (INC, SC) x 2, INC, 6 SC (19)
Round 13 :
6 SC, (INC, 2 SC) x 2, INC, 6 SC (22)
Round 14 :
DEC, 18 SC, DEC (20)
Round 15 :
6 SC, (INC, 3 SC) x 2, INC, 5 SC (23)
Round 16 :
2 INC, 19 SC, 2 INC (27)
Round 17 :
8 SC, (DEC, 3 SC) x 2, DEC, 7 SC (24)
Round 18 :
INC, 22 SC, INC (26)
Round 19 :
8 SC, (DEC, 2 SC) x 2, DEC, 8 SC (23)
Round 21 :
(2 SC, DEC) x 5, 3 SC (18)
Round 22 :
(SC, DEC) x 6 (12)
Infos :
Tighten hole, fix thread and hide end inside. If using joints to mount legs, insert them on sides between Rounds 19 and 20. Embroider stitches/stripes with black thread
— Body :
Orange Yarn, Stuff in Process (Stuff neck area tight):
Info :
Mark square 6 by 6 SC below head, attach thread and work in spiral
Rounds 1-3 :
3 rounds of 18 SC
Round 4 :
(5 SC, INC) x 3 (21)
Rounds 5-6 :
2 rounds of 21 SC
Round 7 :
(6 SC, INC) x 3 (24)
Info :
Place stitch marker exactly in middle of neck behind
Round 8 :
3 SC, INC, 4 SC, INC, 6 SC, INC, 4 SC, INC, 3 SC (28)
Round 9 :
4 SC, INC, 4 SC, INC, 8 SC, INC, 4 SC, INC, 4 SC (32)
Round 10 :
5 SC, INC, 4 SC, INC, 10 SC, INC, 4 SC, INC, 5 SC (36)
Rounds 11-16 :
6 rounds of 36 SC
Info :
Place stitch marker exactly in middle of back
Round 17 :
8 SC, (2 SC, INC) x 6, 10 SC (42)
Rounds 18-29 :
12 rounds of 42 SC
Round 30 :
(5 SC, DEC) x 6 (36)
Rounds 31-36 :
6 rounds of 36 SC
Round 37 :
(4 SC, DEC) x 6 (30)
Round 38 :
(3 SC, DEC) x 6 (24)
Round 39 :
(2 SC, DEC) x 6 (18)
Round 40 :
(SC, DEC) x 6 (12)
Infos :
Tighten hole, fix thread and hide end inside. If using joints, install arms between Rounds 12 and 13, legs between Rounds 35 and 36
— Tummy :
Light Yellow Yarn (Make turn and work turning chain at end of each row):
Row 1 :
Start in 2nd chain from hook: 4 SC
Rows 6-19 :
14 rows of 8 SC
Row 20 :
Skip a St, 5 SC, DEC (6)
Row 21 :
Skip a St, 3 SC, DEC (4)
Infos :
Work a chain, crochet detail around with SC, work INC in two loops on sides from above and below. Fix thread, leave long end to sew. Sew detail to body. Embroider stitches/stripes with black thread on body in random order
— Thread Mount :
Infos :
Mark attachment area on limbs: on arms between Rounds 28-29 on line with thumb, on legs between Rounds 19-20 on sides. Mark attachment area on body: from above between Rounds 12-13 on sides, from below between Rounds 35-36 on sides. Insert long needle through body in place of mounting 1st arm and withdraw in place of mounting 2nd arm. Put arm on needle taking only front part of fabric (not through whole detail), 2-3 SC and fiber filling. Turn back through same hole to initial thread end and put 2nd arm on needle. Stretch arms very well and tie thread ends, hide them in body through same initial hole so knot hides inside. Do thread mount of legs as described above
— Tail :
Start with Black Yarn:
Rounds 5-7 :
3 rounds of 12 SC
Rounds 8-9 :
---
2 rounds of 12 SC
Rounds 10-12 :
3 rounds of 12 SC
Rounds 13-14 :
2 rounds of 12 SC
Rounds 15-17 :
3 rounds of 12 SC
Rounds 18-19 :
2 rounds of 12 SC
Rounds 20-22 :
3 rounds of 12 SC
Rounds 23-24 :
2 rounds of 12 SC
Rounds 25-27 :
3 rounds of 12 SC
Info :
Change to black, fix thread and leave long end to sew
Installing Wire (Optional):
Infos :
Cut piece of wire longer than tail itself. Bend one end and wrap with fabric patch. Stuff tip of tail and insert wire inside
Rounds 28-29 :
2 rounds of 12 SC
Rounds 30-32 :
3 rounds of 12 SC
Rounds 33-34 :
2 rounds of 12 SC
Rounds 35-37 :
3 rounds of 12 SC
Rounds 38-39 :
2 rounds of 12 SC
Rounds 40-42 :
3 rounds of 12 SC
Infos :
Stretch loops on body between Rounds 36-37 to insert wire there. Insert loose end of wire into stretched loops, twist it and wrap with patch. Stuff tail not too tight so wire inside is fixed. Sew tail to body in area of Rounds 35-38 along contour
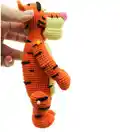
This bouncy Tigger amigurumi pattern captures the wonderful thing about Tiggers—they're full of personality, stripes, and springy fun! With detailed instructions for color changes, posable limbs, and that signature bouncy tail, you'll create a huggable friend straight from the Hundred Acre Wood. Perfect for Disney lovers and anyone who needs a little more bounce in their day. The optional wire tail feature makes him extra special and display-worthy. Grab your orange and black yarn and get ready to bring this beloved character to life, one joyful stitch at a time! 🧶🐯✨