Create your own adorable Benjamin Tiger with this charming amigurumi pattern! This detailed crochet design features beautiful striped details, expressive facial features, and the option to dress your tiger in either a sweet tie for boys or a lovely dress with flowers for girls. Perfect for gift-giving or adding to your handmade collection, Benjamin brings personality and warmth to any space. The pattern includes comprehensive instructions for creating realistic tiger stripes using color changes, detailed eye embroidery techniques, and clothing options to customize your creation.
Progress Tracker
0% Complete
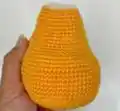
— Head :
Round 1 :
Start with Egg Yolk: AM of 8 sc (8)
Round 2 :
Inc in each sc (16)
Round 3 :
[1 sc and 1 inc] 8x (24)
Round 4 :
[2 sc and 1 inc] 8x (32)
Round 5 :
[3 sc and 1 inc] 8x (40)
Round 6 :
sc over sc (40)
Round 7 :
[4 sc and 1 inc] 8x (48)
Round 8 :
21 sc, change to Date, 6 sc, change to Egg Yolk, 21 sc (48)
Round 9 :
[5 sc and 1 inc] 8x (56)
Round 10 :
[6 sc and 1 inc] 3x, 1 sc, change Date to Egg Yolk, 1 sc, 1 inc, [6 sc and 1 inc] 3x (64)
Round 11 :
sc over sc (64)
Round 12 :
28 sc, change to Date, 30 sc, 6 sc, change to Egg Yolk (64)
Round 13-17 :
sc over sc (64) - [5 rows]
Round 18 :
Change to Date, 19 sc, change to Egg Yolk, 5 sc, 1 inc, 5 sc, change to Date, 6 sc, change to Egg Yolk (64)
Round 19 :
Change to White, [3 sc and 1 inc] 16x (80)
Round 20 :
Change to Date, 27 sc, change to White, 25 sc, change to Date, 20 sc, 8 sc (80)
Round 21 :
Change to White, sc over sc (80)
Round 22 :
Change to Date, 23 sc, change to White, 25 sc, 24 sc, change to Date, 29 sc (80)
Round 23-27 :
Change to White, sc over sc - [5 rows] (80)
Round 28 :
[3 sc and 1 dec] 16x (64)
Round 29 :
[1 dec and 2 sc] 16x (48)
Round 30 :
[1 sc and 1 dec] 16x (32)
Round 31 :
sc over sc all the way around (32). Close with sl st
Info :
Place eyes between rows 16 and 17, separated by 6 sc. Press locks to second step for depth and security
— Whites of the Eyes :
Step 1 :
Use double White Amigurumi yarn. Insert needle into open part of head, exit at corner of eye
Step 2 :
Insert needle at corner of lower eye part, exit into open part of head
Step 3 :
Exit with needle in corner of second eye
Step 4 :
Insert needle at corner of lower eye part, exit into open head part, pull threads and tie 2 knots
— Black Embroidery of Eyes :
Step 1 :
Use double Black Cléa yarn. Insert needle into open head part, exit at eye corner
Step 2 :
Insert needle at corner of upper eye part, exit into open head part
Step 3 :
Exit with needle in corner of second eye
Step 4 :
Insert needle at corner of upper eye part, exit into open head, pull threads and tie 2 knots
— Eyebrows :
Step 1 :
Use Black Cléa yarn (single strand). Insert needle into open head, leave on second row above eyes, skip 3 sc, insert needle in row above
Step 2 :
Repeat same process on other side of eyes. Join thread ends and tie knots
— Snout :
Round 1 :
Use White: AM of 8 sc (8)
Round 2 :
Inc all around (16)
Round 3 :
4 sc, 4 inc, 4 sc, 4 inc (24)
Round 4 :
6 sc, 4 inc, 8 sc, 4 inc, 2 sc (32)
Round 5 :
8 sc, 4 inc, 12 sc, 4 inc, 4 sc (40)
Round 6 :
10 sc, 4 inc, 16 sc, 4 inc, 6 sc (48)
Info :
Close with sl st. Sew snout between rows 17-29 of head without stuffing, taking only front loops. Sink eyes after sewing
— Muzzle Embroidery :
Step 1 :
Use Black thread: Make 5 ch, from second ch do 3 sc
Step 2 :
In last ch do 3 sc in same place, at bottom of ch do 2 sc, in last ch 2 sc in same place (10)
Info :
Close with sl st. Sew black snout on top of white snout, add black detail for expression
— Ears :
Round 1 :
Start with White: AM of 11 sc (11)
Round 2 :
3 sc in same sc, 2 sc, 3 sc in same sc, 2 sc, 3 sc in same sc, 4 sc (17)
Round 3 :
1 sc, 3 sc in same sc, 4 sc, 3 sc in same sc, 4 sc, 3 sc in same sc, 5 sc (23)
Round 4 :
Change to Egg Yolk: 2 sc, 3 sc in same sc, 6 sc, 3 sc in same sc, 6 sc, 3 sc in same sc, 6 sc (29)
Round 5 :
2 sc, change to Date, 21 sc, change to Egg Yolk, 6 sc. Finish with 2 sl st
Info :
Sew ears between rows 5-12 of head with 5 sc separating the eyes
— Body :
Round 1 :
Use Egg Yolk: AM of 8 sc (8)
Round 2 :
Inc all around (16)
Round 3 :
[1 sc and 1 inc] 8x (24)
Round 4 :
[2 sc and 1 inc] 8x (32)
Round 5 :
[3 sc and 1 inc] 8x (40)
Round 6 :
[4 sc and 1 inc] 8x (48)
Round 7 :
[5 sc and 1 inc] 8x (56)
Round 8 :
[6 sc and 1 inc] 8x (64)
Round 9-20 :
sc over sc (64) - [12 rows]
Round 21 :
16 sc, 16 dec, 16 sc (48)
Round 22-25 :
sc over sc (48) - [4 rows]
Round 26 :
[4 sc and 1 dec] 8x (40)
Round 27-30 :
sc over sc (40) - [4 rows]
Round 31 :
[3 sc and 1 dec] 8x (32)
Round 32-33 :
sc over sc all the way around (32) - [2 rows]. Close with sl st
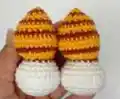
— Legs :
Round 1 :
Start with White: AM of 6 sc (6)
Round 2 :
Inc all around (12)
Round 3 :
[1 sc and 1 inc] 6x (18)
Round 4 :
[2 sc and 1 inc] 6x (24)
Round 5 :
[3 sc and 1 inc] 6x (30)
Round 6-8 :
sc over sc (30) - [3 rows]
Round 9 :
6 sc, [1 dec and 1 sc] 6x, 6 sc (24)
Round 10 :
[2 sc and 1 dec] 6x (18)
Round 11 :
Change to Date: sc over sc (18)
Round 12 :
Change to Egg Yolk: 6 sc, [1 inc] 6x, 6 sc (24)
Round 13 :
6 sc, [1 sc and 1 inc] 6x, 6 sc (30)
Round 14 :
Change to Date: [1 inc] 2x, 24 sc, [1 inc] 4x (36)
Round 15-16 :
Change to Egg Yolk: sc over sc (36)
Round 17 :
Change to Date: sc over sc (36)
Round 18 :
Change to Egg Yolk: 8 sc, [1 sc and 1 dec] 6x, 10 sc (30)
Round 19 :
sc over sc (30)
Round 20 :
Change to Date: sc over sc (30)
Round 21 :
Change to Egg Yolk: 8 sc, [1 dec] 6x, 10 sc (24)
Round 22 :
[1 dec] 2x, 12 sc, [1 dec] 4x (18)
Info :
Add filling. Don't over-stuff thigh part to keep it flatter
Round 23 :
Change to Date: [1 sc and 1 dec] 6x (12)
Round 24 :
Change to Egg Yolk: [1 dec] 6x (6). Close with inverted magic ring
— Arms :
Round 1 :
Start with White: AM of 6 sc (6)
Round 2 :
Inc all around (12)
Round 3 :
[1 sc and 1 inc] 6x (18)
Round 4 :
[2 sc and 1 inc] 6x (24)
Round 5-7 :
sc over sc (24) - [3 rows]
Round 8 :
3 sc, [1 dec and 1 sc] 6x, 3 sc (18)
Round 9 :
Change to Date: sc over sc (18)
Round 10-11 :
Change to Egg Yolk: sc over sc (18) - [2 rows]
Round 12 :
Change to Date: sc over sc (18)
Round 13-14 :
Change to Egg Yolk: sc over sc (18)
Round 15 :
Change to Date: sc over sc (18)
Round 16-17 :
Change to Egg Yolk: sc over sc (18)
Round 18 :
Change to Date: sc over sc (18)
Info :
Only stuff lower part of arm
Round 19 :
Change to Egg Yolk: [4 sc and 1 dec] 3x (15)
Round 20 :
[3 sc and 1 dec] 3x (12)
Round 21 :
Change to Date: Fold arm in half and close with 6 sc (6). Make 1 ch
Info :
Sew arms on row 31 of body, leaving 7-8 sc space between them
— Tie (Boy Version) :
Row 1 :
Use Eucalyptus: Make 16 ch, skip first ch, from second make 1 sc for each ch (15)
Row 2-12 :
Turn work, make 1 ch, then sc over sc (15) - [11 rows]
Info :
Fold tie, wrap thread around middle 6 times, secure at back. Make cord with 51 ch, pass behind tie, place on animal
— Flowers 2x (Girl Version) :
Round 1 :
Start with Cream: AM of 5 sc (5). Close with sl st in front loop
Step 1 :
Go up 3 ch, in next loop make 1 sl st. Follow sequence until 5 petals complete
Round 2 :
Work on back loops: Make 1 inc all around (10). Close with sl st
Step 2 :
Change to White: Make 3 dc in same place, 1 ch, 1 sl st in next dc. Complete 5 petals
— Dress (Girl Version) :
Round 1 :
Use Cream with 3mm hook: Make 42 ch, close with sl st forming ring. Go up 3 ch, make 1 hdc inc for each ch (84)
Round 2 :
Go up 2 ch, do 1 hdc, 1 inc of hdc. Follow sequence [2 hdc and 1 inc] to end. Close with sl st
Round 3-5 :
Go up 2 ch, do hdc over hdc all around - [3 rows]. Close with sl st in last row
Straps :
Attach Cream thread, make sc all around. 7 sc, 24 ch, skip 6 ch make 1 sc for each ch, 30 sc, 24 ch, skip 6 ch make 1 sc for each ch, 6 sc
This enchanting Benjamin Tiger pattern brings together classic amigurumi techniques with creative striping and detailed facial features to create a truly special companion. Whether you choose the dapper boy version with his sweet tie or the adorable girl version with her dress and flowers, Benjamin is sure to capture hearts! The pattern's clear instructions and helpful video tutorials make it accessible for intermediate crocheters looking to expand their skills. Every stitch brings this playful tiger to life, creating a treasured handmade friend that will be loved for years to come. 🐯🧶✨