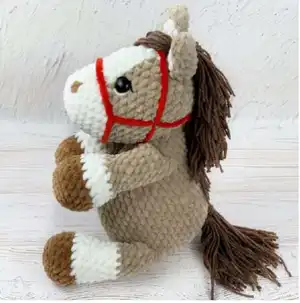
Create your very own cuddly horse friend with this delightful amigurumi pattern! Standing at approximately 11.40 inches tall, this charming horse features beautiful velvet yarn in your choice of colors, complete with a flowing mane and tail made from sport weight yarn. The pattern includes detailed instructions for creating expressive safety eyes, embroidered features, and optional bridle details. Perfect for horse lovers of all ages, this handmade creation makes a wonderful gift or decorative piece that showcases your crochet skills while bringing joy to anyone who receives it.
Progress Tracker
0% Complete
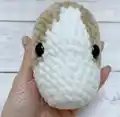
— Head :
Info :
Start with white yarn
Round 3 :
(1sc, inc)×6 (18)
Round 4 :
(2sc, inc)×6 (24)
Round 5-6 :
24sc (2 rounds)
Round 7 :
(4sc, inc)×4, 4sc (28)
Info :
Add the main yarn. Next alternate stitches in white color (W) and main color (M)
Round 9 :
3sc (M), 6inc (W), 19sc (M) (34)
Round 10 :
5sc (M), 9sc (W), 20sc (M) (34)
Round 11 :
6sc (M), 7sc (W), 21sc (M) (34)
Round 12 :
7sc (M), 5sc (W), 22sc (M) (34)
Round 13 :
8sc (M), 3sc (W), 23sc (M) (34)
Round 14 :
8sc (M), 3sc (W), 23sc (M) (34)
Info :
Further crochet only with the main yarn
Round 15 :
(5sc, dec)×4, 6sc (30)
Info :
Insert safety eyes between rounds 9 and 10
Round 17 :
(4sc, dec)×5 (25)
Info :
Stuff in the process
Round 18 :
(3sc, dec)×5 (20)
Round 19 :
(2sc, dec)×5 (15)
Round 20 :
(1sc, dec)×5 (10)
Round 21 :
2dec, then take a needle with a wide eye and grab the front loop of each stitch, thread the yarn tail and tighten it a little. So the hole is closed, fasten off and weave in the ends
— Ears (make 2) :
Info :
Start with the main yarn
Round 2 :
(1sc, inc)×2, 1sc (7)
Round 4 :
1sc (M), inc (W), (1sc, inc, 2sc, inc) (M) (10)
Round 5 :
inc (M), 3sc (W), (inc, 5sc) (M) (12)
Round 6-7 :
2sc (M), 3sc (W), 7sc (M) (12) (2 rounds)
Info :
Fold the ear in half at the base, grab the stitches at the edges of the last round and crochet them together with sl st. Leave the yarn tail for sewing pieces. Sew the ears to the head in the place where the white color ends
— Needle Sculpting :
Info :
Tightening with white velvet or cotton yarn
— Whites of the eyes :
Info :
Embroider with white velvet yarn
— Eyelashes :
Info :
Embroider with a black cotton thread
— Nostrils :
Info :
Embroider with brown velvet yarn in rounds 3-4 of the head
— Forelegs (make 2) :
Info :
Start with dark yarn for hooves
Round 3 :
(1sc, inc)×6 (18)
Round 5-6 :
18sc (2 rounds)
Info :
Change color to white
Round 8 :
(3 sc, dec)×3, 3 sc (15)
Info :
Stuff the leg to the middle (in halfway). Change color to the main
Round 10 :
(3sc, dec)×3 (12)
Round 11-18 :
12sc (8 rounds)
Round 19 :
Fold the leg in half and crochet 6 sc through both sides. Leave a small yarn end
— Bridle :
Info :
Make with velvet yarn
— Hind legs (make 2) :
Info :
Start with dark yarn for hooves
Round 3 :
(1sc, inc)×6 (18)
Round 5-6 :
18 sc (2 rounds)
Info :
Change color to white
Round 8 :
(3sc, dec)×3, 3sc (15)
Info :
Stuff the leg (only 2/3 of it)
Round 10 :
(3sc, dec)×3 (12)
Round 11-13 :
12sc (3 rounds)
Info :
Change color to main
Round 14-18 :
12sc (5 rounds)
Round 19 :
Fold the leg in half and crochet 6 sc through both sides. Leave a small yarn end
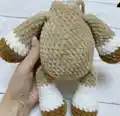
— Body :
Info :
Crochet with the main yarn
Round 3 :
(1sc, inc)×6 (18)
Round 4 :
(2sc, inc)×6 (24)
Round 5 :
(3sc, inc)×6 (30)
Round 6 :
(4sc, inc)×6 (36)
Round 7 :
(5sc, inc)×6 (42)
Round 8 :
6sc, 6sc with the hind leg, 15 sc, 6sc with the second hind leg, 9sc (42)
Info :
Weave in the yarn ends on the wrong side of the body
Round 9-13 :
42sc (5 rounds)
Round 14 :
32sc (3sc, dec)×2 (40)
Round 15 :
3sc, dec, 35sc (39)
Round 16 :
(5sc, dec)×5, 4sc (34)
Round 18 :
(4sc, dec)×5, 4sc (29)
Round 20 :
(3sc, dec)×5, 4sc (24)
Round 21 :
5sc, 6sc with the foreleg, 5 sc, 6sc with the second foreleg, 2sc (24)
Info :
Weave in the ends. Stuff the body in the process
Round 22 :
(2sc, dec)×6 (18)
Round 23-24 :
18sc (2 rounds)
Round 25 :
7sc, 8 sl st, 3sc (18)
Info :
Fasten off, leave a long end for sewing pieces. Sew the head to the body
— Mane & Tail :
For the mane :
Need 4ply yarn: 2 bundles of strands 24cm long and 14 bundles of strands 17cm long (1 bundle consists of 10 strands). Cardboard pieces 8.5cm and 12cm wide. Fold the strands in half. Attach 2 long bundles 24cm in front of the ears on one line (this will be the bangs). Attach 14 bundles 17 cm each to each other tightly, 2 bundles in a row (the mane will consist of 8 rows)
For the tail :
Need 4 bundles of strands 24cm long (1 bundle consists of 10 strands). Fold them in half. Attach the bundles in the shape of a rhombus: one on the top, then 2 together and 1 on the bottom. The tail consists of 4 bundles arranged in 4 rows
This enchanting horse amigurumi pattern brings together the luxurious softness of velvet yarn with carefully crafted details that result in a truly special handmade creation. From the distinctive white facial markings to the flowing mane and tail, every element has been designed to capture the grace and beauty of these magnificent animals in cuddly form. Whether you're creating a gift for an equestrian enthusiast or adding to your own collection of handmade treasures, this pattern offers a rewarding project that combines intermediate techniques with stunning results. The finished horse stands proudly on its own four legs, ready to gallop into someone's heart! 🐴✨