🧶 Beautiful ✨ Detailed 💝 Adorable

Twinkling Snowflakes Crochet Pattern

Twinkling Snowflakes Crochet Pattern
4.2★ Rating
1-2.5 Hours Time Needed
3.8K Made This
✂️

Intermediate Level

Ideal for those with basic knitting experience, featuring slightly more advanced stitches and techniques to expand your skills.

⏱️

Bite-Sized Project

Complete in under 2 hours—quick, fun, and perfect for a little creative escape.

❄️

Winter Warmth

Cozy layers for chilly nights that combine practical warmth with beautiful, intricate stitch patterns.

About This Twinkling Snowflakes Crochet Pattern

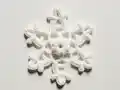
This collection features three stunning snowflake designs that capture the delicate beauty of winter's frozen crystals. Each pattern uses traditional crochet techniques with clusters, chains, and strategic stitch placement to create lacy, dimensional snowflakes. The White Sparkle yarn adds a touch of festive shimmer, making these ornaments truly magical when they catch the light on your Christmas tree or in your window displays.

Twinkling Snowflakes Crochet Pattern crochet pattern - detailed view of completed project

Perfect for holiday decorating, these snowflakes can be stiffened with spray starch to hold their shape beautifully. Each one crochets up quickly, making them ideal for last-minute gift tags, tree ornaments, or creating an entire winter wonderland.

Why You'll Love This Twinkling Snowflakes Crochet Pattern

I absolutely love these snowflake patterns because they offer three levels of complexity, so you can start simple and work your way up to more intricate designs. The sparkle yarn makes each finished piece look absolutely magical without any extra embellishments needed. I find it incredibly satisfying to watch these flat rounds transform into dimensional snowflakes with each new round of stitches. They're quick enough to make several in an evening, yet detailed enough to feel like a real accomplishment. Plus, there's something wonderfully therapeutic about creating delicate winter beauty while staying cozy indoors.

Twinkling Snowflakes Crochet Pattern step 1 - construction progress Twinkling Snowflakes Crochet Pattern step 2 - assembly progress Twinkling Snowflakes Crochet Pattern step 3 - details and accessories Twinkling Snowflakes Crochet Pattern step 4 - final assembly and finishing

Switch Things Up

I love experimenting with these snowflake patterns to create unique variations that reflect my personal style and holiday aesthetic. Sometimes I'll work them in icy blue or silver metallic yarn for a more contemporary frozen look, or even in rich burgundy and forest green for a traditional Christmas palette. One of my favorite modifications is adding tiny seed beads by threading them onto the yarn before I start - they catch the light beautifully when positioned in the chain spaces.

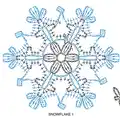
For a more whimsical approach, I've created rainbow snowflakes using color changes between rounds, which makes adorable decorations for children's rooms year-round. I also enjoy scaling down Snowflake 1 with crochet thread and a steel hook to create delicate jewelry pieces like earrings or pendants. When I want extra sparkle without specialty yarn, I carefully brush on a thin layer of white glue mixed with fine glitter after blocking.

Another variation I adore is connecting multiple snowflakes into garlands, bunting, or even a stunning winter table runner by joining them at their outer points. Sometimes I'll layer two different sized snowflakes together with a small button in the center for dimensional wall art. The possibilities truly are endless, and each variation teaches me something new about how these elegant structures come together through simple stitches and creative vision.

Common Mistakes & How to Fix Them

✗ Skipping the slip stitch joins between rounds can cause your snowflake to unravel—always secure each round properly before moving to the next one ✗ Making clusters too tight will cause puckering and distort the snowflake shape—keep your tension relaxed and even throughout all cluster stitches ✗ Not counting stitches carefully in the foundation ring leads to uneven points—use stitch markers to track your starting position in each round ✗ Pulling chain spaces too tight will compress the lacy effect—allow chains to flow naturally for the best dimensional snowflake appearance ✗ Forgetting to pin snowflakes to correct measurements before starching results in asymmetrical shapes—always block to specified dimensions for professional results

Twinkling Snowflakes Crochet Pattern

Transform your holiday season with these three elegant crochet snowflakes that sparkle with winter magic. Each design offers a unique level of intricacy, from the classic 7-inch Snowflake 1 to the stunning 10-inch Snowflake 3, perfect for adorning your Christmas tree, creating festive garlands, or decorating your winter wonderland. Crafted with Bernat Handicrafter Holidays yarn in White Sparkle, these delicate ornaments catch and reflect light beautifully, bringing a touch of handmade charm to every corner of your home.

Intermediate 1-2.5 Hours

Materials Needed for Twinkling Snowflakes Crochet Pattern

— Main Fabric

  • 01
    Bernat Handicrafter Holidays yarn in White Sparkle (2.8 oz/80 g; 138 yds/126 m)
  • 02
    One ball will make approximately 4 snowflakes

— Tools Required

  • 01
    Crochet hook size U.S. F/5 (3.75 mm)
  • 02
    Scissors
  • 03
    Tapestry needle for weaving in ends
  • 04
    Spray starch (optional for stiffening)
  • 05
    Pins for blocking
  • 06
    Flat blocking surface or foam board

Progress Tracker

0% Complete

— Snowflake 1 (7 inches diameter):

Foundation:

Ch 6. Join with sl st to first ch to form a ring.

Round 1:

*Ch 4. [(Yoh) twice and draw up a loop in ring. (Yoh and draw through 2 loops on hook) twice] twice. Yoh and draw through all loops on hook - Tr cluster made. Ch 4. Sl st in ring. Rep from * 5 times more. Fasten off.

Round 2:

Ch 3. Join yarn with sl st to first Tr cluster. (Ch 9. Sl st in same sp as previous sl st. Ch 3. Sl st in next Tr cluster) 5 times. Ch 9. Sl st in same sp as previous sl st. Join with sl st to first ch.

Round 3:

Ch 1. *1 sc in each of next 3 ch. [(3 sc. Ch 3) 3 times. 3 sc] in next ch-9 loop. Rep from * 5 times more. Join with sl st to first sc. Fasten off.

Round 4:

Join yarn with sl st to first ch-3 sp. Ch 1. 2 sc in same sp as sl st. *1 sc in each of next 3 sc. (1 sc. Ch 3. 1 dc. Ch 3. Sl st. Ch 4. 2 tr. Ch 4. Sl st. Ch 3. 1 dc. Ch 3. 1 sc) all in next ch-3 sp. 1 sc in each of next 3 sc. 2 sc in next ch-3 sp. Ch 4. (1 hdc. Ch 2. Sl st) in 2nd ch from hook. Ch 2. Skip next 9 sc. 2 sc in next ch-3 sp. Rep from * 5 times more. Fasten off.

— Snowflake 2 (8.5 inches diameter):

Foundation:

Ch 7. Join with sl st to first ch to form a ring.

Round 1:

Ch 1. (3 sc. Ch 9) 6 times in ring. Join with sl st to first sc. Fasten off.

Round 2:

Join yarn with sl st to any ch-9 loop. Ch 3. (2 dc. Ch 3. 3 dc) in same sp as sl st. [Ch 1. (3 dc. Ch 3. 3 dc) in next ch-9 loop] 5 times. Ch 1. Join with sl st to top of ch 3.

Round 3:

Sl st back into last ch-1 sp. Ch 1. 1 sc in same sp as sl st. *Ch 1. 6 dc in next ch-3 sp. Ch 6. Sl st to first ch. Turn. (Ch 4. 2 tr. Ch 4. Sl st) 3 times in last ch-6 sp made - top cluster made. Turn. 6 dc in same ch-3 sp as last 6 dc. Ch 1.** 1 sc in next ch-1 sp. Rep from * 4 times more, then from * to ** once. Join with sl st to first sc. Fasten off.

— Snowflake 3 (10 inches diameter):

Foundation:

Ch 6. Join with sl st to first ch to form a ring.

Round 1:

Ch 6 (counts as dc and ch 3). (1 dc. Ch 3) 11 times in ring. Join with sl st to 3rd ch of ch 6. 12 ch-3 sps.

Round 2:

Sl st in next ch-3 sp. Ch 3. (Yoh and draw up a loop. Yoh and draw through 2 loops on hook) twice in same sp as last sl st. Yoh and draw through all loops on hook - beg cluster made. [Ch 5. (Yoh and draw up a loop. Yoh and draw through 2 loops on hook) 3 times in next ch-3 sp. Yoh and draw through all loops on hook - cluster made] 11 times. Ch 5. Join with sl st to top of first cluster.

Round 3:

(Sl st. Ch 1. 1 sc. Ch 5. 1 sc) in next ch-5 sp. *(Sl st. Ch 3. Cluster) in next cluster. (Ch 3. Cluster in top of cluster just made) twice. (Ch 3. Sl st. Ch 6. Sl st. Ch 3. Sl st) all in top of last cluster. Working down towards 2nd rnd, (Ch 3. Sl st to base of cluster) 3 times. (1 sc. Ch 5. 1 sc) in next ch-5 sp. (Sl st. Ch 3. Cluster) in next cluster. (Ch 3. Sl st. Ch 6. Sl st. Ch 3. Sl st) all in top of cluster. Working down towards 2nd rnd, ch 3. Sl st to base of cluster.** (1 sc. Ch 5. 1 sc) in next ch-5 sp. Rep from * 4 times more, then from * to ** once. Join with sl st to first sc. Fasten off.

Assembly Instructions

  • Weave in all loose ends with a tapestry needle, being careful to hide them within the stitches for a clean finish.
  • Pin each snowflake to the specified measurements on a flat blocking surface or foam board, ensuring all points are evenly spaced.
  • If using spray starch for stiffening, apply evenly to both sides of the pinned snowflake and allow to dry completely overnight.
  • For hanging, thread a length of matching yarn or invisible thread through one of the outer points and tie in a loop.
  • Alternatively, attach small ornament hooks or ribbon loops for display on your Christmas tree or in windows.
  • Store finished snowflakes flat between layers of tissue paper to prevent crushing and maintain their shape year after year.

Important Notes

  • 💡Gauge is important for achieving the correct snowflake sizes - 16 sc and 17 rows should equal 4 inches
  • 💡Work with consistent tension throughout to maintain even, symmetrical snowflake shapes and prevent warping
  • 💡Count your stitches carefully after each round to ensure you have the correct number before proceeding
  • 💡The sparkle yarn may be slightly more slippery than regular yarn - work in good lighting to see your stitches clearly
  • 💡Blocking is essential for professional-looking snowflakes - don't skip the pinning and steaming step for best results
  • 💡Each snowflake uses minimal yarn, so one ball can create multiple ornaments for gifts or decorating projects

These Twinkling Snowflakes bring the magic of winter right into your home with three beautiful designs that showcase the art of lacy crochet. Whether you're creating a collection for your own tree or crafting handmade gifts for loved ones, these sparkly ornaments capture the delicate beauty of freshly fallen snow. The pattern's versatility allows you to choose your challenge level while the gorgeous results remain consistent across all three sizes. Pin them to your window to catch the sunlight, scatter them across your mantel, or create an elegant garland that celebrates the season's frosty beauty. 🧶 Happy crocheting! ❄️✨

You ask,

we answer.

FAQs

Can I make these snowflakes with regular yarn instead of sparkle yarn?

Absolutely! While the sparkle yarn adds festive shimmer, you can use any worsted weight cotton or acrylic yarn. White, cream, silver, or even colored yarns work beautifully for different looks.

Do I need to stiffen these snowflakes?

Stiffening is optional but recommended if you want your snowflakes to hold their shape and hang flat. Spray starch, fabric stiffener, or a homemade mixture of sugar water or cornstarch solution all work well.

Which snowflake should I start with as a beginner?

Snowflake 1 is the simplest and most straightforward, making it perfect for beginners. Once you master the cluster stitches and basic construction, you can progress to Snowflakes 2 and 3.

How do I prevent my snowflakes from curling or warping?

Blocking is key! Pin your finished snowflake to the correct measurements while slightly damp or after applying starch, ensuring all points are evenly spaced. Allow it to dry completely before unpinning.

Can I resize these snowflakes by using different hook sizes?

Yes! Using a smaller hook will create more delicate, smaller snowflakes, while a larger hook will make bigger, more open snowflakes. Just remember your final size will vary from the pattern specifications.

How much yarn does each snowflake use?

Each snowflake uses very little yarn - approximately 30-40 yards depending on which size you make. One ball of yarn will easily make 4 or more snowflakes, making this a budget-friendly project.