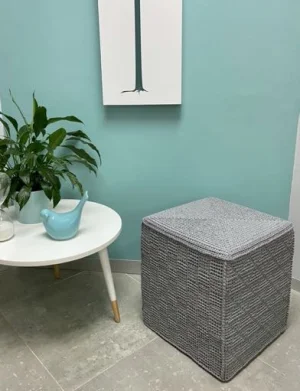
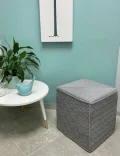
Transform your living space with this gorgeous, modern square ottoman cover! Perfect for breathing new life into an old, worn-out footstool or crafting a brand-new stuffed floor pouf from scratch. This seamless, one-piece design features four stunning, unique textured panels that work up quickly using super bulky yarn. You will love watching the geometric patterns emerge as you crochet this functional piece of home decor.
Progress Tracker
0% Complete
— 1. Main Body :
Round 1 :
Start with a magic circle. ch 1, 2 sc, (ch 2, sc) x 3, ch 2. Do not join; continue working in continuous rounds. (One side will have 2 sc, while all other sides have 1 sc).
Round 2 :
BLOsc in the first sc made in the magic circle, then (BLOsc in next st, sc in first ch of ch-2 corner, ch 2, sc in next ch of ch-2 corner) x 4. Place a marker in the next st to track your round start. (3 sc per side).
Round 3 :
Work (BLOsc in each st across, sc in first ch of ch-2 corner, ch 2, sc in next ch of ch-2 corner) x 4. (5 sc per side).
Round 4 :
Work (BLOsc in each st across, sc in first ch of ch-2 corner, ch 2, sc in next ch of ch-2 corner) x 4. (7 sc per side).
Round 5 :
Work (BLOsc in each st across, sc in first ch of ch-2 corner, ch 2, sc in next ch of ch-2 corner) x 4. (9 sc per side).
Round 6 :
Work (BLOsc in each st across, sc in first ch of ch-2 corner, ch 2, sc in next ch of ch-2 corner) x 4. (11 sc per side).
Round 7 :
Work (BLOsc in each st across, sc in first ch of ch-2 corner, ch 2, sc in next ch of ch-2 corner) x 4. (13 sc per side).
Round 8 :
Work (BLOsc in each st across, sc in first ch of ch-2 corner, ch 2, sc in next ch of ch-2 corner) x 4. (15 sc per side).
Round 9 :
Work (BLOsc in each st across, sc in first ch of ch-2 corner, ch 2, sc in next ch of ch-2 corner) x 4. (17 sc per side).
Round 10 :
Work (BLOsc in each st across, sc in first ch of ch-2 corner, ch 2, sc in next ch of ch-2 corner) x 4. (19 sc per side).
Round 11 :
Work (BLOsc in each st across, sc in first ch of ch-2 corner, ch 2, sc in next ch of ch-2 corner) x 4. (21 sc per side).
Round 12 :
Work (BLOsc in each st across, sc in first ch of ch-2 corner, ch 2, sc in next ch of ch-2 corner) x 4. (23 sc per side).
Round 13 :
Work (BLOsc in each st across, sc in first ch of ch-2 corner, ch 2, sc in next ch of ch-2 corner) x 4. (25 sc per side).
Round 14 :
Work (BLOsc in each st across, sc in first ch of ch-2 corner, ch 2, sc in next ch of ch-2 corner) x 4. (27 sc per side).
Round 15 :
Work (BLOsc in each st across, sc in first ch of ch-2 corner, ch 2, sc in next ch of ch-2 corner) x 4. (29 sc per side).
Round 16 :
Work (BLOsc in each st across, sc in first ch of ch-2 corner, ch 2, sc in next ch of ch-2 corner) x 4. (31 sc per side).
Round 17 :
Work (BLOsc in each st across, sc in first ch of ch-2 corner, ch 2, sc in next ch of ch-2 corner) x 4. (33 sc per side).
Round 18 :
Work (BLOsc in each st across, sc in first ch of ch-2 corner, ch 2, sc in next ch of ch-2 corner) x 4. (35 sc per side).
Round 19 :
Work (BLOsc in each st across, sc in first ch of ch-2 corner, ch 2, sc in next ch of ch-2 corner) x 4. (37 sc per side).
Round 20 :
Work (BLOsc in each st across, sc in first ch of ch-2 corner, ch 2, sc in next ch of ch-2 corner) x 3, then BLOsc in each st across, BLOsc in first ch of ch-2 corner, ch 1. (39 sc per side).
Round 21 :
sc in the next ch of the ch-2 corner, then (BLOsc in each st across, sc in first ch of ch-2 corner, sc in next ch of ch-2 corner) x 3, BLOsc in each st across, sc in the last ch made in Round 20. (41 sc per side). Place a marker in every 41st st.
Round 22 :
BPsc in each st around. Move your markers to the 41st st on each side (these mark the corners). Do not fasten off.
Round 23 :
Side 1: (BLOsc x 5, FLOsc x 5) x 4, FPdc. Side 2: (BLOsc x 9, FLOsc x 1) x 4, FPdc. Side 3: (BLOsc x 5, FLOsc x 5) x 4, FPdc. Side 4: BLOsc x 40, FPdc.
Round 24 :
Side 1: FLOsc x 1, (BLOsc x 5, FLOsc x 5) x 3, BLOsc x 5, FLOsc x 4, FPdc. Side 2: FLOsc x 1, (BLOsc x 7, FLOsc x 3) x 3, BLOsc x 7, FLOsc x 2, FPdc. Side 3: Repeat Round 23. Side 4: Repeat Round 23.
Round 25 :
Side 1: FLOsc x 2, (BLOsc x 5, FLOsc x 5) x 3, BLOsc x 5, FLOsc x 3, FPdc. Side 2: FLOsc x 2, (BLOsc x 5, FLOsc x 5) x 3, BLOsc x 5, FLOsc x 3, FPdc. Side 3: Repeat Round 23. Side 4: Repeat Round 23.
Round 26 :
Side 1: FLOsc x 3, (BLOsc x 5, FLOsc x 5) x 3, BLOsc x 5, FLOsc x 2, FPdc. Side 2: FLOsc x 3, (BLOsc x 3, FLOsc x 7) x 3, BLOsc x 3, FLOsc x 4, FPdc. Side 3: Repeat Round 23. Side 4: Repeat Round 23.
Round 27 :
Side 1: FLOsc x 4, (BLOsc x 5, FLOsc x 5) x 3, BLOsc x 5, FLOsc x 1, FPdc. Side 2: FLOsc x 4, (BLOsc x 1, FLOsc x 9) x 3, BLOsc x 1, FLOsc x 5, FPdc. Side 3: Repeat Round 23. Side 4: Repeat Round 23.
Round 28 :
Side 1: (FLOsc x 5, BLOsc x 5) x 4, FPdc. Side 2: BLOsc x 4, (FLOsc x 1, BLOsc x 9) x 3, FLOsc x 1, BLOsc x 5, FPdc. Side 3: (FLOsc x 5, BLOsc x 5) x 4, FPdc. Side 4: FLOsc x 40, FPdc.
Round 29 :
Side 1: BLOsc x 1, (FLOsc x 5, BLOsc x 5) x 3, FLOsc x 5, BLOsc x 4, FPdc. Side 2: BLOsc x 3, (FLOsc x 3, BLOsc x 7) x 3, BLOsc x 3, BLOsc x 4, FPdc. Side 3: Repeat Round 28. Side 4: Repeat Round 28.
Round 30 :
Side 1: BLOsc x 2, (FLOsc x 5, BLOsc x 5) x 3, FLOsc x 5, BLOsc x 3, FPdc. Side 2: BLOsc x 2, (FLOsc x 5, BLOsc x 5) x 3, FLOsc x 5, BLOsc x 3, FPdc. Side 3: Repeat Round 28. Side 4: Repeat Round 28.
Round 31 :
Side 1: BLOsc x 3, (FLOsc x 5, BLOsc x 5) x 3, FLOsc x 5, BLOsc x 2, FPdc. Side 2: BLOsc x 1, (FLOsc x 7, BLOsc x 3) x 3, FLOsc x 7, BLOsc x 2, FPdc. Side 3: Repeat Round 28. Side 4: Repeat Round 28.
Round 32 :
Side 1: BLOsc x 4, (FLOsc x 5, BLOsc x 5) x 3, FLOsc x 5, BLOsc x 1, FPdc. Side 2: (FLOsc x 9, BLOsc x 1) x 4, FPdc. Side 3: Repeat Round 28. Side 4: Repeat Round 28.
Round 33 :
Repeat Round 23 instructions.
Round 34 :
Repeat Round 24 instructions.
Round 35 :
Repeat Round 25 instructions.
Round 36 :
Repeat Round 26 instructions.
Round 37 :
Repeat Round 27 instructions.
Round 38 :
Repeat Round 28 instructions.
Round 39 :
Repeat Round 29 instructions.
Round 40 :
Repeat Round 30 instructions.
Round 41 :
Repeat Round 31 instructions.
Round 42 :
Repeat Round 32 instructions.
Round 43 :
Repeat Round 23 instructions.
Round 44 :
Repeat Round 24 instructions.
Round 45 :
Repeat Round 25 instructions.
Round 46 :
Repeat Round 26 instructions.
Round 47 :
Repeat Round 27 instructions.
Round 48 :
Repeat Round 28 instructions.
Round 49 :
Repeat Round 29 instructions.
Round 50 :
Repeat Round 30 instructions.
Round 51 :
Repeat Round 31 instructions.
Round 52 :
Repeat Round 32 instructions.
Round 53 :
Repeat Round 23 instructions.
Round 54 :
Repeat Round 24 instructions.
Round 55 :
Repeat Round 25 instructions.
Round 56 :
Repeat Round 26 instructions.
Round 57 :
Repeat Round 27 instructions.
Round 58 :
Repeat Round 28 instructions.
Round 59 :
Repeat Round 29 instructions.
Round 60 :
Repeat Round 30 instructions.
Round 61 :
Repeat Round 31 instructions.
Round 62 :
Repeat Round 32 instructions.
Last Round :
Work (sc around the post of the next FPdc, sl st into the back loops of all sts on that side) x 4, then fasten off.
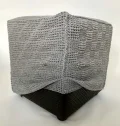
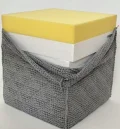
— 2. Bottom of Ottoman (Optional) :
Info :
If you are making the stuffed ottoman version, you will need a bottom piece. Work Rounds 1 through 21 exactly as detailed in the Body section, then fasten off and weave in your ends.
I hope you have the absolute best time crocheting this gorgeous ottoman cover! There is nothing quite like the satisfaction of making your own functional furniture. Place your finished cube in your favorite reading nook, prop your feet up, and enjoy the cozy handmade vibes you just created. Happy crafting, friends! 🧶✨