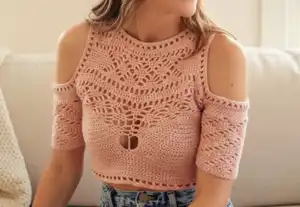
Create your own stunning Quartz crochet top with this comprehensive pattern designed for multiple sizes. This beautiful garment features delicate lacework sleeves, a flattering fitted bodice, and elegant shoulder straps that showcase your crochet skills. Perfect for spring and summer wear, this top combines classic crochet techniques with modern styling. The pattern includes detailed instructions for Small, Medium, and Large sizes with bust measurements of 30-32", 34-36", and 38-40". Work with DK weight yarn and a 3.5mm hook to bring this gorgeous piece to life and add a handmade touch to your wardrobe.
Progress Tracker
0% Complete
— Front Piece :
Row 1 :
sc in 2nd ch from hook and in each ch across (51-61-71)
Rows 2-10 :
ch 1, turn; sc in each st across (51-61-71)
Info :
Add more rows in multiples of 2 here if you'd like more length - Just remember how many rows you added so the back piece will be even
Row 11 :
ch 1, turn; sc in next 25-30-35 sts (25-30-35)
Rows 12-16 :
ch 1, turn; sc in each st across (25-30-35)
Row 17 :
ch 1, turn; sc in next 5 sts, {sc2} in next st, sc in next 13-18-23 sts, {sc2} in next st, sc in next 5 sts (27-32-37)
Row 18 :
ch 1, turn; sc in next 5 sts, {sc2} in next st, sc in next 15-20-25 sts, {sc2} in next st, sc in last 5 sts (29-34-39)
Rows 19-21 :
ch 1, turn; sc in each st across (29-34-39)
Row 22 :
turn; sk 1st st, sc in next 5 sts, sk next st, sc in each st across (27-32-37)
Row 23 :
ch 1, turn; sc in each st across (27-32-37)
Info :
Continue decreasing by 2 sts every other row until you have a total of 19-20-21 sts and 31-35-39 rows - you'll decrease only on rows moving from center of work to outside edge
Row 24 :
turn; sk 1st st, sc in next 5 sts, sk next st, sc in each st across (25-30-35)
Row 25 :
ch 1, turn; sc in each st across (25-30-35)
Row 26 :
turn; sk 1st st, sc in next 5 sts, sk next st, sc in each st across (23-28-33)
Row 27 :
ch 1, turn; sc in each st across (23-28-33)
Row 28 :
turn; sk 1st st, sc in next 5 sts, sk next st, sc in each st across (21-26-31)
Row 29 :
ch 1, turn; sc in each st across (21-26-31)
Row 30 :
turn; sk 1st st, sc in next 5 sts, sk next st, sc in each st across (19-24-29)
Row 31 :
ch 1, turn; sc in each st across (19-24-29)
Info :
Size small skip to next section. Medium and large continue:
Row 32 :
turn; sk 1st st, sc in next 5 sts, sk next st, sc in each st across (22-27)
Row 33 :
ch 1, turn; sc in each st across (22-27)
Row 34 :
turn; sk 1st st, sc in next 5 sts, sk next st, sc in each st across (20-25)
Row 35 :
ch 1, turn; sc in each st across (20-25)
Info :
Size medium skip to next section. Large continue:
Row 36 :
turn; sk 1st st, sc in next 5 sts, sk next st, sc in each st across (23)
Row 37 :
ch 1, turn; sc in each st across (23)
Row 38 :
turn; sk 1st st, sc in next 5 sts, sk next st, sc in each st across (21)
Row 39 :
ch 1, turn; sc in each st across (21)
Info :
Continue decreasing by 1 st every other row until you have a total of 17-18-19 sts and 34-38-42 rows
Row 32, 36, 40 :
turn; sk 1st st, sc in each st across (18-19-20)
Row 33, 37, 41 :
ch 1, turn; sc in each st across (18-19-20)
Row 34, 38, 42 :
turn; sk 1st st, sc in each st across (17-18-19)
Row 11 Other Side :
add ch 1 to beg of row 10, sc in next 25-30-35 sts (25-30-35) - there should be 1 stitch skipped between both cups
Info :
Repeat rows to create 2nd cup
— Back Piece :
Row 1 :
sc in 2nd ch from hook and in each ch across (51-61-71)
Rows 2-34, 2-38, 2-42 :
ch 1, turn; sc in each st across (51-61-71)
Info :
Add more rows here if you added length to the front piece
— Connect Pieces :
Connect :
ch 1, lay pieces on top of one another so RS are facing in, sl across the edge of the work to connect the edge of the front and back pieces, fasten off, repeat on other side to form loop
— Border :
Border :
turn work RS out; sc across back 51-61-71 sts, sc across top 17-18-19 sts of cup, sc down 23-27-31 rows along edge of cup, sc in center st, sc up mirror 23-27-31 rows, sc across top 17-18-19 sts of 2nd cup, sl into sc st at beg of round (132-152-172)
— Sleeve :
Row 1 :
sc in 2nd ch from hook and in each ch across (37-45-53)
Row 2 :
ch 1, turn; sc in next 5 sts, (ch 3, sk next 3 sts, sc in next 5 sts) all the way across (25-30-35 sc sts)
Row 3 :
ch 1, turn; sc in next 4 sts, (ch 3, sk sc st, sc in ch sp, ch 3, sk sc st, sc in next 3 sts) all the way across, sc in last st (21-25-29 sc sts)
Row 4 :
ch 1, turn; {sc2} in 1st st, sc in next 2 sts, (ch 3, sk sc st, sc in ch sp, sc in sc st, sc in ch sp, ch 3, sk sc st, sc in next st) all the way across, sc in next st, {sc2} in last st (23-27-31 sc sts)
Row 5 :
ch 1, turn; sc in 1st 3 sts, (ch 3, sk sc st, sc in ch sp, sc in next 3 sts, sc in ch sp) all the way across, ch 3, sk sc st, sc in last 3 sts (26-31-36 sc sts)
Row 6 :
ch 1, turn; sc in next 3 sts, sc in ch sp, (ch 3, sk sc st, sc in next 3 sts, ch 3, sk sc st, sc in ch sp) all the way across, sc in last 3 sts (23-27-31 sc sts)
Row 7 :
ch 1, turn; {sc2} in 1st st, sc in next 3 sts, (sc in ch sp, ch 3, sk sc st, sc in next st, ch 3, sk sc st, sc in ch sp, sc in sc st) all the way across, sc in next 2 sts, {sc2} in last st (25-29-33 sc sts)
Row 8 :
ch 1, turn; sc in 1st 6 sts, sc in ch sp, (ch 3, sk sc st, sc in next ch sp, sc in next 3 sts, sc in ch sp) all the way across, ch 3, sk sc st, sc in ch sp, sc in last 6 sts (29-34-39 sc sts)
Row 9 :
ch 1, turn; sc in next 6 sts, (ch 3, sk sc st, sc in ch sp, ch 3, sk sc st, sc in next 3 sts) all the way across, sc in last 3 sts (25-29-33 sc sts)
Row 10 :
ch 1, turn; {sc2} in 1st st, sc in next 4 sts, (ch 3, sk sc st, sc in ch sp, sc in sc st, sc in ch sp, ch 3, sk sc st, sc in next st) all the way across, sc in next 3 sts, {sc2} in last st (27-31-35 sc sts)
Row 11 :
ch 1, turn; sc in 1st 5 sts, (ch 3, sk sc st, sc in ch sp, sc in next 3 sts, sc in ch sp) all the way across, ch 3, sk sc st, sc in last 5 sts (30-35-40 sc sts)
Row 12 :
ch 1, turn; sc in next 5 sts, sc in ch sp, (ch 3, sk sc st, sc in next 3 sts, ch 3, sk sc st, sc in ch sp) all the way across, sc in last 5 sts (27-31-35 sc sts)
Info :
Continue repeating this format, increasing every 3 rows:
Row 13 :
ch 1, turn; {sc2} in 1st st, sc in next 5 sts, (sc in ch sp, ch 3, sk sc st, sc in next st, ch 3, sk sc st, sc in ch sp, sc in sc st) all the way across, sc in next 4 sts, {sc2} in last st (29-33-37 sc sts)
Row 14 :
ch 1, turn; sc in 1st 8 sts, sc in ch sp, (ch 3, sk sc st, sc in next ch sp, sc in next 3 sts, sc in ch sp) all the way across, ch 3, sk sc st, sc in ch sp, sc in last 8 sts (33-38-43 sc sts)
Row 15 :
ch 1, turn; sc in next 8 sts, (ch 3, sk sc st, sc in ch sp, ch 3, sk sc st, sc in next 3 sts) all the way across, sc in last 5 sts (29-33-37 sc sts)
Row 16 :
ch 1, turn; {sc2} in 1st st, sc in next 6 sts, (ch 3, sk sc st, sc in ch sp, sc in sc st, sc in ch sp, ch 3, sk sc st, sc in next st) all the way across, sc in next 5 sts, {sc2} in last st (31-35-39 sc sts)
Row 17 :
ch 1, turn; sc in 1st 7 sts, (ch 3, sk sc st, sc in ch sp, sc in next 3 sts, sc in ch sp) all the way across, ch 3, sk sc st, sc in last 7 sts (34-39-44 sc sts)
Row 18 :
ch 1, turn; sc in next 7 sts, sc in ch sp, (ch 3, sk sc st, sc in next 3 sts, ch 3, sk sc st, sc in ch sp) all the way across, sc in last 7 sts (31-35-39 sc sts)
Row 19 :
ch 1, turn; {sc2} in 1st st, sc in next 7 sts, (sc in ch sp, ch 3, sk sc st, sc in next st, ch 3, sk sc st, sc in ch sp, sc in sc st) all the way across, sc in next 6 sts, {sc2} in last st (33-37-41 sc sts)
Row 20 :
ch 1, turn; sc in 1st 10 sts, sc in ch sp, (ch 3, sk sc st, sc in next ch sp, sc in next 3 sts, sc in ch sp) all the way across, ch 3, sk sc st, sc in ch sp, sc in last 10 sts (37-42-47 sc sts)
Row 21 :
ch 1, turn; sc in next 10 sts, (ch 3, sk sc st, sc in ch sp, ch 3, sk sc st, sc in next 3 sts) all the way across, sc in last 7 sts (33-37-41 sc sts)
Row 22 :
ch 1, turn; {sc2} in 1st st, sc in next 8 sts, (ch 3, sk sc st, sc in ch sp, sc in sc st, sc in ch sp, ch 3, sk sc st, sc in next st) all the way across, sc in next 7 sts, {sc2} in last st (35-39-43 sc sts)
Row 23 :
ch 1, turn; sc in 1st 9 sts, (ch 3, sk sc st, sc in ch sp, sc in next 3 sts, sc in ch sp) all the way across, ch 3, sk sc st, sc in last 9 sts (38-43-48 sc sts)
Row 24 :
ch 1, turn; sc in next 9 sts, {sc2} in ch sp, (sc in next 5 sts, {sc2} in ch sp) all the way across, sc in last 9 sts (48-55-62)
Finishing :
ch 1, fold sleeve so RS faces in, sl along edge of both sides to form loop, fasten off
— Attach Sleeve to Body :
Attach :
turn sleeve and body RS out, line seam of sleeve up with seam of body, sl through 10-12-14 sts of both pieces together, making sure the seam splits center (You'll have 5-6-7 sts before and after the seam) fasten off
Info :
Repeat steps to create and add the 2nd sleeve, do not fasten off (This will leave 41-49-57 sts free at back and 35-39-43 sts free from top of cup down to right before center st between cups)
— Neck :
Neck Round 1 :
sc across back 41-49-57 sts, sc in next 38-43-48 around outside of sleeve only, sc in next 4-8-12 sts, (ch 3, sk 3 sts, sc in next 5 sts) 3 times, ch 1, sk 7 sts, dtr into next st at center, ch 1, sk 7, (sc in next 5 sts, ch 3, sk next 3 sts) 3 times, sc in next 4-8-12 sts, sc in next 38-43-48 sts around outside of sleeve, sl into sc st at beg of round (155-181-207 sc sts + 1 dtr st)
Neck Round 2 :
sc in next 83-99-116 across back and around outside of sleeve to front, (ch 3, sk sc st, sc in ch sp, ch 3, sk sc st, sc in next 3 sts) 3 times, ch 2, sc in dtr st, (ch 3, sk next sc st, sc in next 3 sts, ch 3, sk next sc st, sc in ch sp) 3 times, ch 3, sk next sc st, sc in next 41-50-59 sts, sl into sc st at beg of round (149-174-200 sc sts)
Neck Round 3 :
sc in next 82-98-115 sts across back and around sleeve to front, (ch 3, sk next sc st, sc in ch sp, sc in sc st, sc in ch sp, ch 3, sk next sc st, sc in next st) 3 times, ch 2, sk sc st, sc into center sc st, ch 2, sk next sc st (sc into next st, ch 3, sk next st, sc in ch sp, sc in sc st, sc in ch sp, ch 3, sk next st) 3 times, sc into last 40-49-58 sts, sl into sc st at beg of round (147-172-198 sc sts)
Neck Round 4 :
sc in next 81-97-114 sts across back and around sleeve to front, (ch 3, sk next sc st, sc in ch sp, sc in next 3 sc sts, sc in ch sp) 3 times, ch 1, sk sc st, dc into center sc st, ch 1, sk next sc st (sc in ch sp, sc in next 3 sc sts, sc in ch sp, ch 3, sk next sc st) 3 times, sc into last 39-48-57 sts, sl into sc st at beg of round (150-175-201 sc sts + 1 dc st) fasten off
Neck Row 5 :
Add ch 1 to 4th st from where 1st ch sp of 3 begins on prev row, sc in same st you added ch 1 to, sc in next 2 sts, (ch 3, sk sc st, sc in ch sp, ch 3, sk sc st, sc in next 3 sts) 3 times, ch 3, sk sc st, sc in dc st at center of work, (ch 3, sk sc st, sc in next 3 sts, ch 3, sk sc st, sc in ch sp) 3 times, ch 3, sk sc st, sc in next 3 sts (31)
Info :
Stitch count will be the same for all sizes during this part. Medium & Large will have option of widening this part later in the pattern
Neck Row 6 :
ch 1, turn; sk 1st st, sc in next st, ch 3, (sc in ch sp, sc in sc st, sc in ch sp, ch 3, sk sc st, sc in next st, ch 3, sk next sc st) 6 times, sc in ch sp, sc in sc st, sc in ch sp, ch 3, sk next sc st, sc last 2 sts together (29)
Row 7 :
ch 4, turn; (sc in ch sp, sc in next 3 sc sts, sc in ch sp, ch 3, sk sc st) 6 times, sc in ch sp, sc in next 3 sc sts, sc in ch sp, tr into sc st (35 sc sts + ch 4 at beg and tr at end)
Row 8 :
ch 2 to decrease, turn; *dc in next st, (ch 1, sk next st, dc in next st) 2 times, ch 1, dc in ch sp, ch 1, rep from * 6 times, dc in next st, ch 1, sk next st, dc in next st, ch 1, sk next st, dc last st and 4th ch at beg of prev row together (27 dc sts)
Row 9 :
ch 2 to decrease, turn; (dc in ch sp, dc in dc st) all the way across, dc last ch sp and dc at beg of prev row together (51 dc sts)
Row 10 :
ch 2 to decrease, turn; (dc in next st, ch 1, sk next st) all the way across, dc last 2 sts together (25 dc sts)
Row 11 :
ch 1, turn; sc in 1st st (sc in ch sp, sc in next st) all the way across (49 sc sts)
Info :
There is no decrease from this point of the chest onwards
Row 12 :
ch 1, turn; sc in 1st 7 sts (ch 3, sk next 3 sts, sc in next 5 sts) all the way across, sc in last 2 sts (34 sc sts)
Row 13 :
ch 1, turn; sc in next 7 sts, sc in ch sp, (ch 3, sk sc st, sc in next 3, ch 3, sk sc st, sc in ch sp) all the way across, sc in last 7 sts (31 sc sts)
Row 14 :
ch 1, turn; sc in next 8 sts, (sc in ch sp, ch 3, sk sc st, sc in next sc st, ch 3, sk sc st, sc in ch sp, sc in sc st) all the way across, sc in last 7 sts (31 sc sts)
Row 15 :
ch 1, turn; sc in next 9 sts, (sc in ch sp, ch 3, sk sc st, sc in ch sp, sc in next 3 sts) all the way across, sc in last 6 sts (35-40-45 sc sts)
Row 16 :
ch 1, turn; sc in next 9 sts, (ch 3, sk sc st, sc in ch sp, ch 3, sk sc st, sc in next 3 sts) all the way across, sc in last 6 sts (31 sc sts)
Row 17 :
ch 1, turn; sc in 1st 8 sts, (ch 3, sk sc st, sc in ch sp, sc in sc st, sc in ch sp, ch 3, sk sc st, sc in next st) all the way across, sc in last 7 sts (31 sc sts)
Row 18 :
ch 1, turn; sc in 1st 7 sts, (ch 3, sk sc st, sc in ch sp, sc in next 3 sts, sc in ch sp) all the way across, ch 3, sk sc st, sc in last 7 sts (34 sc sts)
Row 19 :
ch 4, turn; (sk next st, dc in next st, ch 1) 3 times, *dc in ch sp, ch 1, (dc in next st, ch 1, sk next st) 3 times, repeat from *all the way across, ch 1, dc in last st (24 dc sts + first 3 chs at beg of row counts as 25th dc)
Row 20 :
ch 3, turn; (dc in ch sp, dc in dc st) all the way across (49 dc sts)
Row 21 :
ch 4, turn; (sk next st, dc in next st, ch 1) 3 times, dc in next st, sk next st, dc next st -sk a st- and next st together (4 dc sts +3 chs at beg + dc last 2 sts together =6 dc sts total)
Row 22 :
ch 2 to decrease, turn; (dc in next st, dc in ch sp) all the way across, dc in 3rd ch at beg of prev row (9 dc sts)
Row 23 :
ch 4, turn; sk next st, dc in next st, ch 1, sk next st, dc in next st, sk next st, dc next st -sk a st- and next st together (2 dc sts +3 chs at beg + dc last 2 sts together =4 dc sts total)
Row 24 :
ch 2 to decrease, turn; (dc in next st, dc in ch sp) 2 times, dc in 3rd ch at beg of prev row (5 dc sts) fasten off
Row 21 Other Side :
add ch 4 to edge stitch on other end, (sk next st, dc in next st, ch 1) 3 times, dc in next st, sk next st, dc next st -sk a st- and next st together (4 dc sts +3 chs at beg + dc last 2 sts together =6 dc sts total)
Info :
Repeat rows to make a mirror shoulder strap fasten off
— Back :
Back Row 4 :
(First 3 rows were created in the round earlier): Locate center 45 sts at back of work- This row will work into those sts only. Add ch 1 to 1st of the 45 center sts, sc in 1st 3 sts, (ch 3, sk next st, sc in next st, ch 3, sk next st, sc in next 3 sts) 7 times (31 sc sts)
Row 5 :
ch 1, turn; sk 1st st, sc in next st, ch 3, (sc in ch sp, sc in sc st, sc in ch sp, ch 3, sk sc st, sc in next st, ch 3, sk next sc st) 6 times, sc in ch sp, sc in sc st, sc in ch sp, ch 3, sk next sc st, sc last 2 sts together (29)
Info :
Repeat rows 7-20 the exact same way they were completed on the front chest part
Row 21 :
ch 4, turn; (sk next st, dc in next st, ch 1, sk next st, dc in next st, sk next st, dc next st -sk a st- and next st together (2 dc sts +3 chs at beg + dc last 2 sts together =4 dc sts total)
Row 22 :
ch 2 to decrease, turn; (dc in next st, dc in ch sp) 2 times, dc in 3rd ch at beg of prev row (5 dc sts)
— Connect Shoulder :
Connect :
Turn garment RS in, sl across top 5 sts of both pieces together, fasten off
Row 21 :
add ch 4 to opposite edge of work; (sk next st, dc in next st, ch 1, sk next st, dc in next st, sk next st, dc next st -sk a st- and next st together (2 dc sts +3 chs at beg + dc last 2 sts together =4 dc sts total)
Info :
Repeat steps to complete and attach second shoulder
— Shoulder Edge :
Round 1 :
Turn work RS out, add a round of sc sts around edge of shoulder (st count doesn't need to be exact here, just make sure you end up with an even number of sts and it looks pretty)
Row 2 :
ch 4, sk next st, (dc in next st, ch 1, sk next st) all the way around, sl into 3rd ch at beg of round
Row 3 :
ch 1, sc in 1st st, sc in ch sp, (sc in next st, sc in ch sp) all the way around, sl into sc at beg of round
Info :
Sizes medium and large can repeat these last 2 rows if desired to add width to the chest and back
— Neck Edge :
Round 1 :
Add a round of sc sts around neck working on RS, sl into sc st at beg of round (Make sure you have an even number of sts)
Round 2 :
ch 4, sk next st, (dc in next st, ch 1, sk next st) all the way around, sl into 3rd ch at beg of round
Round 3 :
ch 1, sc in 1st st, sc in ch sp, (sc in next st, sc in ch sp) all the way around, sl into sc at beg of round. fasten off
— Bottom Edge :
Round 1 :
Add round of sc sts to bottom foundation chain of work
Round 2 :
ch 4, sk next st, (dc in next st, ch 1, sk next st) all the way around, sl into 3rd ch at beg of round
Round 3 :
ch 1, sc in 1st st, sc in ch sp, (sc in next st, sc in ch sp) all the way around, sl into sc at beg of round. fasten off
This stunning Quartz crochet top pattern combines timeless elegance with modern style, creating a truly wearable piece of art. The pattern guides you through shaping techniques for a flattering fit, beautiful lace sleeve construction, and delicate finishing details that make this garment special. With three size options and clear instructions for every step, you'll love watching this sophisticated top come together stitch by stitch. Whether you're looking to expand your handmade wardrobe or create a unique gift, this pattern delivers a rewarding crochet experience and a gorgeous finished piece you'll treasure for years. 🧶 Happy crocheting! 🧵✨