🧶 Beautiful ✨ Detailed 💝 Adorable

Pride Frog Amigurumi Pattern

Pride Frog Amigurumi Pattern
3.9★ Rating
4-5 Hours Time Needed
2.8K Made This
✂️

Intermediate Level

Ideal for those with basic knitting experience, featuring slightly more advanced stitches and techniques to expand your skills.

⏱️

Weekend Treat

Takes 5-7 hours, making it an enjoyable project to finish over a couple of days.

🐸

Whimsical Buddy

Playful characters full of personality, designed to spark imagination and become cherished playtime favorites.

About This Pride Frog Amigurumi Pattern

Pride Frog Amigurumi Pattern crochet pattern - detailed view of completed project

Worked in a continuous spiral with clear round-by-round instructions, this pattern guides you through creating the main body, four limbs, protruding eyes, and your choice of colorful pride patches. The result is a huggable friend that spreads love and acceptance wherever it goes.

Why You'll Love This Pride Frog Amigurumi Pattern

I absolutely love this pattern because it combines the joy of amigurumi crafting with a powerful message of inclusivity and pride. The ability to choose between three different pride flag designs means you can personalize your frog to represent yourself or gift it to someone special. I find the construction clever yet accessible—the spiral technique keeps things moving smoothly, and watching those vibrant pride colors come together in the patches is incredibly satisfying. Plus, there's something wonderfully heartwarming about creating a smiling frog friend that stands as a symbol of love and acceptance!

Pride Frog Amigurumi Pattern step 1 - construction progress Pride Frog Amigurumi Pattern step 2 - assembly progress Pride Frog Amigurumi Pattern step 3 - details and accessories Pride Frog Amigurumi Pattern step 4 - final assembly and finishing

Switch Things Up

I love how versatile this Pride Frog pattern is! While the pattern provides three specific pride flag options, you can absolutely customize it to represent other pride flags that are meaningful to you. Consider creating patches in the colors of the bisexual, pansexual, asexual, or lesbian pride flags by simply adapting the color sequences in the patch instructions.

You could also experiment with the frog's base color—imagine a blue frog, a pink frog, or even a rainbow-gradient frog body! Try using variegated yarn for a magical color-shifting effect that adds extra whimsy to your creation.

Another fun modification is adding accessories: a tiny crocheted crown, a small flower behind the ear, or even a miniature pride flag on a toothpick 'pole' that the frog can hold. You could also embroider additional facial details like eyelashes or rosy cheeks to give your frog more personality and charm.

Common Mistakes & How to Fix Them

✗ Forgetting to mark the last stitch of each round can cause your spiral to become misaligned and distort the frog's shape completely ✗ Not stuffing the body firmly enough before sewing it closed will result in a floppy frog that won't hold its adorable rounded shape properly ✗ Placing safety eyes too close together or at the wrong rounds makes the frog look cross-eyed instead of giving it that sweet friendly expression ✗ Failing to tighten the starting ring properly leaves a visible hole at the beginning of each piece that's difficult to hide later ✗ Sewing the pride patch with the flat edge not aligned to the body's sewn edge creates an awkward, puckered appearance instead of smooth integration

Pride Frog Amigurumi Pattern

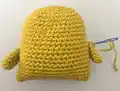
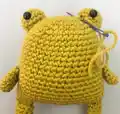
Create your own adorable Pride Frog with this heartwarming crochet pattern! This charming 7-inch companion features interchangeable pride patches including Rainbow, Trans, and Non-Binary flags, making it a perfect symbol of love and acceptance. With detailed instructions for the frog body, limbs, and colorful patches, you'll craft a meaningful piece that celebrates diversity and inclusivity. Perfect for gifting or displaying with pride, this pattern combines simple amigurumi techniques with vibrant colors to create a treasured keepsake.

Intermediate 4-5 Hours

Materials Needed for Pride Frog Amigurumi Pattern

— Main Fabric

  • 01
    Worsted Weight yarn in Green for Frog body, arms, legs, and eyes
  • 02
    Rainbow Flag colors: Red, Orange, Yellow, Green, Blue, and Purple worsted weight yarn
  • 03
    Trans Flag colors: Light Blue, Pink, and White worsted weight yarn
  • 04
    Non-Binary Flag colors: Yellow, White, Purple, and Black worsted weight yarn
  • 05
    Scrap of Black yarn or thread for nose embroidery

— Tools Required

  • 01
    Size G (4.00mm) crochet hook
  • 02
    1 pair of 9.00mm black safety eyes with washers
  • 03
    Poly-fill stuffing
  • 04
    Yarn needle
  • 05
    Stitch marker or safety pin
  • 06
    Scissors

Progress Tracker

0% Complete

— Frog Body (Green yarn):

Round 1:

Make a ring, sc 6 times into ring (6)

Round 2:

(starting in 1st sc on the ring) 2scinc in each stitch around (12)

Round 3:

*2scinc, sc the next stitch * repeat between in *'s across (18)

Round 4:

*2scinc, sc in each of the next 2 stitches once each * repeat between in *'s across (24)

Round 5:

*2scinc, sc in each of the next 3 stitches once each * repeat between in *'s across (30)

Round 6:

*2scinc, sc in each of the next 4 stitches once each * repeat between in *'s across (36)

Round 7:

*2scinc, sc in each of the next 5 stitches once each * repeat between in *'s across (42)

Rounds 8-23:

Sc around (72)

Round 24:

*2sctog, sc in each of the next 5 stitches once each * repeat between in *'s across (36)

Info:

End- cut yarn leaving a 16 inch yarn tail and pull through last stitch. Stuff the body firmly, then sew the body closed with the yarn tail across the last row.

— Arms (Green yarn, make 2):

Round 1:

Make a ring, sc 8 times into ring (8)

Round 2:

(starting in 1st sc on the ring) sc in each stitch around (8)

Rounds 3-6:

Sc around (8)

Info:

End- slip stitch to next stitch, cut yarn leaving a 10 inch yarn tail and pull through. Use this yarn tail to sew arms to body at either side.

— Legs (Green yarn, make 2):

Round 1:

Make a ring, sc 8 times into ring (8)

Round 2:

(starting in 1st sc on the ring) sc in each stitch around (8)

Rounds 3-12:

Sc around (8)

Info:

End- slip stitch to next stitch, cut yarn leaving a 10 inch yarn tail and pull through. Use this yarn tail to sew legs to the bottom of the body.

— Eyes (Green yarn, make 2):

Round 1:

Make a ring, sc 6 times into ring (6)

Round 2:

(starting in 1st sc on the ring) 2scinc in each stitch around (12)

Rounds 3-4:

Sc around (12)

Infos:

End- slip stitch to next stitch, cut yarn leaving a 10 inch yarn tail and pull through. Secure the black safety eyes to the inside of the eye pieces with the washers. Stuff each eye lightly. Arrange and sew each eye to the top of the body with the yarn tail.

— Face Details:

Info:

With a scrap of black yarn or thread, embroider a simple "V" for the frog's mouth at the top of the body just below the eyes.

— Rainbow Patch (Start with Purple yarn):

Starting:

Chain 2

Row 1:

In the 2nd chain from hook make 4 sc stitches (4)

Row 2:

ch 1, turn: 2scinc in the first stitch, 2hdcinc in each of the next 2 stitches, 2scinc in the last stitch (8) Change to Blue Yarn

Row 3:

ch 1, turn: 2scinc in the first stitch, sc the next stitch, *2hdcinc, hdc the next stitch * twice, 2scinc in the next stitch, sc the last stitch (12) Change to Green Yarn

Row 4:

ch 1, turn: 2scinc in the first stitch, sc in each of the next 2 stitches, *2hdcinc, hdc in each of the next 2 stitches * twice, 2scinc in the next stitch, sc each of the last 2 stitches (16) Change to Yellow Yarn

Row 5:

ch 1, turn: 2scinc in the first stitch, sc in each of the next 3 stitches, *2hdcinc, hdc in each of the next 3 stitches * twice, 2scinc in the next stitch, sc each of the last 3 stitches (20) Change to Orange Yarn

Row 6:

ch 1, turn: 2scinc in the first stitch, sc in each of the next 4 stitches, *2hdcinc, hdc in each of the next 4 stitches * twice, 2scinc in the next stitch, sc each of the last 4 stitches (24) Change to Red Yarn

Row 7:

ch 1, turn: 2scinc in the first stitch, sc in each of the next 5 stitches, *2hdcinc, hdc in each of the next 5 stitches * twice, 2scinc in the next stitch, sc each of the last 5 stitches (28)

Info:

End- cut yarn leaving a 20 inch yarn tail and pull through last stitch. Arrange the rainbow at the body, so that the flat portion aligns with the sewn edge of the body, with yarn tail sew all along the rainbow to secure.

— Trans Patch (Start with Light Blue yarn):

Starting:

Chain 2

Row 1:

In the 2nd chain from hook make 4 sc stitches (4)

Row 2:

ch 1, turn: 2scinc in the first stitch, 2hdcinc in each of the next 2 stitches, 2scinc in the last stitch (8) Change to Pink Yarn

Row 3:

ch 1, turn: 2scinc in the first stitch, sc the next stitch, *2hdcinc, hdc the next stitch * twice, 2scinc in the next stitch, sc the last stitch (12) Change to White Yarn

Row 4:

ch 1, turn: 2scinc in the first stitch, sc in each of the next 2 stitches, *2hdcinc, hdc in each of the next 2 stitches * twice, 2scinc in the next stitch, sc each of the last 2 stitches (16) Change to Pink Yarn

Row 5:

ch 1, turn: 2scinc in the first stitch, sc in each of the next 3 stitches, *2hdcinc, hdc in each of the next 3 stitches * twice, 2scinc in the next stitch, sc each of the last 3 stitches (20) Change to Light Blue Yarn

Info:

End- cut yarn leaving a 20 inch yarn tail and pull through last stitch. Arrange the patch at the body, so that the flat portion aligns with the sewn edge of the body, with yarn tail sew all along the patch to secure.

— Non-Binary Patch (Start with Black yarn):

Starting:

Chain 2

Row 1:

In the 2nd chain from hook make 4 sc stitches (4)

Row 2:

ch 1, turn: 2scinc in the first stitch, 2hdcinc in each of the next 2 stitches, 2scinc in the last stitch (8) Change to Purple Yarn

Row 3:

ch 1, turn: 2scinc in the first stitch, sc the next stitch, *2hdcinc, hdc the next stitch * twice, 2scinc in the next stitch, sc the last stitch (12)

Row 4:

ch 1, turn: 2scinc in the first stitch, sc in each of the next 2 stitches, *2hdcinc, hdc in each of the next 2 stitches * twice, 2scinc in the next stitch, sc each of the last 2 stitches (16) Change to White Yarn

Row 5:

ch 1, turn: 2scinc in the first stitch, sc in each of the next 3 stitches, *2hdcinc, hdc in each of the next 3 stitches * twice, 2scinc in the next stitch, sc each of the last 3 stitches (20)

Row 6:

ch 1, turn: 2scinc in the first stitch, sc in each of the next 4 stitches, *2hdcinc, hdc in each of the next 4 stitches * twice, 2scinc in the next stitch, sc each of the last 4 stitches (24) Change to Yellow Yarn

Row 7:

ch 1, turn: 2scinc in the first stitch, sc in each of the next 5 stitches, *2hdcinc, hdc in each of the next 5 stitches * twice, 2scinc in the next stitch, sc each of the last 5 stitches (28)

Row 8:

ch 1, turn: 2scinc in the first stitch, sc in each of the next 6 stitches, *2hdcinc, hdc in each of the next 6 stitches * twice, 2scinc in the next stitch, sc each of the last 6 stitches (32)

Info:

End- cut yarn leaving a 20 inch yarn tail and pull through last stitch. Arrange the patch at the body, so that the flat portion aligns with the sewn edge of the body, with yarn tail sew all along the patch to secure.

Assembly Instructions

  • Sew the arms to either side of the frog body using the 10-inch yarn tails, positioning them approximately where the body starts to curve.
  • Attach the legs to the bottom of the body using the 10-inch yarn tails, spacing them evenly for a balanced sitting position.
  • Secure black safety eyes inside each eye piece with washers, then stuff the eyes lightly before sewing them to the top of the body.
  • Position the eyes on the top portion of the body with proper spacing to create a friendly expression.
  • Embroider a simple 'V' shape with black yarn or thread below the eyes to create the frog's charming smile.
  • Choose your pride patch (Rainbow, Trans, or Non-Binary) and align the flat edge with the sewn edge of the body.
  • Sew the chosen pride patch securely to the body using the 20-inch yarn tail, stitching all around the edges for a neat finish.

Important Notes

  • 💡Always use a stitch marker to track the last stitch of each round since this pattern is worked in a continuous spiral
  • 💡Make sure to tighten the starting ring tail and weave it securely into each piece to avoid visible holes
  • 💡Stuff the body firmly but not overly tight to maintain the frog's adorable rounded shape
  • 💡Pin all pieces in place before final sewing to ensure proper positioning and symmetry
  • 💡When changing colors on the pride patches, carry the yarn carefully to maintain clean color transitions
  • 💡The pattern allows you to make all three pride patches if desired, creating multiple display options for your frog

This heartwarming Pride Frog pattern was designed to celebrate love, diversity, and acceptance through the art of crochet! With its cheerful smile and colorful pride patches, this little companion spreads joy wherever it goes. Whether you choose the Rainbow, Trans, or Non-Binary flag design, you're creating more than just an amigurumi—you're crafting a symbol of inclusivity and pride. The pattern's clear instructions and spiral construction make it an enjoyable project that results in a meaningful keepsake perfect for gifting or display. 🐸🌈 Happy crocheting! 🧶✨

You ask,

we answer.

FAQs

Can I make all three pride patches for my frog?

Absolutely! The pattern provides instructions for all three patches—Rainbow, Trans, and Non-Binary. You can make all of them and switch them out, or create multiple frogs each featuring a different pride flag.

What size safety eyes should I use?

The pattern calls for 9.00mm black safety eyes with washers. This size creates the perfect proportion for the frog's eye pieces and gives your frog a friendly, approachable expression.

Do I need to know how to work in spiral rounds?

Yes, this pattern is worked continuously in spiral rounds rather than joined rounds. Using a stitch marker to track your last stitch in each round is essential to prevent the spiral from becoming misaligned.

How much yarn will I need for this project?

You'll need approximately one skein of green worsted weight yarn for the frog body and pieces. For the pride patches, small amounts (less than 50 yards each) of the specific flag colors are sufficient.

What's the best way to attach the pride patches?

Align the flat edge of your chosen patch with the sewn closed edge of the frog body. Pin it in place first to ensure proper positioning, then use the long yarn tail to sew all around the curved edges, securing it firmly to the body.

Can I use a different yarn weight?

While the pattern is written for worsted weight yarn, you can use a different weight if you adjust your hook size accordingly. Just be aware that using thinner or thicker yarn will change the finished size of your frog.