🧢 Beautiful ✨ Detailed πŸ’ Adorable

Plush Ghost in Pumpkin Amigurumi Pattern

Plush Ghost in Pumpkin Amigurumi Pattern
4.4β˜… Rating
3-4 Hours Time Needed
3.6K Made This
βœ‚οΈ

Beginner Friendly Level

Perfect for those just starting their sewing journey, with clear instructions and simple techniques

⏱️

Bite-Sized Project

Complete in under 2 hoursβ€”quick, fun, and perfect for a little creative escape.

πŸŽƒ

Holiday Cheer

Festive fun for the season, bringing handmade magic to celebrations and creating new family traditions.

About This Plush Ghost in Pumpkin Amigurumi Pattern

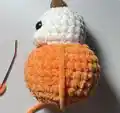
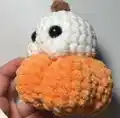
This delightful Plush Ghost in Pumpkin pattern brings together two beloved Halloween icons in one adorable creation. The pattern features a sweet little ghost character that sits snugly inside a textured pumpkin shell, creating a charming display piece perfect for autumn decorating. With straightforward instructions and basic stitches, this project works up quickly and makes a wonderful introduction to amigurumi crafting while delivering professional-looking results.

Plush Ghost in Pumpkin Amigurumi Pattern crochet pattern - detailed view of completed project

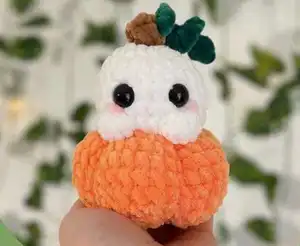
The combination of soft white yarn for the ghost and warm orange tones for the pumpkin creates a visually appealing contrast that captures the essence of Halloween charm. This pattern is versatile enough to customize with different expressions or color variations to match your personal style.

Why You'll Love This Plush Ghost in Pumpkin Amigurumi Pattern

I absolutely love this pattern because it perfectly captures the cozy, whimsical spirit of Halloween without being scary. The ghost's sweet expression and the way it nestles into the pumpkin creates such an endearing display that works beautifully as seasonal decor. I find the color-changing technique between the ghost and pumpkin both fun to work and satisfying to watch come together. The finished piece has such personality and charm that it brings smiles to everyone who sees it. Plus, it's the perfect size for gifting or displaying on a shelf, mantel, or desk throughout the entire autumn season.

Plush Ghost in Pumpkin Amigurumi Pattern step 1 - construction progress Plush Ghost in Pumpkin Amigurumi Pattern step 2 - assembly progress Plush Ghost in Pumpkin Amigurumi Pattern step 3 - details and accessories Plush Ghost in Pumpkin Amigurumi Pattern step 4 - final assembly and finishing

Switch Things Up

I love experimenting with this pattern because there are so many creative possibilities to make it your own! You could swap the classic orange pumpkin for a white or pastel version to create a more whimsical, dreamy aesthetic that works year-round. I've also tried making the ghost in different colors like soft pink or lavender for a more kawaii-inspired look that's absolutely adorable.

Another fun variation I enjoy is adding tiny accessories to the ghost, like a miniature witch hat, a bow, or even little crocheted arms that peek out. You could also enlarge the pattern by using bulky yarn and a larger hook to create a statement piece for your autumn mantel display.

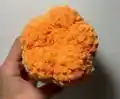
For a more detailed pumpkin, try adding embroidered lines from top to bottom using orange thread to emphasize the ridges and create more dimension. I've even experimented with adding small leaves around the stem using green felt or crocheted leaf shapes for extra botanical charm. The facial expressions are another area where you can get creativeβ€”try different eye shapes, add rosy cheeks with embroidery or fabric paint, or even create a surprised or sleepy expression for varied personalities.

Common Mistakes & How to Fix Them

βœ— Not counting stitches carefully when creating the pumpkin ridges can result in uneven segments and distorted shape βœ— Stuffing too firmly makes it difficult to position the ghost properly inside the pumpkin shell opening βœ— Forgetting to embroider the ghost's face before assembly makes it challenging to add details later on βœ— Using yarn that's too thin or thick for the recommended hook size creates sizing inconsistencies between pieces

Plush Ghost in Pumpkin Amigurumi Pattern

Create an adorable ghostly companion nestled inside a cozy pumpkin with this charming Halloween-themed amigurumi pattern. Perfect for seasonal decor or as a delightful handmade gift, this pattern combines simple crochet techniques with playful design elements. The sweet ghost peeks out from its pumpkin home, bringing a touch of whimsy and warmth to your autumn celebrations. Whether you're crafting for Halloween festivities or just love cute seasonal projects, this pattern offers a rewarding and enjoyable crocheting experience.

Beginner Friendly 3-4 Hours

Materials Needed for Plush Ghost in Pumpkin Amigurumi Pattern

β€” Main Fabric

  • 01
    White yarn for ghost body (approximately 20g)
  • 02
    Orange yarn for pumpkin shell (approximately 30g)
  • 03
    Green yarn for pumpkin stem (approximately 5g)
  • 04
    Black embroidery thread for facial features

β€” Tools Required

  • 01
    Crochet hook size 2.5mm (C)
  • 02
    Yarn needle for sewing
  • 03
    Stitch markers
  • 04
    Scissors
  • 05
    Polyester fiberfill stuffing
  • 06
    Pins for positioning

Progress Tracker

0% Complete

β€” Ghost Body :

Round 1 :

6 sc in magic ring (6)

Round 2 :

6 inc (12)

Round 3 :

(1 sc, 1 inc) x 6 (18)

Round 4 :

(2 sc, 1 inc) x 6 (24)

Round 5-8 :

1 sc in each st (24)

Round 9 :

(2 sc, 1 dec) x 6 (18)

Info :

Stuff the ghost body firmly before continuing

Round 10 :

(1 sc, 1 dec) x 6 (12)

Round 11 :

6 dec (6)

Info :

Fasten off and close the opening

β€” Pumpkin Base :

Round 1 :

6 sc in magic ring (6)

Round 2 :

6 inc (12)

Round 3 :

(1 sc, 1 inc) x 6 (18)

Round 4 :

(2 sc, 1 inc) x 6 (24)

Round 5 :

(3 sc, 1 inc) x 6 (30)

Round 6 :

(4 sc, 1 inc) x 6 (36)

Round 7-9 :

1 sc in each st BLO (36)

Round 10 :

(4 sc, 1 dec) x 6 (30)

Round 11 :

(3 sc, 1 dec) x 6 (24)

Round 12 :

(2 sc, 1 dec) x 6 (18)

Info :

Stuff the pumpkin lightly, leaving room for the ghost

Round 13 :

1 sc in each st (18)

β€” Pumpkin Stem :

Round 1 :

Green yarn: 6 sc in magic ring (6)

Round 2-4 :

1 sc in each st (6)

Info :

Fasten off leaving long tail for sewing

β€” Facial Details :

Eyes :

Embroider two small black dots using black thread between rounds 5-6, separated by 2 stitches

Mouth :

Embroider a small curved smile below the eyes using black thread

Assembly Instructions

  • Embroider the ghost's face with black thread before beginning assembly for easier positioning and stitching
  • Place the finished ghost body into the opening of the pumpkin shell, adjusting until it sits naturally
  • Pin the ghost in position inside the pumpkin to ensure proper placement before sewing
  • Attach the green stem to the top center of the pumpkin using the long tail and yarn needle
  • Weave in all loose ends securely and trim excess yarn for a clean professional finish

Important Notes

  • πŸ’‘Use stitch markers at the beginning of each round to keep track of your progress
  • πŸ’‘Stuff the ghost more firmly than the pumpkin for better shape contrast and stability
  • πŸ’‘Leave the pumpkin opening loose enough to position and secure the ghost comfortably inside
  • πŸ’‘Embroider facial features before assembly to avoid damaging the finished pumpkin shell
  • πŸ’‘Pin all pieces together before final sewing to ensure balanced proportions and proper alignment

This enchanting Plush Ghost in Pumpkin pattern was designed to celebrate the magic of Halloween in the sweetest way possible. The combination of the adorable ghost nestled inside its pumpkin home creates a heartwarming seasonal decoration that's perfect for beginners and experienced crocheters alike. With simple techniques and clear instructions, you'll create a charming piece that brings autumn joy to any space. πŸŽƒπŸ‘» Happy crocheting! 🧢✨

You ask,

we answer.

FAQs

Can I use different yarn weights for this pattern?

Yes, you can use different yarn weights, but keep in mind that your finished piece will be larger or smaller depending on your choice. Just make sure to adjust your hook size accordingly and maintain consistent tension throughout.

How do I keep the ghost securely positioned inside the pumpkin?

After placing the ghost inside the pumpkin opening, use pins to hold it in place, then sew around the base where the ghost meets the pumpkin edge using matching yarn and small invisible stitches.

Can I make the pumpkin without the ghost?

Absolutely! You can simply close the top of the pumpkin completely and add the stem for a standalone pumpkin decoration. Just continue with decrease rounds until the opening is closed.

What's the best way to create even pumpkin ridges?

Work in the back loops only for several rounds as indicated in the pattern. This creates natural vertical ridges. Count your stitches carefully and maintain even tension for the best definition.

Is this pattern suitable for complete beginners?

Yes! This pattern uses only basic stitches like single crochet, increases, and decreases. If you know how to make a magic ring and work in rounds, you can definitely complete this adorable project.