🧢 Beautiful ✨ Detailed πŸ’ Adorable

Guell Ladies' Sweater Knitting Pattern

Guell Ladies' Sweater Knitting Pattern
4.3β˜… Rating
60-80 Hours Time Needed
3.2K Made This
βœ‚οΈ

Advanced Level

Designed for experienced knitters, these patterns involve intricate designs and complex techniques to challenge and inspire.

⏱️

Slow & Steady

A 10-12 hour projectβ€”great for savoring the process over several sessions.

🌟

Elegant Drape

Soft flow with graceful movement, designed to flatter all body types with sophisticated comfort.

About This Guell Ladies' Sweater Knitting Pattern

The Guell Ladies' Sweater is a masterpiece of top-down knitting construction that combines traditional techniques with modern design sensibilities. This seamless pullover features a stunning circular colorwork yoke with delicate geometric patterns that create visual interest while providing the necessary increases for proper fit. The pattern includes sophisticated shaping elements including German short rows for raising the back neck, vertical bust darts for feminine contouring, and waist shaping that creates a beautiful silhouette. What makes this pattern truly special is its attention to detail in both construction and fit, resulting in a garment that looks professionally made and fits like it was custom tailored just for you.

Guell Ladies' Sweater Knitting Pattern crochet pattern - detailed view of completed project

Worked entirely from the top down in luxurious fingering weight yarn, this sweater showcases your knitting skills while creating a timeless wardrobe piece. The colorwork charts are clearly presented and easy to follow, while the extensive size range ensures a perfect fit for every body type.

Why You'll Love This Guell Ladies' Sweater Knitting Pattern

I absolutely love this pattern because it challenges me as a knitter while creating something truly wearable and beautiful. The seamless construction means no tedious seaming at the end, and being able to try on the work in progress as you go ensures the perfect fit every single time. The colorwork yoke is mesmerizing to knit and creates a stunning focal point that elevates this sweater from simple to spectacular. What really drew me to this pattern is the thoughtful shaping - the bust darts and waist shaping create a flattering feminine silhouette that's so hard to find in handknit sweaters. I also appreciate that despite being an advanced pattern, the instructions are crystal clear with detailed charts and step-by-step guidance for every technique used. This is the kind of project that teaches you new skills while creating an heirloom-quality garment you'll treasure for years to come.

Guell Ladies' Sweater Knitting Pattern step 1 - construction progress Guell Ladies' Sweater Knitting Pattern step 2 - assembly progress Guell Ladies' Sweater Knitting Pattern step 3 - details and accessories Guell Ladies' Sweater Knitting Pattern step 4 - final assembly and finishing

Switch Things Up

I've knitted this Guell sweater three times now, and each version has taught me something new about customization and personalization. The first time I followed the pattern exactly as written using the suggested cashmere yarn, and it turned out absolutely stunning - truly a show-stopping piece perfect for special occasions.

For my second version, I experimented with a solid color instead of working the colorwork yoke, and I was amazed at how elegant and sophisticated it looked. I simply worked increases evenly across the yoke rounds instead of following the charts, which created a beautifully simple raglan sweater that knits up much faster. This version became my go-to everyday sweater because it's so wearable with everything.

The third time around, I got really creative with the colorwork by choosing non-traditional color combinations - instead of the classic neutral palette, I used jewel tones that really made the geometric patterns pop. I also added some waist shaping adjustments by working a few extra decrease rounds to create an even more fitted silhouette through the torso.

One modification I absolutely love is adjusting the sleeve length. I've made both three-quarter length sleeves and full-length sleeves depending on the season and my wardrobe needs. The pattern makes this so easy - you just work more or fewer plain rounds before starting the final colorwork section.

I've also experimented with the neckline by working fewer rounds of ribbing at the beginning for a more relaxed, scooped neckline, and adding extra rounds for a higher, cozier collar. Both variations worked beautifully and changed the entire character of the sweater.

For knitters who find the bust dart shaping too subtle, you can easily work additional decrease rounds in that section to create even more shaping. I did this for a friend with a more pronounced bust-to-waist ratio, and the fit was absolutely perfect for her body type.

The colorwork charts are also perfect for substitution - I've seen knitters replace the geometric patterns with fair isle motifs, traditional Nordic snowflakes, or even create their own custom designs. As long as you maintain the stitch counts and increase rates, the possibilities are truly endless.

Don't be afraid to play with yarn choices either. While the pattern suggests luxurious cashmere or merino, I've successfully made versions in cotton blends for warmer climates and alpaca blends for extra warmth. Just make sure to swatch carefully to maintain the correct gauge.

This pattern is truly a canvas for creativity, and I encourage every knitter to make it their own while respecting the beautiful foundation that the designer has provided.

Common Mistakes & How to Fix Them

βœ— Not making a gauge swatch or checking gauge regularly throughout the colorwork sections can result in a sweater that doesn't fit properly despite following the pattern exactly as written βœ— Rushing through the German short rows without understanding the double stitch technique can create visible holes or puckering in the neck shaping area that's difficult to fix later βœ— Forgetting to move the beginning of round marker after completing the colorwork yoke will throw off all sleeve and body stitch counts and placement throughout the entire pattern βœ— Not maintaining consistent tension during the colorwork sections can cause puckering or the yoke becoming too tight compared to the body of the sweater βœ— Skipping the vertical bust dart decreases or losing track of where you are in the decrease sequence results in poor fit and an unflattering shape through the torso βœ— Ignoring the different chart numbers for different sizes and following the wrong chart leads to incorrect stitch counts and improper fit throughout the entire yoke section

Guell Ladies' Sweater Knitting Pattern

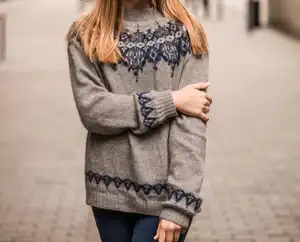
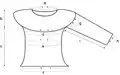
Create a stunning top-down seamless sweater with this elegant Guell pattern featuring intricate colorwork yoke designs and flattering feminine shaping. This beautiful pullover is worked entirely in the round starting from the neckline, incorporating sophisticated techniques like German short rows for perfect neck shaping and vertical bust darts for a tailored fit. Available in an impressive range of 16 sizes from chest circumference 32 inches to 62 inches, this versatile pattern uses luxurious fingering weight cashmere or merino wool to create a lightweight yet warm garment perfect for layering or wearing on its own throughout the seasons.

Advanced 60-80 Hours

Materials Needed for Guell Ladies' Sweater Knitting Pattern

β€” Main Fabric

  • 01
    Stitch Sisterz Mongolian Cashmere 4 ply (100% cashmere, 100g = 366m / 3.5oz = 400yds) - Main color yarn amounts range from 340g to 670g depending on size
  • 02
    Juli by Yarna (100% merino wool, 50g = 175m / 1.75oz = 192yds) - Contrast color: 75-150g depending on size
  • 03
    Mechita by Malabrigo Yarn (100% merino wool, 100g = 384m / 3.75oz = 420yds) - Contrast color: 75-150g depending on size
  • 04
    Any fingering weight yarn that achieves the correct gauge can be substituted

β€” Tools Required

  • 01
    Circular knitting needles 1.5mm (US000) for ribbing
  • 02
    Circular knitting needles 2.75mm (US2) for body and sleeves
  • 03
    Circular knitting needles 3mm (US2.5) for colorwork sections
  • 04
    Stitch markers in multiple colors
  • 05
    Tapestry needle for weaving in ends
  • 06
    Stitch holders or spare circular needles for holding sleeve stitches
  • 07
    Extra cable cords or auxiliary yarn for holding stitches
  • 08
    Row counter or notepad for tracking rounds
  • 09
    Scissors
  • 10
    Measuring tape
  • 11
    Blocking pins and blocking mats

Progress Tracker

0% Complete

β€” Neckline Setup :

Cast On :

Using 1.5mm (US000) needles, cast on 152 (152; 152; 152) (152; 152; 168) (168; 168; 168) (180; 180; 180) (196; 196; 196) sts, place BoR marker, and join into the round without twisting

Ribbing Section :

Work in Ribbing pattern (k2, p2) to a height of 3cm (1.2 in) from cast-on edge

Change Needles :

Change to 2.75mm (US2) needles and continue

β€” Initial Increases :

Sizes 32-42 :

Slip BoR marker to right needle, RLI, k76, LLI, work in st st to end of round - total 154 sts

Sizes 52-56 :

Slip BoR marker to right needle, RLI, k90, LLI, work in st st to end of round - total 182 sts

Stockinette Rounds :

Work 7 rounds in st st

Change Needles :

Change to 3mm (US2.5) needles

β€” Circular Yoke Colorwork :

Chart #1 :

Work all rows of Chart #1 for all sizes

Size-Specific Charts :

Continue from Chart #2 (sizes 32, 34), Chart #3 (size 36), Chart #4 (size 38), Chart #5 (size 44), Chart #6 (sizes 40, 46), Chart #7 (size 42), Chart #8 (size 48), Chart #9 (size 54), Chart #10 (size 50), Chart #11 (sizes 52, 56), Chart #12 (size 58), Chart #13 (size 60), Chart #14 (size 62)

Complete Colorwork :

Work all rows of your size-specific chart

Change Needles :

Change to 2.75mm (US2) needles

Plain Rounds :

Work 2 rounds of st st

β€” Reposition Marker :

Sizes 32-34 :

Move BoR marker 13 sts to the right

Size 36 :

Move BoR marker 13 sts to the right

Size 38 :

Move BoR marker 14 sts to the right

Size 40 :

Move BoR marker 17 sts to the right

Size 42 :

Move BoR marker 14 sts to the right

Size 44 :

Move BoR marker 12 sts to the left

Size 46 :

Move BoR marker 12 sts to the left

Size 48 :

Move BoR marker 13 sts to the left

Size 50 :

Move BoR marker 14 sts to the left

Size 52 :

Move BoR marker 14 sts to the left

Size 54 :

Move BoR marker 3 sts to the right

Size 56 :

Move BoR marker 6 sts to the left

Size 58 :

Move BoR marker 1 st to the right

Size 60 :

Move BoR marker 1 st to the right

Size 62 :

Don't move the marker

β€” Divide for Sleeves and Body :

Place Markers :

Distribute stitches for right sleeve, front, left sleeve, and back according to your size chart, placing markers M1, M2, and M3

β€” Short Row Shaping :

Setup Round :

Slip BoR marker, k37 (37; 39; 40) (45; 46; 48) (50; 56; 58) (61; 62; 63) (66; 67; 68), turn work to WS, create double stitch

Continue :

Work to BoR marker, slip marker, work to M3, slip M3, p37 (37; 39; 40) (45; 46; 48) (50; 56; 58) (61; 62; 63) (66; 67; 68), turn to RS, create double stitch

Short Row Sequence 1 :

Work to 5 sts before double stitch, turn and create double stitch - repeat 2 (2; 2; 2) (2; 2; 3) (3; 3; 3) (3; 3; 3) (3; 3; 3) more times

Short Row Sequence 2 :

Work to 3 sts before double stitch, turn and create double stitch - repeat 2 (2; 2; 2) (2; 2; 3) (3; 3; 3) (3; 3; 3) (3; 3; 3) more times

Short Row Sequence 3 :

Work to 1 st before double stitch, create double stitch - repeat 1 (1; 1; 1) (1; 1; 1) (2; 2; 2) (2; 2; 2) (2; 2; 2) more time(s)

Complete Short Rows :

Continue working in the round to BoR marker, knitting both legs of double stitches together as one

Plain Rounds :

Work 0 (0; 0; 2) (2; 2; 4) (4; 4; 6) (6; 6; 6) (8; 8; 8) more rounds in st st

β€” Separate Sleeves from Body :

Right Sleeve :

Transfer 75 (75; 79; 81) (91; 93; 97) (101; 113; 116) (122; 124; 126) (132; 134; 137) sts to holder

Underarm Cast On :

Cast on 9 (13; 13; 13) (13; 13; 15) (17; 17; 17) (17; 19; 21) (21; 21; 21) new underarm sts

Front :

Work across front sts to M2

Left Sleeve :

Transfer 75 (75; 79; 81) (91; 93; 97) (101; 113; 116) (122; 124; 126) (132; 134; 137) sts to holder

Second Underarm :

Cast on 9 (13; 13; 13) (13; 13; 15) (17; 17; 17) (17; 19; 21) (21; 21; 21) new underarm sts

Back :

Work across back sts to BoR marker

β€” Body Shaping :

Plain Rounds :

Work 2cm (0.8 in) in st st

Bust Dart Decrease Round :

Work 9 (13; 13; 13) (13; 13; 15) (17; 17; 17) (17; 19; 21) (21; 21; 21) sts, slip M1, k2, k2tog, work to 4 sts before M2, ssk, k2, slip M2, work side panel, slip M3, k2, k2tog, work to 4 sts before BoR, ssk, k2 = 4 sts decreased

Rounds 2-6 :

Work even in st st, slipping markers

Repeat :

Repeat decrease sequence 3 (3; 3; 3) (2; 2; 2) (1; 1; 1) (1; 1; 1) (1; 1; 1) more time(s)

Additional Decreases :

Work front decreases only (k2, k2tog, work to 4 sts before M2, ssk, k2) every 4 rounds, 3 more times

Plain Section :

Work even for 5cm (2 in) - waist level falls in middle of this section

Waist Increase Round :

Work side panel, slip M1, k2, LLI, work to 2 sts before M2, RLI, k2, slip M2, work side panel, slip M3, k2, LLI, work to 2 sts before BoR, RLI, k2 = 4 sts increased

Rounds 2-8 :

Work even in st st

Repeat Increases :

Repeat increase sequence 8 (8; 7; 7) (6; 6; 6) (6; 7; 7) (5; 5; 5) (4; 4; 4) more times

Work to Length :

Continue until piece measures 34 (36; 38; 39) (40; 42; 44) (46; 48; 49) (50; 51; 52) (53; 54; 55) cm from sleeve division, or is 10cm (4 in) shorter than desired length

Final Adjustments :

Make size-specific increases or decreases to achieve final stitch count of 275 (286; 308; 319) (341; 363; 363) (374; 407; 418) (429; 440; 451) (473; 484; 506) sts

β€” Lower Body Colorwork :

Change Needles :

Change to 3mm (US2.5) needles

Chart #15 :

Work all rounds of Chart #15

Change Needles :

Change to 2.75mm (US2) needles

Plain Rounds :

Work 7 rounds in st st

β€” Body Ribbing :

Change Needles :

Change to 1.5mm (US000) needles

Setup :

K1, *(p2, k2), repeat from * to last 3 sts, p2, k1, decreasing 3 (2; 0; 3) (1; 3; 3) (2; 3; 2) (1; 0; 3) (1; 0; 2) st(s) evenly

Ribbing :

Work in established ribbing pattern for 3cm (1.2 in)

Bind Off :

Bind off all sts

β€” Right Sleeve :

Setup :

Place held sleeve sts on 2.75mm (US2) needles, RS facing, join yarn

Join Round :

Work across sleeve sts, place M1, pick up and knit 9 (13; 13; 13) (13; 13; 15) (17; 17; 17) (17; 19; 21) (21; 21; 21) sts from underarm, place BoR marker, join

Plain Rounds :

Work 11 rounds in st st

Decrease Round :

Slip BoR marker, k2, k2tog, work to 4 sts before M1, ssk, k2 = 2 sts decreased

Rounds 2-11 :

Work even in st st

Repeat Decreases :

Repeat decrease sequence 10 (12; 11; 12) (11; 12; 12) (11; 12; 12) (11; 12; 12) (11; 11; 11) times total

Work to Length :

Continue until sleeve measures 28 (30; 32; 34) (35; 37; 39) (40; 41; 42) (43; 44; 45) (46; 48; 50) cm from armhole, or is 10cm (4 in) shorter than desired length

Remove Marker :

Remove M1

Final Adjustments :

Make size-specific increases to achieve 66 (66; 77; 77) (88; 88; 88) (99; 110; 110) (121; 121; 132) (132; 143; 143) sts

β€” Sleeve Colorwork :

Change Needles :

Change to 3mm (US2.5) needles

Chart #15 :

Work all rounds of Chart #15

Change Needles :

Change to 2.75mm (US2) needles

Plain Rounds :

Work 7 rounds in st st

β€” Sleeve Ribbing :

Change Needles :

Change to 1.5mm (US000) needles

Setup :

K1, *(p2, k2), repeat from * to last 3 sts, p2, k1, decreasing 2 (2; 1; 1) (0; 0; 0) (3; 2; 2) (1; 1; 0) (0; 3; 3) st(s) evenly

Ribbing :

Work in established ribbing pattern for 3cm (1.2 in)

Bind Off :

Bind off all sts

Left Sleeve :

Work left sleeve same as right sleeve

β€” Finishing :

Blocking :

Moisten sweater and block spread out flat until completely dry

Weaving Ends :

Hide all yarn ends securely

Assembly Instructions

  • This sweater is worked seamlessly from the top down, so no assembly is required beyond finishing techniques
  • Weave in all yarn ends securely on the wrong side of the fabric, especially at color changes in the colorwork sections
  • Block the completed sweater by moistening it thoroughly and pinning it out to the measurements specified in the pattern schematic
  • Pay special attention to blocking the colorwork yoke flat and even, ensuring the pattern sits smoothly across the shoulders
  • Allow the sweater to dry completely while blocked before unpinning - this typically takes 24-48 hours depending on humidity
  • Steam block gently if needed to smooth any puckering in the colorwork sections, holding the iron above the fabric without touching directly

Important Notes

  • πŸ’‘Gauge is absolutely critical for this pattern - a difference of even half a stitch per inch will significantly affect the final measurements and fit
  • πŸ’‘Use stitch markers in different colors to distinguish between the beginning of round marker and section markers (M1, M2, M3) throughout the pattern
  • πŸ’‘When working the colorwork charts, read all charts from bottom to top and from right to left, working only the chart specified for your size
  • πŸ’‘The double stitch technique used in the German short rows should be practiced on a swatch before working on the actual sweater
  • πŸ’‘Keep track of your rounds carefully during the bust dart and waist shaping sections as missing a decrease or increase round will affect the final fit
  • πŸ’‘The pattern includes specific instructions for moving the beginning of round marker after the colorwork yoke - do not skip this step
  • πŸ’‘Try on the sweater body before separating the sleeves to ensure proper fit and length, making adjustments as needed before continuing

The Guell Ladies' Sweater pattern represents the perfect marriage of traditional Nordic-inspired colorwork and modern feminine shaping techniques. This sophisticated design challenges advanced knitters with its intricate yoke construction while rewarding them with a beautifully fitted, seamless garment that showcases their skills. The extensive size range and detailed instructions ensure that knitters of all body types can create a sweater that fits perfectly and flatters their figure. Whether worked in luxurious cashmere for a special occasion piece or cozy merino for everyday wear, this timeless design will become a treasured handmade heirloom. Happy knitting! 🧢✨

You ask,

we answer.

FAQs

Can I substitute different yarn weights for this pattern?

It's not recommended to substitute yarn weights as this pattern is specifically designed for fingering weight yarn to achieve the proper drape and fit. Using a different weight would require completely recalculating all the stitch counts and measurements throughout the entire pattern.

How do I choose the right size for this sweater?

Measure your bust circumference at the fullest point and compare it to the finished chest measurements in the pattern. The sweater is designed with positive ease, so choose a size that's 2-4 inches larger than your actual bust measurement for a comfortable fit, or follow the ease recommendations in your size.

What if I've never worked German short rows before?

The pattern includes detailed instructions for creating the double stitch technique used in German short rows. It's highly recommended to practice this technique on a small swatch before beginning the sweater. There are also many video tutorials available online that demonstrate this technique clearly.

Can I make the sleeves longer or shorter?

Yes, absolutely! The pattern provides a measurement point where you can adjust the sleeve length. Simply work more or fewer rounds in the plain stockinette section before beginning the final colorwork chart and ribbing. Just make sure you have enough yarn for your modifications.

How do I know which colorwork chart to follow for my size?

After completing Chart #1, the pattern specifies exactly which chart number to follow based on your size. This is clearly listed in the instructions with size numbers in parentheses. Make sure to highlight your size throughout the entire pattern to avoid confusion.

What's the purpose of the vertical bust dart shaping?

The vertical bust dart creates a more fitted, feminine silhouette by adding shaping through the bust and ribcage area. This technique prevents the sweater from hanging straight down from the bust and creates a more tailored, flattering fit that follows the natural curves of the body.

Do I need to block this sweater after completing it?

Yes, blocking is essential for this pattern. It evens out the colorwork, sets the stitches, and ensures the sweater achieves its intended drape and measurements. The fingering weight yarn and intricate colorwork really benefit from proper wet blocking to look their best.