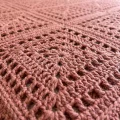
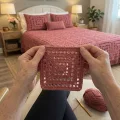
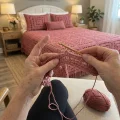
Picture sliding into bed under a handmade lace spread that looks like it came out of a family heirloom chest. This pattern gives you the entire matching set: a joined square bedspread with a scalloped, fringed edge, two pillow shams with a big concentric center, and a little ridged bolster finished with pom-poms. Each square is a small, satisfying project on its own, so progress is easy to see and easy to pick back up. By the time the last strip is joined, you’ll have a bedroom statement piece you stitched yourself.
Progress Tracker
0% Complete
— 1. Lace Square Motif (make 48) :
Info :
Each square measures approximately 28 cm (11 in) across with a 5 mm hook and worsted weight cotton. Six squares across and eight down make a bedspread of approximately 168 cm x 224 cm (66 x 88 in) before the tassels, which suits a full or double bed with a modest drop. To resize, add or remove squares: each one adds about 28 cm (11 in) in that direction.
Info :
Every corner is worked as (2 dc, ch 2, 2 dc) in the ch-2 corner sp. Every round after Round 1 begins the same way: sl st in next dc and in the ch-2 corner sp, then ch 3 (counts as first dc), dc, ch 2, 2 dc in that same corner sp. Place a stitch marker in the first corner of Round 1 so every square faces the same direction.
Round 1 :
ch 4 and join with a sl st in the first ch to form a ring. ch 3 (counts as dc), dc in the ring, ch 2, 2 dc in the ring. (ch 1, 2 dc in the ring, ch 2, 2 dc in the ring) 3 times. ch 1, join with a sl st to the top of the beginning ch 3 (16 dc, 4 ch-2 corner sps, 4 ch-1 sps)
Round 2 :
Start by working sl st in next dc and in the ch-2 corner sp. ch 3 (counts as dc), dc, ch 2, 2 dc in the same corner sp. dc in each of next 5 sts (2 dc, the ch-1 sp, 2 dc). (2 dc, ch 2, 2 dc) in next corner sp, dc in each of next 5 sts. Rep the last corner and side 2 more times. Join with a sl st to the top of the beginning ch 3 (36 dc, 4 ch-2 corner sps)
Round 3 :
Start by working sl st in next dc and in the ch-2 corner sp. ch 3 (counts as dc), dc, ch 2, 2 dc in the same corner sp. dc in next st, (ch 1, skip next st, dc in next st) 4 times. (2 dc, ch 2, 2 dc) in next corner sp, dc in next st, (ch 1, skip next st, dc in next st) 4 times. Rep the last corner and side 2 more times. Join with a sl st to the top of the beginning ch 3 (36 dc, 16 ch-1 sps, 4 ch-2 corner sps)
Round 4 :
Start by working sl st in next dc and in the ch-2 corner sp. ch 3 (counts as dc), dc, ch 2, 2 dc in the same corner sp. dc in each of next 13 sts, working into each dc and each ch-1 sp. (2 dc, ch 2, 2 dc) in next corner sp, dc in each of next 13 sts. Rep the last corner and side 2 more times. Join with a sl st to the top of the beginning ch 3 (68 dc, 4 ch-2 corner sps)
Round 5 :
Start by working sl st in next dc and in the ch-2 corner sp. ch 3 (counts as dc), dc, ch 2, 2 dc in the same corner sp. dc in next st, (ch 1, skip next st, dc in next st) 8 times. (2 dc, ch 2, 2 dc) in next corner sp, dc in next st, (ch 1, skip next st, dc in next st) 8 times. Rep the last corner and side 2 more times. Join with a sl st to the top of the beginning ch 3 (52 dc, 32 ch-1 sps, 4 ch-2 corner sps)
Round 6 :
Start by working sl st in next dc and in the ch-2 corner sp. ch 3 (counts as dc), dc, ch 2, 2 dc in the same corner sp. dc in each of next 21 sts, working into each dc and each ch-1 sp. (2 dc, ch 2, 2 dc) in next corner sp, dc in each of next 21 sts. Rep the last corner and side 2 more times. Join with a sl st to the top of the beginning ch 3 (100 dc, 4 ch-2 corner sps)
Round 7 :
Start by working sl st in next dc and in the ch-2 corner sp. ch 3 (counts as dc), dc, ch 2, 2 dc in the same corner sp. dc in next st, (ch 1, skip next st, dc in next st) 12 times. (2 dc, ch 2, 2 dc) in next corner sp, dc in next st, (ch 1, skip next st, dc in next st) 12 times. Rep the last corner and side 2 more times. Join with a sl st to the top of the beginning ch 3 (68 dc, 48 ch-1 sps, 4 ch-2 corner sps)
Round 8 :
Start by working sl st in next dc and in the ch-2 corner sp. ch 3 (counts as dc), dc, ch 2, 2 dc in the same corner sp. dc in each of next 29 sts, working into each dc and each ch-1 sp. (2 dc, ch 2, 2 dc) in next corner sp, dc in each of next 29 sts. Rep the last corner and side 2 more times. Join with a sl st to the top of the beginning ch 3 (132 dc, 4 ch-2 corner sps)
Round 9 :
Start by working sl st in next dc and in the ch-2 corner sp. ch 3 (counts as dc), dc, ch 2, 2 dc in the same corner sp. dc in next st, (ch 1, skip next st, dc in next st) 16 times. (2 dc, ch 2, 2 dc) in next corner sp, dc in next st, (ch 1, skip next st, dc in next st) 16 times. Rep the last corner and side 2 more times. Join with a sl st to the top of the beginning ch 3 (84 dc, 64 ch-1 sps, 4 ch-2 corner sps)
Round 10 :
Start by working sl st in next dc and in the ch-2 corner sp. ch 3 (counts as dc), dc, ch 2, 2 dc in the same corner sp. dc in each of next 37 sts, working into each dc and each ch-1 sp. (2 dc, ch 2, 2 dc) in next corner sp, dc in each of next 37 sts. Rep the last corner and side 2 more times. Join with a sl st to the top of the beginning ch 3, fasten off and leave a 30 cm (12 in) tail for sewing (164 dc, 4 ch-2 corner sps, 41 dc along each edge)
— 2. Shell Edging :
Info :
Work the edging after all the squares are sewn into one large rectangle. The edge detail was subtle on this piece, so I used a simple shell scallop. Swap in your favorite scallop or leave the edge in plain sc if you prefer. Hold the short side that will sit at the head of the bed as your starting edge.
Round 1 :
Join yarn in any outer corner sp on the head edge. ch 1, 4 sc in the same corner sp. Work 1 sc in each dc and 1 sc in every corner sp along the edge, including both corner sps at each seam. Work 4 sc in each outer corner sp. Continue around, then join with a sl st to the first sc (256 sc along each short side and 342 sc along each long side between the corners, plus 4 sc in each of the 4 outer corners = 1212 sc)
Round 2 :
Join yarn with a standing sl st in any sc along the head edge. (skip next 2 sc, 5 dc in next sc, skip next 2 sc, sl st in next sc) repeat around, so the final sl st lands in the sc where you started. Fasten off (202 shells)
— 3. Tassel Fringe :
Info :
Tassels hang along the foot edge and both long sides, and the head edge stays plain so it tucks neatly under the pillows. You’ll need approximately 160 tassels: about 44 across the foot and about 58 along each long side. Each tassel uses 3 strands cut to 30 cm (12 in), so cut roughly 480 strands in total, giving tassels about 14 cm (5.5 in) long.
Cut :
Wrap yarn around a 15 cm (6 in) wide piece of cardboard about 80 times, then cut across one edge to release strands that are each 30 cm (12 in) long. Repeat until you have roughly 480 strands, keeping them in bundles of 3.
Attach :
Fold one bundle of 3 strands in half. From the back, push the hook through the sl st that sits between two shells and pull the folded loop through. Pass the 6 tails through the loop and pull snug (1 tassel)
Space :
Add a tassel in every sl st between shells along the foot edge and both long sides, working from one head corner down the long side, across the foot, and up the other long side. Stop at the second head corner so the head edge stays bare.
Trim :
Lay the spread flat and comb each tassel with your fingers. Trim all the ends level with the sharpest scissors you have, using the cardboard as a guide for a straight line.
— 4. Pillow Sham Front (make 2) :
Info :
The sham front is the same lace square, simply carried on to Round 18, so it measures approximately 52 cm (20.5 in) square and fits a 50 x 50 cm (20 x 20 in) insert snugly. Work Rounds 1 to 10 exactly as written in the Lace Square Motif section, then continue with the rounds below. Use the same corner start for every round.
Round 11 :
Start by working sl st in next dc and in the ch-2 corner sp. ch 3 (counts as dc), dc, ch 2, 2 dc in the same corner sp. dc in next st, (ch 1, skip next st, dc in next st) 20 times. (2 dc, ch 2, 2 dc) in next corner sp, dc in next st, (ch 1, skip next st, dc in next st) 20 times. Rep the last corner and side 2 more times. Join with a sl st to the top of the beginning ch 3 (100 dc, 80 ch-1 sps, 4 ch-2 corner sps)
Round 12 :
Start by working sl st in next dc and in the ch-2 corner sp. ch 3 (counts as dc), dc, ch 2, 2 dc in the same corner sp. dc in each of next 45 sts, working into each dc and each ch-1 sp. (2 dc, ch 2, 2 dc) in next corner sp, dc in each of next 45 sts. Rep the last corner and side 2 more times. Join with a sl st to the top of the beginning ch 3 (196 dc, 4 ch-2 corner sps)
Round 13 :
Start by working sl st in next dc and in the ch-2 corner sp. ch 3 (counts as dc), dc, ch 2, 2 dc in the same corner sp. dc in next st, (ch 1, skip next st, dc in next st) 24 times. (2 dc, ch 2, 2 dc) in next corner sp, dc in next st, (ch 1, skip next st, dc in next st) 24 times. Rep the last corner and side 2 more times. Join with a sl st to the top of the beginning ch 3 (116 dc, 96 ch-1 sps, 4 ch-2 corner sps)
Round 14 :
Start by working sl st in next dc and in the ch-2 corner sp. ch 3 (counts as dc), dc, ch 2, 2 dc in the same corner sp. dc in each of next 53 sts, working into each dc and each ch-1 sp. (2 dc, ch 2, 2 dc) in next corner sp, dc in each of next 53 sts. Rep the last corner and side 2 more times. Join with a sl st to the top of the beginning ch 3 (228 dc, 4 ch-2 corner sps)
Round 15 :
Start by working sl st in next dc and in the ch-2 corner sp. ch 3 (counts as dc), dc, ch 2, 2 dc in the same corner sp. dc in next st, (ch 1, skip next st, dc in next st) 28 times. (2 dc, ch 2, 2 dc) in next corner sp, dc in next st, (ch 1, skip next st, dc in next st) 28 times. Rep the last corner and side 2 more times. Join with a sl st to the top of the beginning ch 3 (132 dc, 112 ch-1 sps, 4 ch-2 corner sps)
Round 16 :
Start by working sl st in next dc and in the ch-2 corner sp. ch 3 (counts as dc), dc, ch 2, 2 dc in the same corner sp. dc in each of next 61 sts, working into each dc and each ch-1 sp. (2 dc, ch 2, 2 dc) in next corner sp, dc in each of next 61 sts. Rep the last corner and side 2 more times. Join with a sl st to the top of the beginning ch 3 (260 dc, 4 ch-2 corner sps)
Round 17 :
Start by working sl st in next dc and in the ch-2 corner sp. ch 3 (counts as dc), dc, ch 2, 2 dc in the same corner sp. dc in next st, (ch 1, skip next st, dc in next st) 32 times. (2 dc, ch 2, 2 dc) in next corner sp, dc in next st, (ch 1, skip next st, dc in next st) 32 times. Rep the last corner and side 2 more times. Join with a sl st to the top of the beginning ch 3 (148 dc, 128 ch-1 sps, 4 ch-2 corner sps)
Round 18 :
Start by working sl st in next dc and in the ch-2 corner sp. ch 3 (counts as dc), dc, ch 2, 2 dc in the same corner sp. dc in each of next 69 sts, working into each dc and each ch-1 sp. (2 dc, ch 2, 2 dc) in next corner sp, dc in each of next 69 sts. Rep the last corner and side 2 more times. Join with a sl st to the top of the beginning ch 3, fasten off and leave a long tail for sewing (292 dc, 4 ch-2 corner sps, 73 dc along each edge)
— 5. Pillow Sham Back (make 2) :
Info :
The back is a simple dc rectangle that matches the front at approximately 52 cm (20.5 in) square. Work it flat in rows and turn at the end of every row.
Row 1 :
ch 77, dc in the 4th ch from hook (the 3 skipped ch count as a dc) and in each ch across (75 sts)
Row 2-37 :
ch 3 (counts as dc), turn, skip first st, dc in each of next 73 sts, dc in the top of the turning ch (75 sts). Rep this row 35 more times for a total of 37 rows, then fasten off and leave a long tail for sewing
— 6. Ridged Bolster Cushion :
Info :
The bolster is one long strip, approximately 20 cm x 90 cm (8 x 35 in), that folds in half to make a cushion of about 45 x 20 cm (18 x 8 in). Ridges come from working in the back loop only, and it’s worth keeping the same tension from the first row to the last.
Row 1 :
ch 32, hdc in the 3rd ch from hook and in each ch across (30 sts)
Row 2-100 :
ch 2 (does not count as a st), turn, BLO hdc in each st across (30 sts). Rep this row 98 more times for a total of 100 rows, then fasten off and leave a long tail for sewing
— 7. Pom-Poms (make 10) :
Info :
You’ll need 10 small pom-poms, five for each short end of the bolster. They finish at approximately 3 cm (1.2 in) across, so go easy when trimming.
Wrap :
Wrap yarn around a 4 cm (1.6 in) wide piece of cardboard about 60 times, keeping the wraps even and not too tight.
Tie :
Slide a 25 cm (10 in) strand of yarn between the cardboard and the wraps, pull it very tight, and knot it twice. Slip the bundle off the cardboard.
Cut :
Cut through all the loops on both sides of the knot and fluff the pom-pom between your fingers.
Trim :
Trim the pom-pom into a round ball about 3 cm (1.2 in) across, leaving the two tie tails long enough for sewing.
Every square you finish is a tiny win, and before long they’ll add up to a bedspread you’ll love spreading across your bed. Take it one round at a time, keep a few finished squares nearby for motivation, and let the quiet rhythm of the stitches carry you along. When the last tassel is knotted and the shams are plumped, step back and soak it in. You made all of this yourself! Happy crocheting, and enjoy every cozy minute of it. 🧶✨