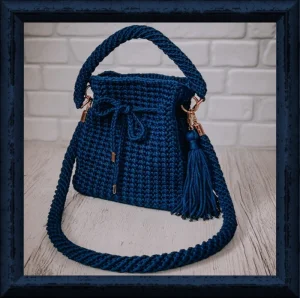
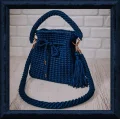
This bag is the perfect blend of practical and stylish! I love how the sturdy cord gives it such a professional, structured look. You're going to enjoy seeing those textured walls grow, and the drawstring closure adds that classic pouch charm we all love. It's a satisfying project that results in a high-end accessory you'll actually use every day.
Progress Tracker
0% Complete
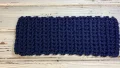
— 1. Rectangular Base (Make 2) :
Info :
When working these single crochet stitches, pull your working loop up to the height of the hook before finishing the stitch to ensure a dense fabric without gaps.
Row 1 :
ch 11. Starting in the 2nd ch from the hook, work 10 sc across. ch 1, turn (10)
Row 2-24 :
10 sc across. ch 1, turn (10)
Row 25 :
10 sc across. Fasten off and weave in ends. Use a lighter to seal the tips if using polyester cord (10)
Note :
Repeat the steps above to create a second identical base piece.
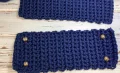
— 2. Joining the Base :
Info :
Position the four metal feet on one of your base pieces. Measure two stitches and two rows inward from each corner. Secure them firmly with your screwdriver.
Round 1 :
Hold both base pieces together with wrong sides touching. Insert hook 4 rows from the left corner on a long side. Leaving a 2-meter tail, ch 1. Work 19 sc along the edge, 3 sc in the corner, 8 sc along the short side, 3 sc in the corner, 23 sc along the long side, 3 sc in the corner, 8 sc along the short side, 3 sc in the corner, and 4 sc to finish the round. Join with an invisible sl st using the long tail (74)
— 3. Bag Walls :
Info :
For Round 1, work only into the back loop and the jumper (the horizontal bar behind the stitch) to create a sharp edge for the base.
Round 1 :
ch 1. sc, inc, 11 sc, inc, 5 sc, inc, sc, inc, 8 sc, inc, sc, inc, 5 sc, inc, 11 sc, inc, 5 sc, inc, sc, inc, 8 sc, inc, sc, inc, 3 sc. Join invisibly (86)
Round 2 :
ch 1. [dec, ch 1] repeat this sequence until you reach the end of the round. Skip the final sc of the previous round and join invisibly (85 loops)
Round 3-26 :
Repeat the pattern from Round 2, working your hook under the loops of the previous row. ch 1, [dec, ch 1] across. Join invisibly at the end of every round (85 loops)
— 4. Finishing the Body :
Round 1 :
Work 1 sl st into every stitch around the top edge to create a clean trim. Fasten off, hide the ends inside, and seal with a lighter.
— 5. Drawstring I-Cord :
Row 1 :
ch 2. Pull up a loop in the 2nd ch from hook (2 loops on hook).
Row 2 :
Carefully remove the hook from the first loop, holding it with your fingers. Yarn over and pull through the remaining loop. Re-insert hook into the held loop, yarn over, and pull through. Repeat this process until the cord measures 39 inches (1 meter).
Finishing :
sl st through both loops to close. Attach the metal end-tips to both ends of the cord and tighten the small screws.
— 6. Hand Handle :
Row 1 :
Work 3 sc directly around one D-ring. ch 1, turn (3)
Row 2 :
Work 3 sc into the blo only, then rotate and work 3 sc into the flo only. This creates a circular base of 6 stitches.
Row 3-End :
Work 6 sc in a continuous spiral, but insert your hook only into the left leg of the sc from the previous row. Continue until the handle is 16 inches (40 cm) long.
Finishing :
Work 3 sc through the second D-ring to attach it. Fasten off and secure the ends.
— 7. Shoulder Strap :
Round 1 :
6 sc in mr. Do not join, work in a spiral (6)
Row 3-End :
Work 6 sc in a spiral, inserting the hook only into the left leg of the previous row's stitches. Continue until the strap reaches 39 inches (1 meter).
Finishing :
dec 3 times, then sl st to close. Fasten off and seal the ends.
I can't wait to see the colors you choose for your pouch! Whether you go for a classic navy like mine or something bright and bold, this bag is going to be a showstopper. Don't forget to take your time with the lining—it's that final step that really makes it feel like a luxury item. Happy hooking, and enjoy your gorgeous new handmade accessory! You've earned all the compliments coming your way. 🧶 ✨