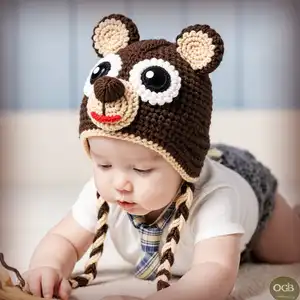
Create adorable animal-themed beanies with this comprehensive crochet pattern collection! This versatile guide includes seven charming designs - Dinosaur, Bear, Puppy, Wolf, Panda, and Giraffe hats - perfect for all ages from babies to adults. Each pattern features detailed instructions for creating warm, functional hats using single crochet stitches that provide excellent wind protection. Complete with earflaps, facial features, and assembly guidance, these patterns let you craft personalized gifts or cozy accessories for the whole family.
Progress Tracker
0% Complete
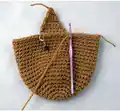
— Basic Beanie (All Sizes Start Here) :
Round 1 :
With Main Color and H hook, CH 2, 6 SC in 2nd CH from hook (6 SC)
Round 2 :
2 SC in each SC around (12 SC)
Round 3 :
*1 SC in next SC, 2 SC in next SC*, repeat from * to * around (18 SC)
Round 4 :
*1 SC in each of the next 2 SC, 2 SC in next SC*, repeat from * to * around (24 SC)
Round 5 :
*1 SC in each of the next 3 SC, 2 SC in next SC*, repeat from * to * around (30 SC)
Round 6 :
*1 SC in each of the next 4 SC, 2 SC in next SC*, repeat from * to * around (36 SC)
Round 7 :
*1 SC in each of the next 5 SC, 2 SC in next SC*, repeat from * to * around (42 SC)
Round 8 :
*1 SC in each of the next 6 SC, 2 SC in next SC*, repeat from * to * around (48 SC)
— Size 14-16 inches (0-3 month) :
Round 9 :
1 SC in each SC around (48 SC)
Info :
Repeat Round 9 until hat measures approximately 5 inches from top to bottom, SLST to join, fasten off
Trim :
With Trim Color, join with SC in back of hat, 1 SC in each SC around, SLST to join, fasten off (48 SC)
— Size 16-18 inches (3-6 month) :
Round 9 :
*1 SC in each of the next 7 SC, 2 SC in next SC*, repeat from * to * around (54 SC)
Round 10 :
1 SC in each SC around (54 SC)
Info :
Repeat Round 10 until hat measures approximately 6 inches from top to bottom, SLST to join, fasten off
Trim :
With Trim Color, join with SC in back of hat, 1 SC in each SC around, SLST to join, fasten off (54 SC)
— Size 18-20 inches (Toddler, Child) :
Round 9 :
*1 SC in each of the next 7 SC, 2 SC in next SC*, repeat from * to * around (54 SC)
Round 10 :
*1 SC in each of the next 8 SC, 2 SC in next SC*, repeat from * to * around (60 SC)
Round 11 :
1 SC in each SC around (60 SC)
Info :
Repeat Round 11 until hat measures approximately 7 inches from top to bottom, SLST to join, fasten off
Trim :
With Trim Color, join SC in back of hat, 1 SC in each SC around, SLST to join, fasten off (60 SC)
— Size 20-22 inches (Child, Pre-Teen, Adult) :
Round 9 :
*1 SC in each of the next 7 SC, 2 SC in next SC*, repeat from * to * around (54 SC)
Round 10 :
*1 SC in each of the next 8 SC, 2 SC in next SC*, repeat from * to * around (60 SC)
Round 11 :
*1 SC in each of the next 9 SC, 2 SC in next SC*, repeat from * to * around (66 SC)
Round 12 :
1 SC in each SC around (66 SC)
Info :
Repeat Round 12 until hat measures approximately 8 inches from top to bottom, SLST to join, fasten off
Trim :
With Trim Color, join SC in back of hat, 1 SC in each SC around, SLST to join, fasten off (66 SC)
— Size 22-24 inches (Large Teen/Adult) :
Round 9 :
*1 SC in each of the next 7 SC, 2 SC in next SC*, repeat from * to * around (54 SC)
Round 10 :
*1 SC in each of the next 8 SC, 2 SC in next SC*, repeat from * to * around (60 SC)
Round 11 :
*1 SC in each of the next 9 SC, 2 SC in next SC*, repeat from * to * around (66 SC)
Round 12 :
*1 SC in each of the next 10 SC, 2 SC in next SC*, repeat from * to * around (72 SC)
Round 13 :
1 SC in each SC around (72 SC)
Info :
Repeat Round 13 until hat measures approximately 9 inches from top to bottom, SLST to join, fasten off
Trim :
With Trim Color, join SC in back of hat, 1 SC in each SC around, SLST to join, fasten off (72 SC)
— Earflaps (Optional) :
Info :
Lay hat flat with tie off in center back. Count 3 stitches in from left side and place marker. Count 3 stitches in from right side and place marker
Left Earflap Row 1 :
With right side facing, attach main color with SC in marked stitch. For 14-16 and 16-18 inch: SC in next 7 SC, CH 1, turn (8 SC). For 18-20 inch: SC in next 9 SC, CH 1, turn (10 SC). For 20-22 and 22-24 inch: SC in next 11 SC, CH 1, turn (12 SC)
Row 2 :
Skip first SC, SC in each SC across, CH 1, turn. Repeat Row 2 until only 1 SC remains. Fasten off
Right Earflap :
Count to the right of remaining marker the number of stitches needed for desired size and attach yarn with SC. Work same as left earflap
Earflap Trim :
Attach Trim Color to back of hat where fastened off. CH 1, SC in each stitch and row end around hat. Do 3 SC in tip of each earflap. SLST to join, fasten off
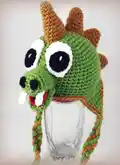
— Dinosaur Large Scale (Make 1) :
Round 1 :
With Trim Color and H hook, CH 2, 4 SC in 2nd CH from hook (4 SC)
Round 2 :
2 SC in each SC around (8 SC)
Round 3-4 :
SC in each SC around (8 SC)
Round 5 :
*2 SC in next SC, SC in next SC*, repeat from * to * around (12 SC)
Round 6-7 :
SC in each SC around (12 SC)
Round 8 :
*2 SC in next SC, SC in next 2 SC*, repeat from * to * around (16 SC)
Round 9-11 :
SC in each SC around (16 SC)
Round 12 :
SC in each SC around, SLST in next SC, fasten off leaving 8 inch tail for sewing (16 SC)
— Dinosaur Medium Scale (Make 1 or more) :
Round 1 :
With Trim Color and H hook, CH 2, 4 SC in 2nd CH from hook (4 SC)
Round 2 :
2 SC in each SC around (8 SC)
Round 3-4 :
SC in each SC around (8 SC)
Round 5 :
*2 SC in next SC, SC in next SC*, repeat from * to * around (12 SC)
Round 6-7 :
SC in each SC around (12 SC)
Round 8 :
*2 SC in next SC, SC in next 2 SC*, repeat from * to * around (16 SC)
Round 9 :
SC in each SC around, SLST in next SC, fasten off leaving 8 inch tail for sewing (16 SC)
— Dinosaur Small Scales (Make 2 or more) :
Round 1 :
With Trim Color and H hook, CH 2, 4 SC in 2nd CH from hook (4 SC)
Round 2 :
2 SC in each SC around (8 SC)
Round 3 :
SC in each SC around (8 SC)
Round 4 :
*2 SC in next SC, SC in next SC*, repeat from * to * around (12 SC)
Round 5 :
SC in each SC around (12 SC)
Round 6 :
*2 SC in next SC, SC in next 2 SC*, repeat from * to * around (16 SC)
Round 7 :
SC in each SC around, SLST in next SC, fasten off leaving 8 inch tail for sewing (16 SC)
— Dinosaur Teeth (Make 2 or more) :
Round 1 :
With White and F hook, CH 2, 3 SC in 2nd CH from hook (3 SC)
Round 2 :
2 SC in first SC, 1 SC in next 2 SC (4 SC)
Round 3 :
1 SC in each SC around, SLST to join, fasten off leaving small tail to sew (4 SC)
— Dinosaur Nostrils (Make 2) :
Round 1 :
With Black and F hook, CH 2, 3 SC in 2nd CH from hook, SLST to join, fasten off leaving small tail to sew
— Bear Inside Ears (Make 2) :
Round 1 :
With Trim Color and H hook, CH 2, 6 SC in 2nd CH from hook, SLST to join, CH 1 (6 SC)
Round 2 :
2 SC in each SC around, SLST to join, CH 1 (12 SC)
Round 3 :
2 SC in each SC around, SLST to join, fasten off and set aside (24 SC)
— Bear Outside Ears (Make 2) :
Round 1 :
With Main Color and H hook, CH 2, 6 SC in 2nd CH from hook, SLST to join, CH 1 (6 SC)
Round 2 :
2 SC in each SC around, SLST to join, CH 1 (12 SC)
Round 3 :
2 SC in each SC around, SLST to join, CH 1, turn (24 SC)
Round 4 :
Pick up inside ear with wrong sides facing each other, working through both thicknesses, 1 SC in each SC around, SLST to join, fasten off leaving tail to sew (24 SC)
— Puppy Ears (Make 2) :
Round 1 :
With Trim Color and H hook, CH 11, 1 SC in 2nd CH from hook, 1 SC in each of next 8 CH, 3 SC in last CH. Working on opposite side of CH, 1 SC in each of next 9 SC, CH 1, turn (21 SC)
Round 2 :
1 SC in each of next 9 SC, 2 SC in each of next 3 SC, 1 SC in each of last 9 SC, CH 1, turn (24 SC)
Round 3 :
1 SC in each of next 9 SC, *2 SC in next SC, 1 SC in next SC*, repeat from * to * 2 more times, 1 SC in each of next 9 SC, CH 1, turn (27 SC)
Round 4 :
1 SC in each of next 9 SC, *2 SC in next SC, 1 SC in each of next 2 SC*, repeat from * to * 2 more times, 1 SC in each of next 9 SC, CH 1, turn (30 SC)
Finishing :
Fold ear in half and make 1 SC through both thicknesses across rows (4 SC). Fasten off leaving long tail for sewing
— Wolf Inside Ears (Make 2) :
Row 1 :
With Trim Color and H hook, CH 2, 1 SC in 2nd CH from hook, CH 1, turn (1 SC)
Row 2 :
2 SC in next SC, CH 1, turn (2 SC)
Row 3 :
2 SC in each SC across, CH 1, turn (4 SC)
Row 4 :
1 SC in each SC across, CH 1, turn (4 SC)
Row 5 :
2 SC in first SC, 1 SC in next 2 SC, 2 SC in last SC, CH 1, turn (6 SC)
Row 6 :
1 SC in each SC across, CH 1, turn (6 SC)
Row 7 :
2 SC in first SC, 1 SC in next 4 SC, 2 SC in last SC, CH 1, turn (8 SC)
Row 8 :
1 SC in each SC across (8 SC)
Info :
For ADULT SIZES only continue two more rows of 10 SC. Fasten off and set aside
— Wolf Outside Ears (Make 2) :
Rows 1-8 :
With Main Color and H hook, repeat steps 1-8 of inner ear but do NOT fasten off
Info :
For ADULT SIZES only continue two more rows of 10 SC
Row 9 :
Pick up inside ear with wrong sides facing each other, working through both thicknesses, 1 SC in each SC around, put 3 SC in each of 3 corners to round corners, SLST to join, fasten off leaving tail to sew
— Panda Inside Ears (Make 2) :
Round 1 :
With Trim Color and H hook, CH 2, 6 SC in 2nd CH from hook, SLST to join, CH 1 (6 SC)
Round 2 :
2 SC in each SC around, SLST to join, CH 1 (12 SC)
Round 3 :
2 SC in each SC around, SLST to join, fasten off and set aside (24 SC)
— Panda Outside Ears (Make 2) :
Round 1 :
With Trim Color and H hook, CH 2, 6 SC in 2nd CH from hook, SLST to join, CH 1 (6 SC)
Round 2 :
2 SC in each SC around, SLST to join, CH 1 (12 SC)
Round 3 :
2 SC in each SC around, SLST to join, CH 1, turn (24 SC)
Round 4 :
Pick up inside ear with wrong sides facing each other, working through both thicknesses, 1 SC in each SC around, SLST to join, fasten off leaving tail to sew (24 SC)
— Panda Eyes Backs (Make 2) :
Round 1 :
With Black and H hook, CH 5, 1 SC in 2nd CH from hook, 1 SC in next 2 CH, 3 SC in last CH. Working on opposite side of CH, 1 SC in next 2 CH, 2 SC in last CH. Do not join
Round 2 :
2 SC in next SC, SC in next 2 SC, 2 SC in next 3 SC, 1 SC in next 2 SC, 2 SC in next 2 SC (16 SC)
Round 3 :
1 SC in next SC, 2 SC in next SC, 1 SC in each of next 2 SC, *1 SC in next SC, 2 SC in next SC*, repeat from * to * 2 more times, SC in next 2 SC, *1 SC in next SC, 2 SC in next SC*, repeat from * to * 1 more time, SLST to join, fasten off leaving tail to sew (22 SC)
— Panda Eyes Whites (Make 2) :
Round 1 :
With White and H hook, CH 2, 6 SC in 2nd CH from hook (6 SC)
Round 2 :
2 SC in each SC around, SLST to join, fasten off leaving tail to sew (12 SC)
— Panda Eyes Pupils (Make 2) :
Round 1 :
With Black and H hook, CH 2, 6 SC in 2nd CH from hook, SLST to join, fasten off leaving tail to sew (6 SC)
— Giraffe Nose :
Round 1 :
With Main Color and H hook, CH 5, 2 SC in 2nd CH from hook, SC in next 2 SC, 3 SC in last CH, working on opposite side of chain, 1 SC in next 3 CH (10 SC)
Round 2 :
1 SC in each SC around (10 SC)
Round 3 :
3 SC in next SC, SC in next 4 SC, 3 SC in next SC, 1 SC in next 4 SC (14 SC)
Round 4 :
1 SC in next SC, 3 SC in next SC, 1 SC in next 6 SC, 3 SC in next SC, 1 SC in next 5 SC (18 SC)
Round 5-7 :
1 SC in each SC around, at end of round 7, SLST to join, fasten off leaving tail for sewing (18 SC)
Info :
For larger hats, if you want bigger nose, repeat Round 4 increasing as appropriate as many times as needed to achieve desired width then repeat round 5 until desired length is achieved
— Giraffe Horns (Make 2) :
Round 1 :
With Trim Color and H hook, CH 2, 6 SC in 2nd CH from hook, do not join (6 SC)
Round 2 :
2 SC in each SC around (12 SC)
Round 3 :
*1 SC in next SC, 2 SC in next SC*, repeat from * to * around (18 SC)
Round 4-5 :
SC in each SC around (18 SC)
Round 6 :
*SC in next SC, SC DEC next two SC*, repeat from * to * around, SLST to join, fasten off (12 SC)
Round 7 :
Attach Main Color in any SC with SC, SCin each SC around (12 SC)
Round 8-10 :
SC in each SC around, at end of Round 10, SLST to join, fasten off leaving tail to sew. Lightly stuff to desired firmness
Info :
For taller horns, repeat Round 8 a few more times to desired height
— Giraffe Ears (Make 2) :
Round 1 :
With Main Color and H hook, CH 2, 4 SC in 2nd CH from hook, do not join (4 SC)
Round 2 :
2 SC in next SC, SC in next SC, 2 SC in next SC, SC in next SC (6 SC)
Round 3 :
SC in next SC, 2 SC in next SC, repeat from * to * 2 more times (9 SC)
Round 4 :
SC in each SC around (9 SC)
Round 5 :
SC in next 2 SC, 2 SC in next SC, repeat from * to * 2 more times (12 SC)
Round 6 :
SC in next 2 SC, 2 SC in next SC, repeat from * to * 3 more times (16 SC)
Round 7-8 :
SC in each SC around (16 SC)
Round 9 :
SC in next 3 SC, 2 SC in next SC, repeat from * to * around (20 SC)
Round 10 :
SC in next 4 SC, 2 SC in next SC, repeat from * to * around (24 SC)
Round 11 :
SC DEC next 2 SC together, repeat from * to * around (12 SC)
Round 12 :
SC DEC next 2 SC together, repeat from * to * around, SLST to join, fasten off leaving tail for sewing (6 SC)
— Giraffe Large Spots (Make as many as desired) :
Row 1 :
With Trim Color and G hook, CH 7, 2 SC in 2nd CH from hook, 1 SC in next 4 CHs, 2 SC in last CH, CH 1, turn (8 SC)
Row 2 :
2 SC in 1st SC, 1 SC in next 5 SC, skip last 2 SC, CH 1, turn (7 SC)
Row 3 :
1 SC in 6 SC, 2 SC in last SC, CH 1, turn (8 SC)
Row 4 :
1 SC in next 7 SC, Skip last SC, CH 1, turn (7 SC)
Row 5 :
1 SC in next 6 SC, Skip last SC, CH 1, turn (6 SC)
Row 6 :
1 SC in next 5 SC, Skip last SC, fasten off leaving tail for sewing (5 SC)
— Giraffe Small Spots (Make as many as desired) :
Row 1 :
With Trim Color and F hook, CH 5, 1 SC in 2nd CH from hook, 1 SC in next 2 CH, 2 SC in last CH, CH 1, turn (5 SC)
Row 2 :
2 SC in 1st SC, 1 SC in next SC, 1 SLST in next SC, CH 1, turn (3 stitches)
Row 3 :
1 SC in next 2 SC, 2 SC in last stitch, CH 1, turn (4 SC)
Row 4 :
2 SC in next SC, 1 SC in next 3 SC, CH 1, turn (5 SC)
Row 5 :
SC in next 4 SC, SLST in last stitch, fasten off leaving tail for sewing (5 stitches)
— Snout (Dino, Bear, Puppy, Wolf, Panda) :
Round 1 :
With Main Color and H hook, CH 2, 6 SC in 2nd CH from hook. Do not join (6 SC)
Round 2 :
2 SC in each SC around (12 SC)
Round 3 :
1 SC in next SC, 2 SC in next SC, repeat from * to * around (18 SC)
Round 4-8 :
SC in each SC around (18 SC)
Round 9 :
SC in each SC around, SLST to join, fasten off leaving tail to sew (18 SC)
Info :
For realistic nose, whip stitch or embroider nose at upper part of snout. You can embroider a line for mouth if you choose not to go with mouth and tongue pieces
— Cartoon Nose (Bear, Puppy, Wolf, Panda) :
Round 1 :
With Black and H hook, CH 2, 6 SC in 2nd CH from hook. Do not join (6 SC)
Round 2 :
2 SC in each SC around (12 SC)
Round 3 :
1 SC in each SC around (12 SC)
Round 4 :
SC Dec around 6 times, SLST to join, fasten off leaving tail to sew (6 SC)
Info :
Use small amount of fiberfill or yarn to lightly stuff nose so it is perky. This nose will be sewn to top of snout during assembly
— Cartoon Eyes Backs (Make 2) :
Info :
Skip for Panda hat. If eyes come out too big, drop down to smaller hook until desired look achieved
Round 1 :
With White and H hook, CH 5, 1 SC in 2nd CH from hook, 1 SC in next 2 CH, 3 SC in last CH, working on opposite side of CH, 1 SC in next 2 CH, 2 SC in last CH, do not join (10 SC)
Round 2 :
2 SC in next SC, SC in next 2 SC, 2 SC in next 3 SC, 1 SC in next 2 SC, 2 SC in next 2 SC (16 SC)
Round 3 :
1 SC in next SC, 2 SC in next SC, 1 SC in each of next 2 SC, 1 SC in next SC, 2 SC in next SC, repeat from * to * 2 more times, SC in next 2 SC, 1 SC in next SC, 2 SC in next SC, repeat from * to * 1 more time, SLST to join, fasten off leaving tail to sew (22 SC)
— Cartoon Eyes Pupils (Make 2) :
Round 1 :
With Black and H hook, CH 2, 6 SC in 2nd CH from hook. Do not join (6 SC)
Round 2 :
2 SC in each SC around, SLST to join, fasten off leaving tail to sew (12 SC)
— Cartoon Mouth :
Round 1 :
With Main Color and H hook, CH 2, 5 SC in 2nd CH from hook. Do not join (5 SC)
Round 2 :
2 SC in each SC around (10 SC)
Round 3 :
1 SC in next SC, 2 SC in next SC, repeat from * to * around (15 SC)
Round 4-5 :
1 SC in each SC around (15 SC)
Round 6 :
1 SC in each SC around, SLST to join, fasten off leaving tail to sew (15 SC)
Info :
This will be sewn under snout during assembly
— Cartoon Tongue :
Row 1 :
With Red and H hook, CH 2, 6 SC in 2nd CH from hook, CH 1, turn (6 SC)
Row 2 :
2 SC in first SC, 1 SC in next SC, repeat from * to * across, fasten off leaving tail to sew (9 SC)
Info :
This will be sewn to top of mouth during assembly
— Serious Eyes (Make 2) :
Round 1 :
With Black and F hook, CH 2, 6 SC in 2nd CH from hook, SLST to join, fasten off (6 SC)
Round 2 :
Attach Warm Brown or eye color of choice in any SC with SC, SC again in same SC, 2 SC in each SC around, SLST to join, fasten off (12 SC)
Round 3 :
Attach White in any SC with SC, 2 SC in next SC, SC in next SC, 2 SC in next SC, repeat from * to * around, do not join (18 SC)
Round 4 :
SC in each SC around, SLST to join, fasten off leaving long tail to sew (18 SC)
— Serious Eyelids (Make 2) :
Round 1 :
With Main Color and H hook, CH 2, 6 SC in 2nd CH from hook, do not join (6 SC)
Round 2 :
2 SC in each SC around (12 SC)
Round 3 :
SC in next SC, 2 SC in next SC repeat from * to * 5 more times (18 SC)
Round 4 :
2 SC in next SC, SC in next SC, 2 SC in next SC, SC in next 6 SC, repeat from * to * one time, SC in next 2 SC (22 SC)
Row 1 :
Fold piece in half and working through both thicknesses SC in each SC across, finish off leaving tail to sew (11 SC)
These charming Animal Hats patterns bring together warmth, functionality, and whimsical design in one delightful collection! Perfect for crafters who want to create gifts that are both practical and adorable, each design offers endless customization options. Whether you're making a fierce dinosaur for a little adventurer or a cuddly panda for someone special, these hats are guaranteed to bring smiles and keep heads toasty warm. The detailed instructions and mix-and-match facial features mean no two hats have to look exactly alike! 🧶 Happy crocheting! 🎩✨