🧶 Beautiful ✨ Detailed 💝 Adorable

Adorable Chunky Bunny Amigurumi Pattern

Adorable Chunky Bunny Amigurumi Pattern
4.7★ Rating
3-4 Hours Time Needed
1.6K Made This
✂️

Beginner Friendly Level

Perfect for those just starting their sewing journey, with clear instructions and simple techniques

⏱️

Bite-Sized Project

Complete in under 2 hours—quick, fun, and perfect for a little creative escape.

🐰

Whimsical Buddy

Playful characters full of personality, designed to spark imagination and become cherished playtime favorites.

About This Adorable Chunky Bunny Amigurumi Pattern

This adorable chunky bunny pattern creates a soft, huggable friend that stands approximately 10 inches tall. The design features distinctive long ears with wire inserts for poseable positioning, giving your bunny character and charm. Working in continuous rounds with chunky yarn means this project comes together quickly, making it ideal for crafters who want satisfying results without a lengthy time commitment. The simple construction starts with the ears and flows naturally into the body, with clear shaping that creates the bunny's sweet rounded form.

Adorable Chunky Bunny Amigurumi Pattern crochet pattern - detailed view of completed project

Safety eyes and a delicate embroidered mouth bring personality to your bunny's face, while the sturdy wire-supported ears can be bent into different positions for added character. The bottom piece creates a stable base so your finished bunny can sit proudly on display.

Why You'll Love This Adorable Chunky Bunny Amigurumi Pattern

I absolutely love how quickly this pattern works up while still delivering an incredibly cuddly result! The chunky yarn means you can see your progress rapidly, which keeps the project exciting from start to finish. What really makes this special is the wire in the ears—being able to pose them gives each bunny such personality and makes every one unique. The simplicity of the construction means you can focus on enjoying the rhythmic flow of stitching rather than worrying about complex techniques, yet the finished result looks professionally crafted and impressive. It's also wonderfully versatile for color choices, so you can create a whole family of bunnies in different shades to match any nursery or personal preference!

Adorable Chunky Bunny Amigurumi Pattern step 1 - construction progress Adorable Chunky Bunny Amigurumi Pattern step 2 - assembly progress Adorable Chunky Bunny Amigurumi Pattern step 3 - details and accessories Adorable Chunky Bunny Amigurumi Pattern step 4 - final assembly and finishing

Switch Things Up

I love experimenting with different color combinations to give each bunny its own personality! While the original uses a beautiful Cloud Blue, you could create a classic white bunny, a soft pink one for a baby shower gift, or even go bold with bright rainbow colors for a playful twist. The chunky yarn weight makes color changes really pop and show off the texture beautifully.

For a more realistic look, I sometimes add a tiny pompom tail to the back of the bunny—it's such a sweet detail that takes just minutes but adds incredible charm. You could also embroider small details like whiskers using the black yarn, or add a tiny nose instead of just the mouth for extra character.

If you want to make this bunny extra special, consider adding a simple crocheted bow tie or a tiny flower crown. Since the ears are poseable, you can bend one ear down for an adorable floppy-eared effect, or have both standing tall and alert. I've even seen crafters add a small carrot amigurumi accessory that the bunny can hold!

For gift-giving, I love personalizing each bunny with embroidered initials on the bottom or choosing colors that match the recipient's nursery or favorite palette. The quick completion time means you can easily make a whole family of bunnies in different sizes and colors—imagine how adorable a mama bunny with baby bunnies would look displayed together!

Common Mistakes & How to Fix Them

✗ Not using stitch markers can cause you to lose track of round beginnings, especially when joining the two ears to start the body ✗ Stuffing the ears will make them stiff and prevent the wire from being inserted properly, so keep them unstuffed for flexibility ✗ Placing safety eyes too close together or at the wrong round can throw off the bunny's facial proportions and sweet expression ✗ Inserting wire without folding the sharp ends can poke through the fabric or cause injury during handling and play ✗ Overstuffing the body creates an overly firm bunny that loses its huggable softness and can distort the rounded shape

Adorable Chunky Bunny Amigurumi Pattern

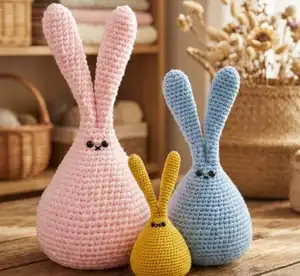
Create your own sweet and huggable bunny friend with this delightful amigurumi pattern! This charming design features long, poseable ears supported by wire, a plump round body, and an endearing embroidered face that will melt your heart. Perfect for gifting or adding to your handmade collection, this chunky bunny works up quickly using bulky yarn and brings instant comfort and joy to any space.

Beginner Friendly 3-4 Hours

Materials Needed for Adorable Chunky Bunny Amigurumi Pattern

— Main Fabric

  • 01
    Stylecraft Special Chunky yarn in Cloud Blue 1019 (65g)
  • 02
    Small amount of Black DK weight yarn for embroidering facial features

— Tools Required

  • 01
    4.00mm crochet hook (US: G/6, UK: 8)
  • 02
    Tapestry needle
  • 03
    Polyester fiberfill (60g)
  • 04
    One pair of 9mm safety eyes
  • 05
    Iron wire 12 inches long (30cm), 18 gauge (1.25mm thick)
  • 06
    Stitch markers

Progress Tracker

0% Complete

— Ear :

Info :

Make 2

Round 1 :

With Cloud Blue 1019 and 4mm hook, 6 sc in a magic ring (6)

Round 2 :

(Sc in next st, 2 sc in next st) around (9)

Round 3 :

(2 sc in next st, sc in next 2 sts) around (12)

Round 4-10 :

Sc in each st around (12)

Round 11 :

Sc next 2 sts tog, sc in next 10 sts (11)

Round 12 :

Sc in each st around (11)

Round 13 :

Sc in next 5 sts, sc next 2 sts tog, sc in next 4 sts (10)

Round 14 :

Sc in each st around (10)

Round 15 :

Sc next 2 sts tog, sc in next 8 sts (9)

Round 16 :

Sc in each st around (9)

Round 17 :

Sc in next 4 sts, sc next 2 sts tog, sc in next 3 sts (8)

Round 18 :

Sc in each st around (8)

Round 19 :

Sc next 2 sts tog, sc in next 6 sts (7)

Round 20 :

Sc in each st around (7)

Round 21 :

Sc in next 3 sts, sc next 2 sts tog, sc in next 2 sts (6)

Round 22-23 :

Sc in each st around (6)

Round 24 :

Sc in each st around (6)

Info :

For the first ear, join with sl st in first st. Fasten off. For the second ear, do not sl st in first st. Do not fasten off

— Body :

Info :

The yarn of the second ear is used to start the body

Round 1 :

Sc in the stitch on rnd 24 of the first ear (mark first st), sc in next 5 sts on first ear, sc in next 6 sts on second ear (12)

Round 2 :

(Sc in next st, 2 sc in next st) around (18)

Round 3 :

Sc in each st around (18)

Round 4 :

(2 sc in next st, sc in next 2 sts) around (24)

Round 5 :

Sc in each st around (24)

Round 6 :

(Sc in next 3 sts, 2 sc in next st) around (30)

Round 7 :

Sc in each st around (30)

Round 8 :

Sc in next 2 sts, 2 sc in next st, (sc in next 4 sts, 2 sc in next st) 5 times, sc in next 2 sts (36)

Round 9 :

Sc in each st around (36)

Round 10 :

(Sc in next 5 sts, 2 sc in next st) around (42)

Round 11 :

Sc in each st around (42)

Round 12 :

Sc in next 3 sts, 2 sc in next st, (sc in next 6 sts, 2 sc in next st) 5 times, sc in next 3 sts (48)

Round 13 :

Sc in each st around (48)

Round 14 :

(Sc in next 7 sts, 2 sc in next st) around (54)

Round 15 :

Sc in each st around (54)

Round 16 :

Sc in next 4 sts, 2 sc in next st, (sc in next 8 sts, 2 sc in next st) 5 times, sc in next 4 sts (60)

Round 17-22 :

Sc in each st around (60)

Round 23 :

Sc in next 4 sts, sc next 2 sts tog, (sc in next 8 sts, sc next 2 sts tog) 5 times, sc in next 4 sts (54)

Round 24 :

(Sc in next 7 sts, sc next 2 sts tog) around (48)

Round 25 :

Sc in next 3 sts, sc next 2 sts tog, (sc in next 6 sts, sc next 2 sts tog) 5 times, sc in next 3 sts (42)

Round 26 :

(Sc in next 5 sts, sc next 2 sts tog) around (36)

Round 27 :

Sc in next 2 sts, sc next 2 sts tog, (sc in next 4 sts, sc next 2 sts tog) 5 times, sc in next 2 sts, sl st in first st, fasten off (30)

— Bottom :

Round 1 :

With Cloud Blue 1019, 6 sc in a magic ring (6)

Round 2 :

2 sc in each st around (12)

Round 3 :

(Sc in next st, 2 sc in next st) around (18)

Round 4 :

(2 sc in next st, sc in next 2 sts) around (24)

Round 5 :

(Sc in next 3 sts, 2 sc in next st) around, join with sl st in first st, leave long end for sewing, fasten off (30)

Assembly Instructions

  • Fold the wire in half and adjust it to match the length of the ear, then fold the sharp ends inward to prevent poking through fabric
  • Carefully insert the folded wire into each ear, ensuring it runs along the full length without bunching
  • Position safety eyes 3 stitches apart between rounds 27-28 of the body before stuffing
  • Stuff the body firmly but gently, maintaining the rounded shape without overstuffing
  • Sew the bottom piece securely to the last round of the body using the long tail left from fastening off
  • Using black DK yarn, embroider a small x-cross for the mouth between the eyes on round 28
  • Leave the ears unstuffed to maintain their flexibility and allow the wire to provide natural support

Important Notes

  • 💡Work in continuous rounds without joining or turning unless specifically instructed in the pattern
  • 💡Always use a stitch marker to mark the first stitch of each round to avoid losing your place
  • 💡Keep the ears completely unstuffed so the wire can be inserted properly and the ears remain poseable
  • 💡Fold all sharp wire ends inward before inserting into ears to prevent injury and fabric damage
  • 💡The second ear is not fastened off because its yarn continues directly into the body construction
  • 💡Attach safety eyes before stuffing the body as they cannot be secured properly once stuffed

This charming chunky bunny pattern brings together simple techniques and thoughtful design details to create an utterly huggable companion! The clever construction method flows naturally from ears to body, while the wire-supported ears add that extra touch of personality that makes each bunny unique. Whether you're crafting for a nursery, making a heartfelt gift, or simply treating yourself to a quick and satisfying project, this sweet bunny delivers big results with minimal fuss. Happy stitching and may your bunny bring endless cuddles! 🐰🧶💙

You ask,

we answer.

FAQs

Can I use a different yarn weight for this pattern?

Yes! The pattern notes mention you can create different sizes by adjusting yarn weight and hook size. Use DK yarn with a 3mm hook for a small bunny, chunky yarn with 4mm hook for medium, or four strands of DK yarn together with a 6mm hook for a large bunny.

Why shouldn't I stuff the ears?

The ears need to remain unstuffed so you can insert the wire support that allows them to be poseable. Stuffing would make them too stiff and prevent the wire from being inserted properly, eliminating the signature bendable ear feature.

What gauge wire works best for the ears?

The pattern specifies 18 gauge wire that is 1.25mm thick and 12 inches long. This gauge provides enough support to hold the ear shape while remaining flexible enough to bend into different positions without breaking.

When should I attach the safety eyes?

Attach the safety eyes between rounds 27-28 of the body, spacing them 3 stitches apart, and do this before you stuff the body. Once the body is stuffed, it becomes very difficult to secure the safety eye backing properly.

How do I join the two ears to start the body?

After completing the first ear, fasten it off. For the second ear, do not fasten off—continue directly from round 24 of the second ear by crocheting into round 24 of the first ear, then back to the second ear to join them together and begin the body rounds.